Draw Ryu from Street Fighter: A Step-by-Step Guide

If you're a fan of Street Fighter and want to draw Ryu, it can be challenging to capture his entire physique, especially if you're not an experienced artist. In this tutorial, we'll provide a step-by-step approach to drawing Ryu's entire body. Whether you're a beginner or an experienced artist, this article will help you learn how to draw Ryu.
Ryu is a fictional character in the Street Fighter video game series. He is a Japanese martial artist trained in the art of Ansatsuken (Assassination Fist). Ryu has been a mainstay of the Street Fighter series since its launch in 1987 and has become one of the most iconic and recognizable video game characters of all time. He is a highly skilled martial artist and is known for his iconic "Hadouken" fireball. He also has many other special moves, such as the upper attack "Shoryuken," the spinning kick "Tatsumaki Senpuu Kyaku," and the multi-purpose fireball “Metsu Hadouken.”
Ryu is often portrayed as kind and generous, willing to help those in need.
He strongly believes in justice and is always ready to fight for his beliefs. He is often accompanied by his best friend and rival, Ken Masters, and the two frequently compete against each other in Street Fighter tournaments. He is a confident, determined, and strong individual, serving as a role model for aspiring fighters. Ryu is an excellent example of a hardworking and determined individual, as he constantly strives to become the best fighter he can be. Let's draw Ryu from Street Fighter!
You will need:
-2B pencil
-HB pencil
-Eraser.
You will find the guides in each sketch in the following tutorial.
Step 1: Draw a Circle
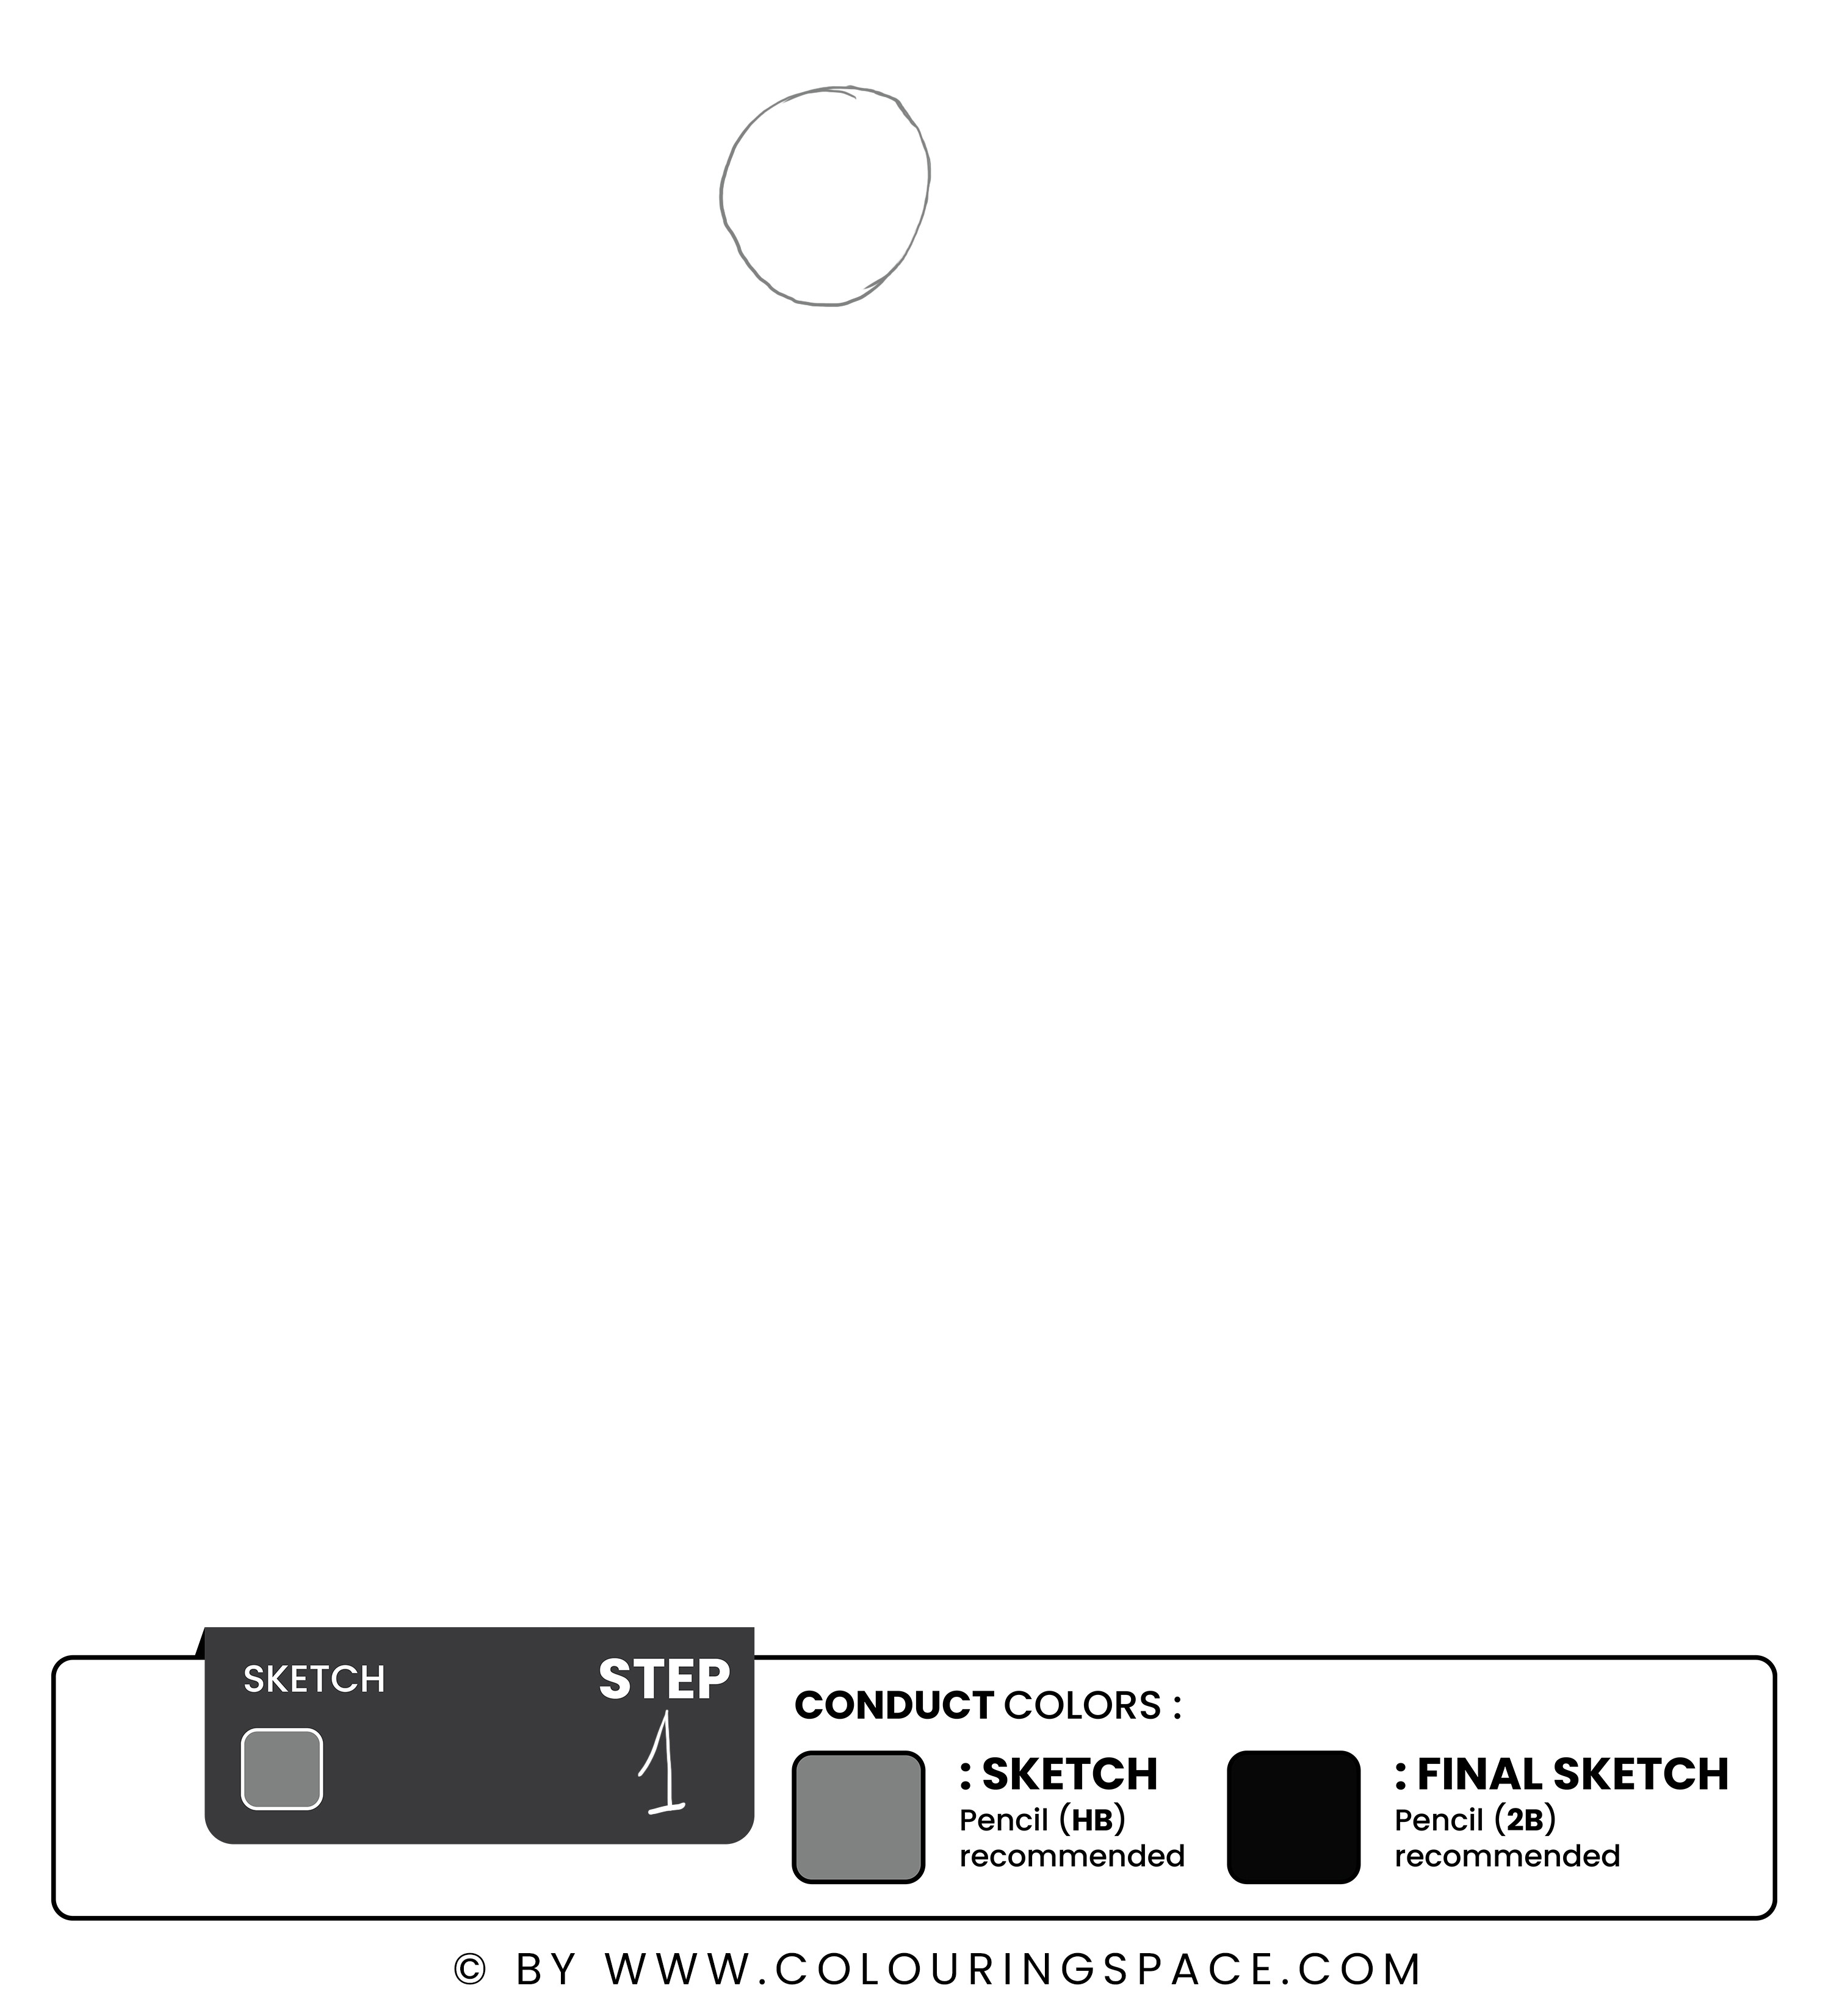
Start by drawing a small circle in the upper middle of your page. Don’t put it way too high to leave some space for the hair details, as this will be the initial sketch of the head.
Step 2: Sketch the Torso
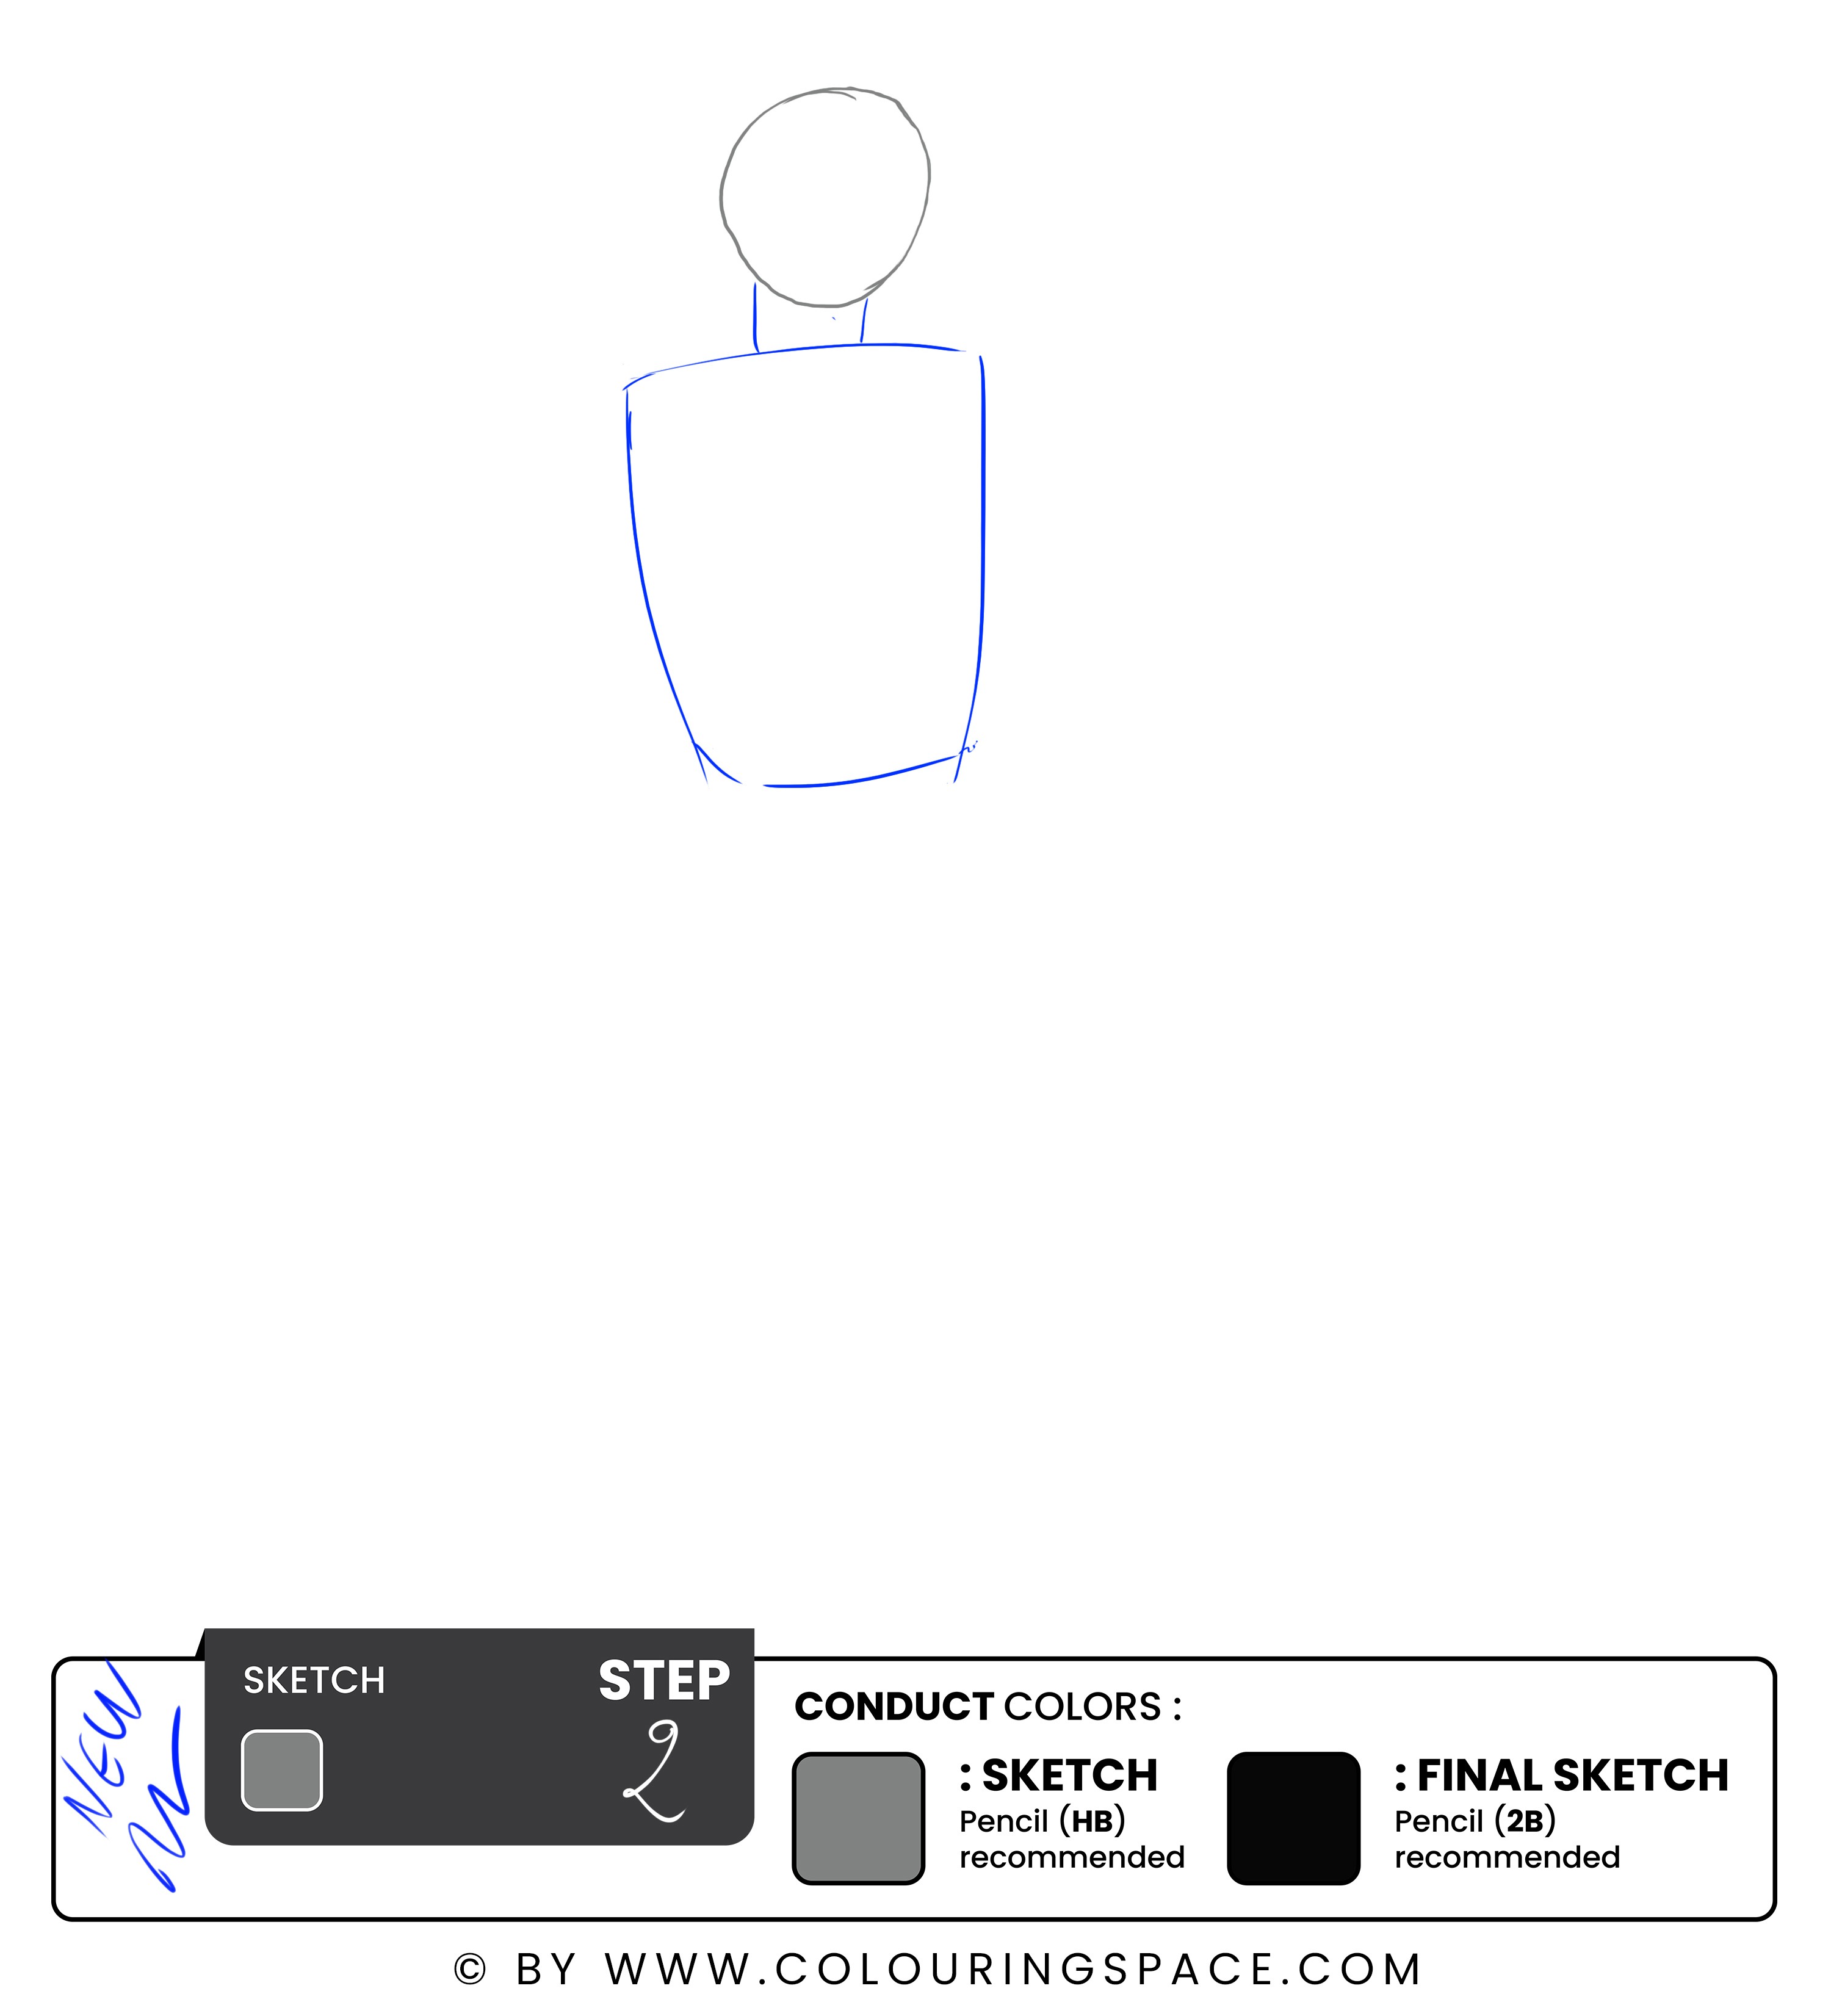
Now that you have drawn the initial sketch of the head, move on to adding the neck sketch.
Start by dragging two short lines down the head and connect them to a rectangle that will depict the torso.
The rectangle doesn’t need to be perfect, as we will be adding more details to the sketch later on.
Step 3: Sketch the Arms
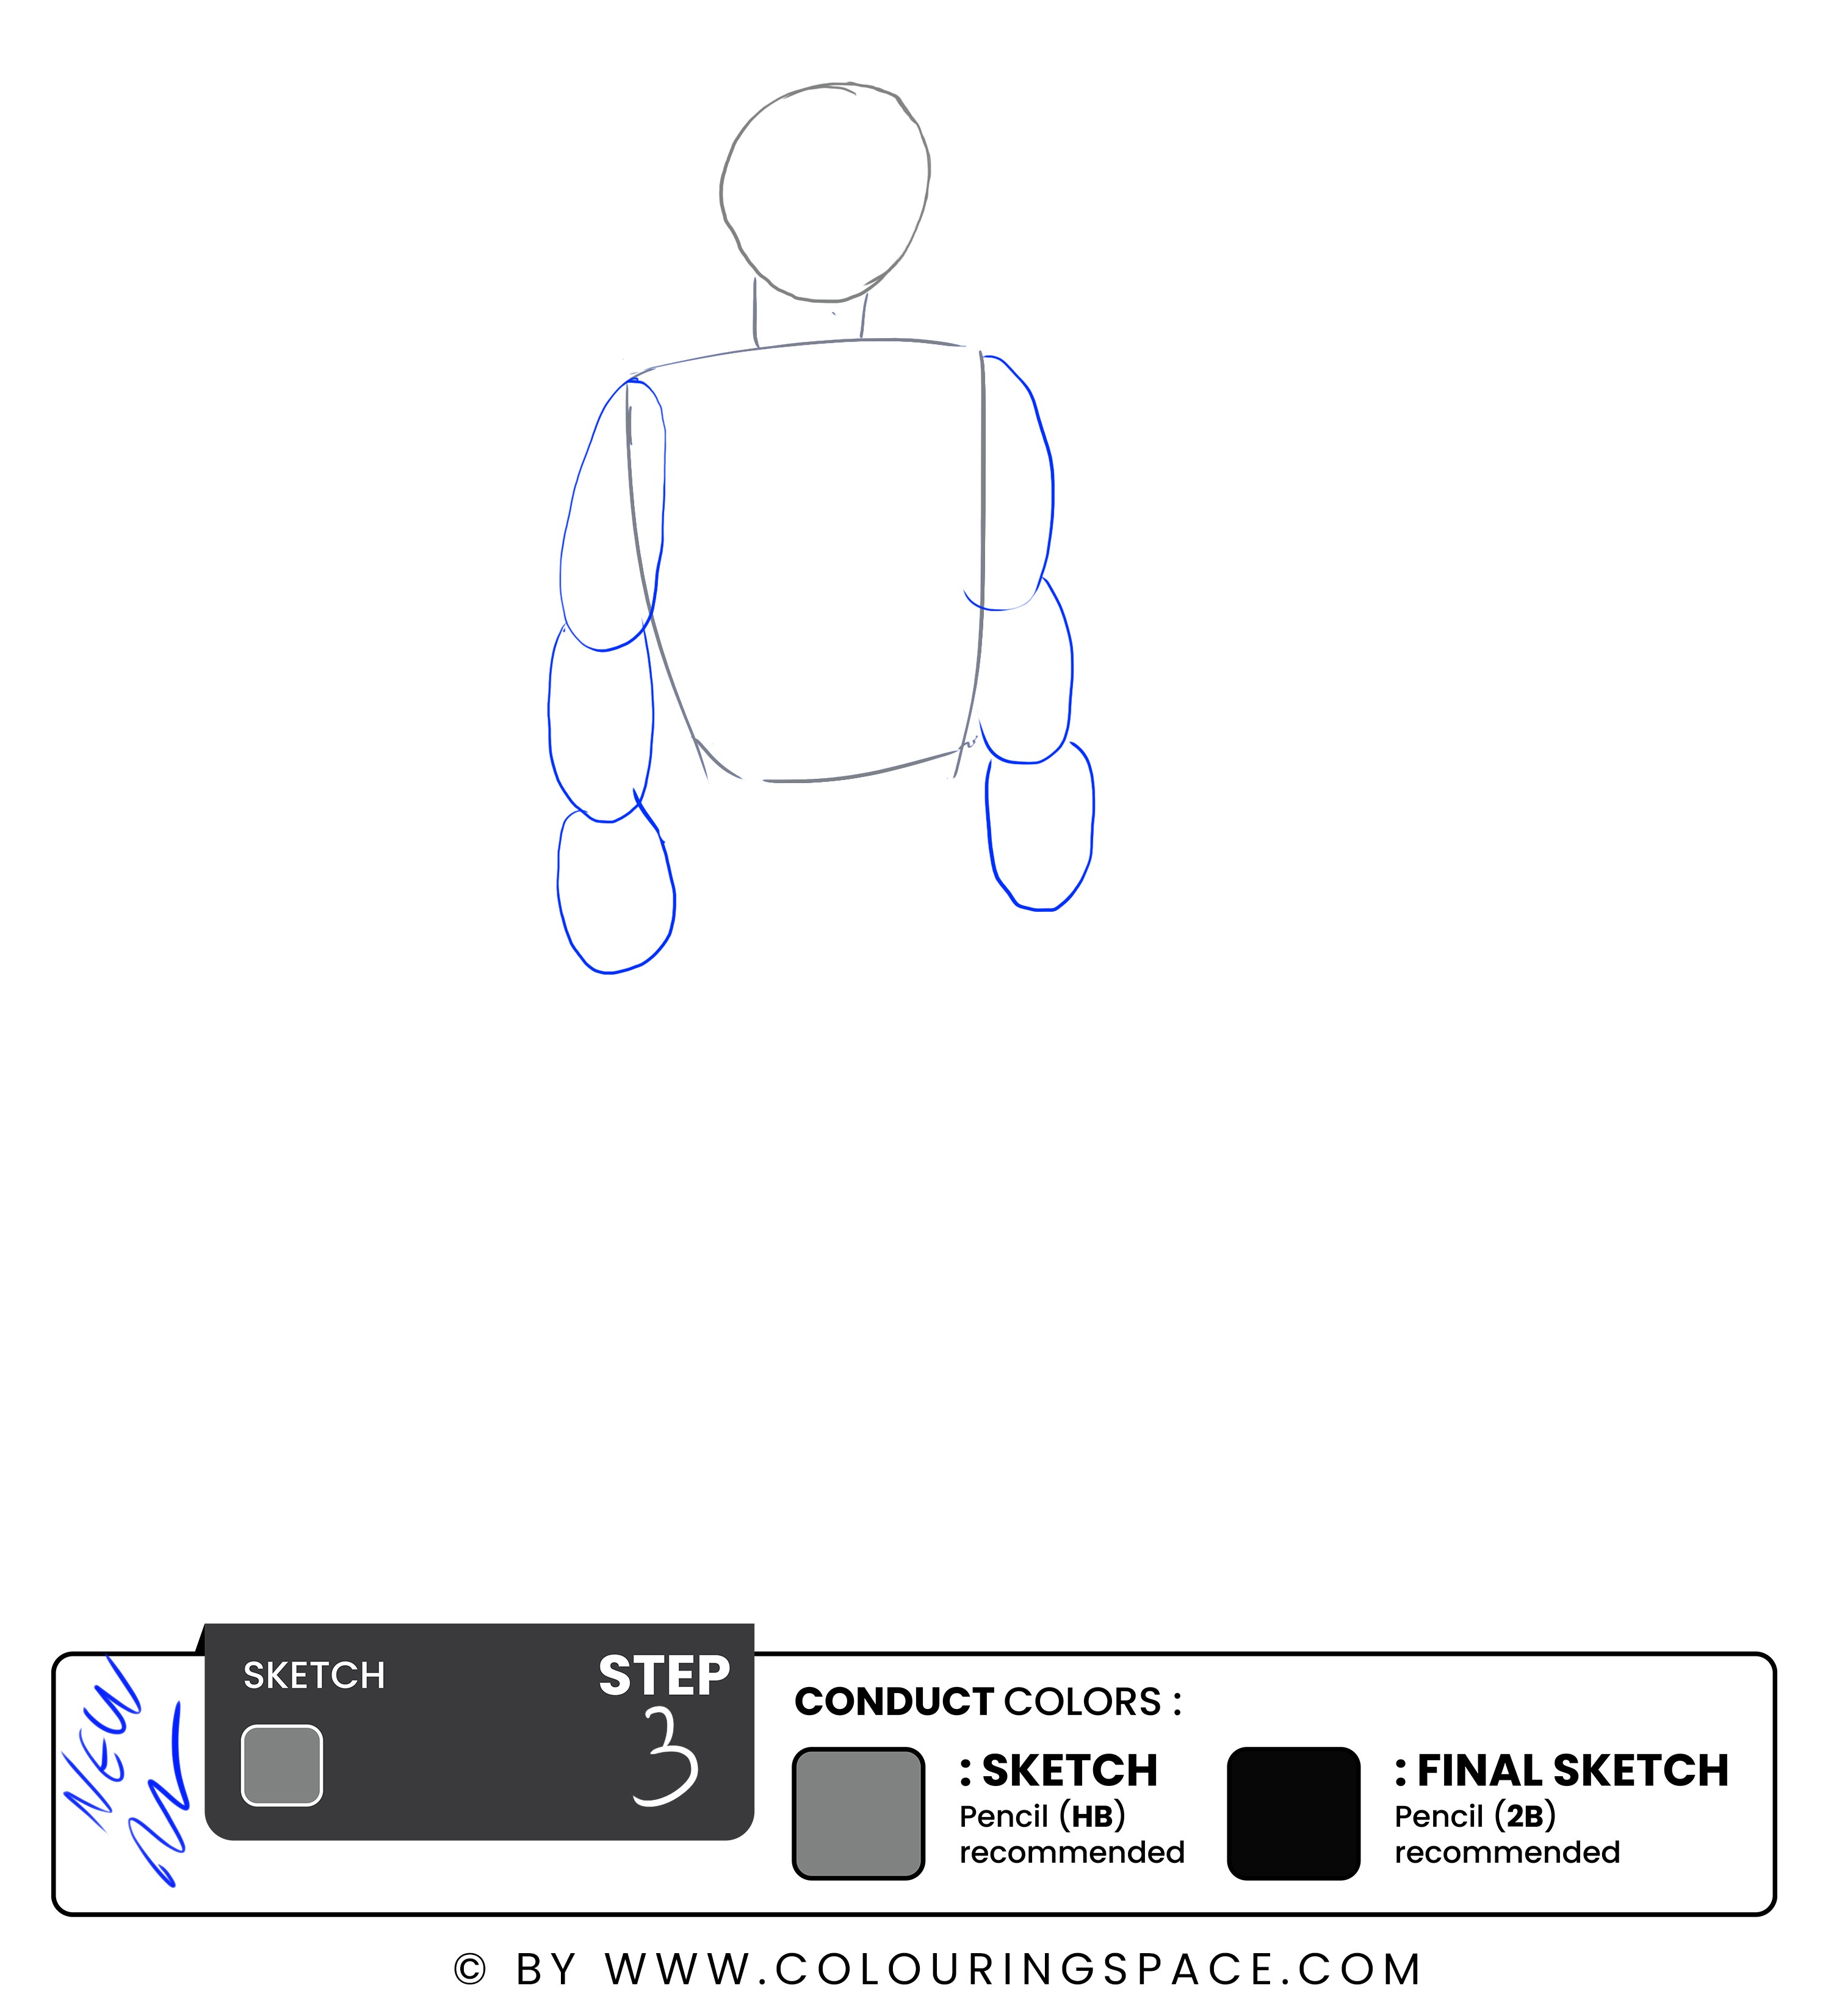
As much as this might seem hard, it is not! Starting with the left arm, draw three oval shapes, one below the other, then the right one.
Step 4: Sketch the Pants
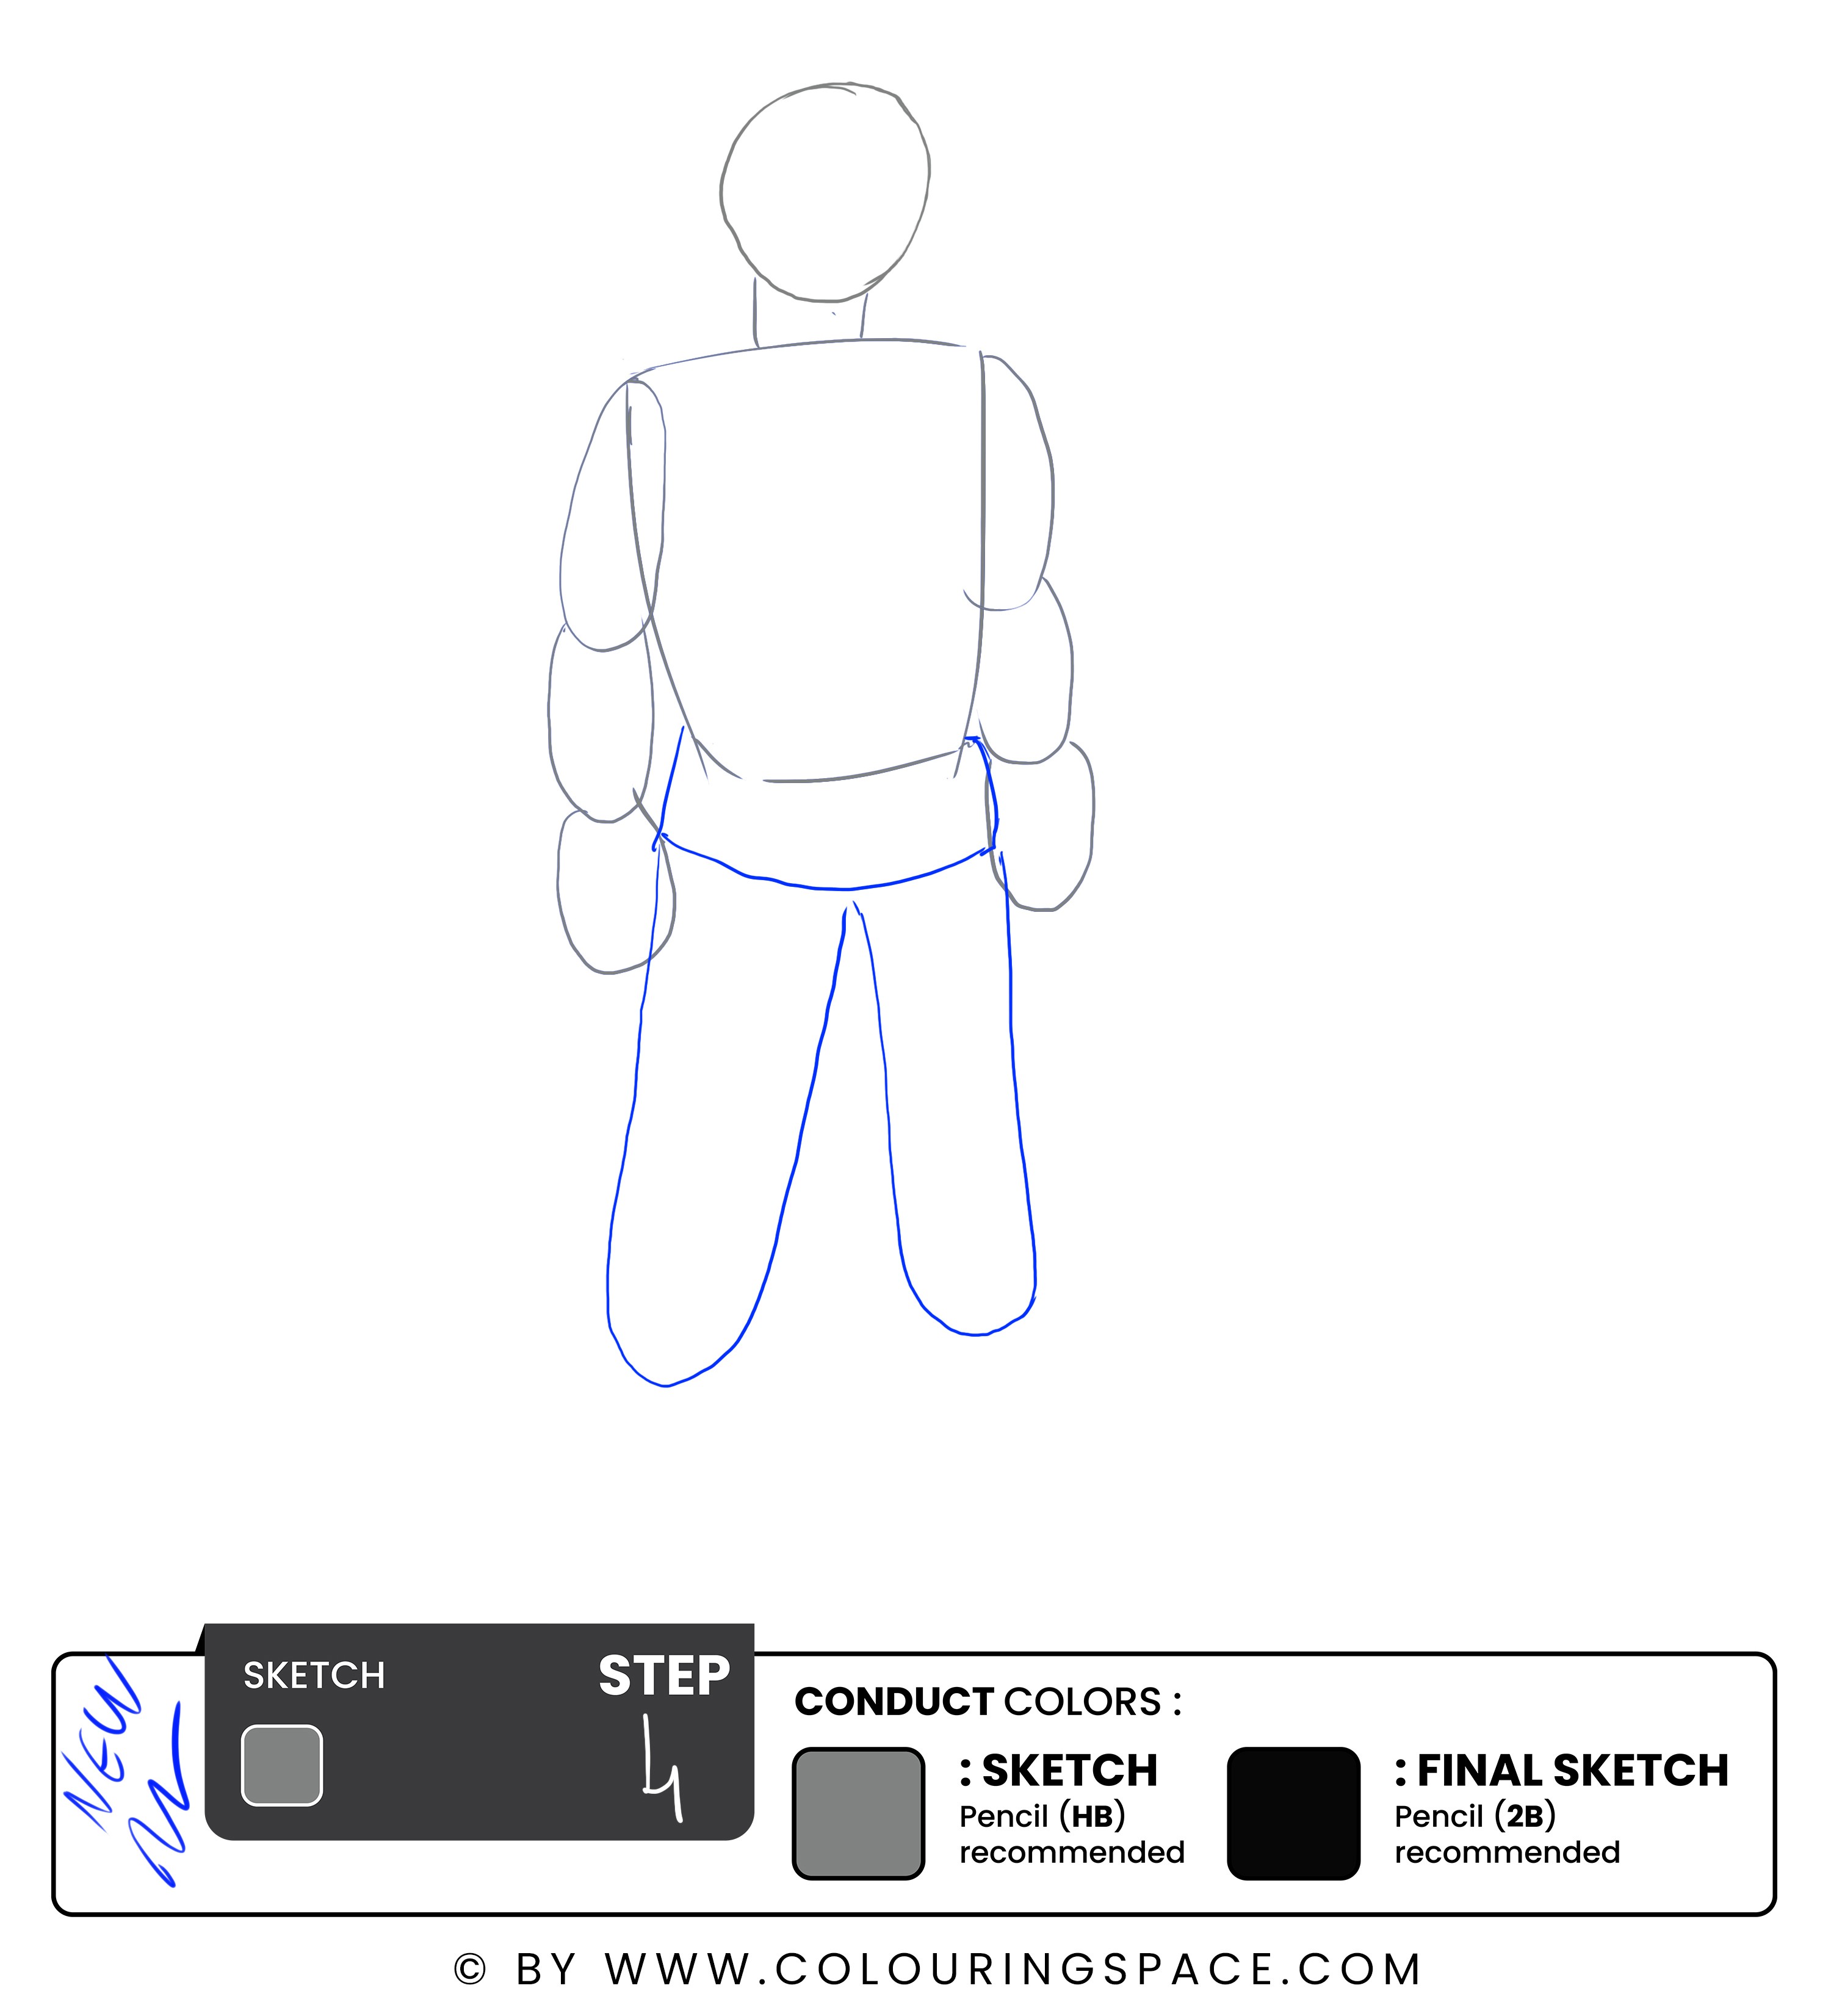
In order to sketch the pants, you need to draw a small rectangle on the waist. Don’t worry; it will serve its purpose soon.
Then, starting from its lower part, sketch two long oval shapes similar to bread loaves.
Step 5: Sketch the Feet
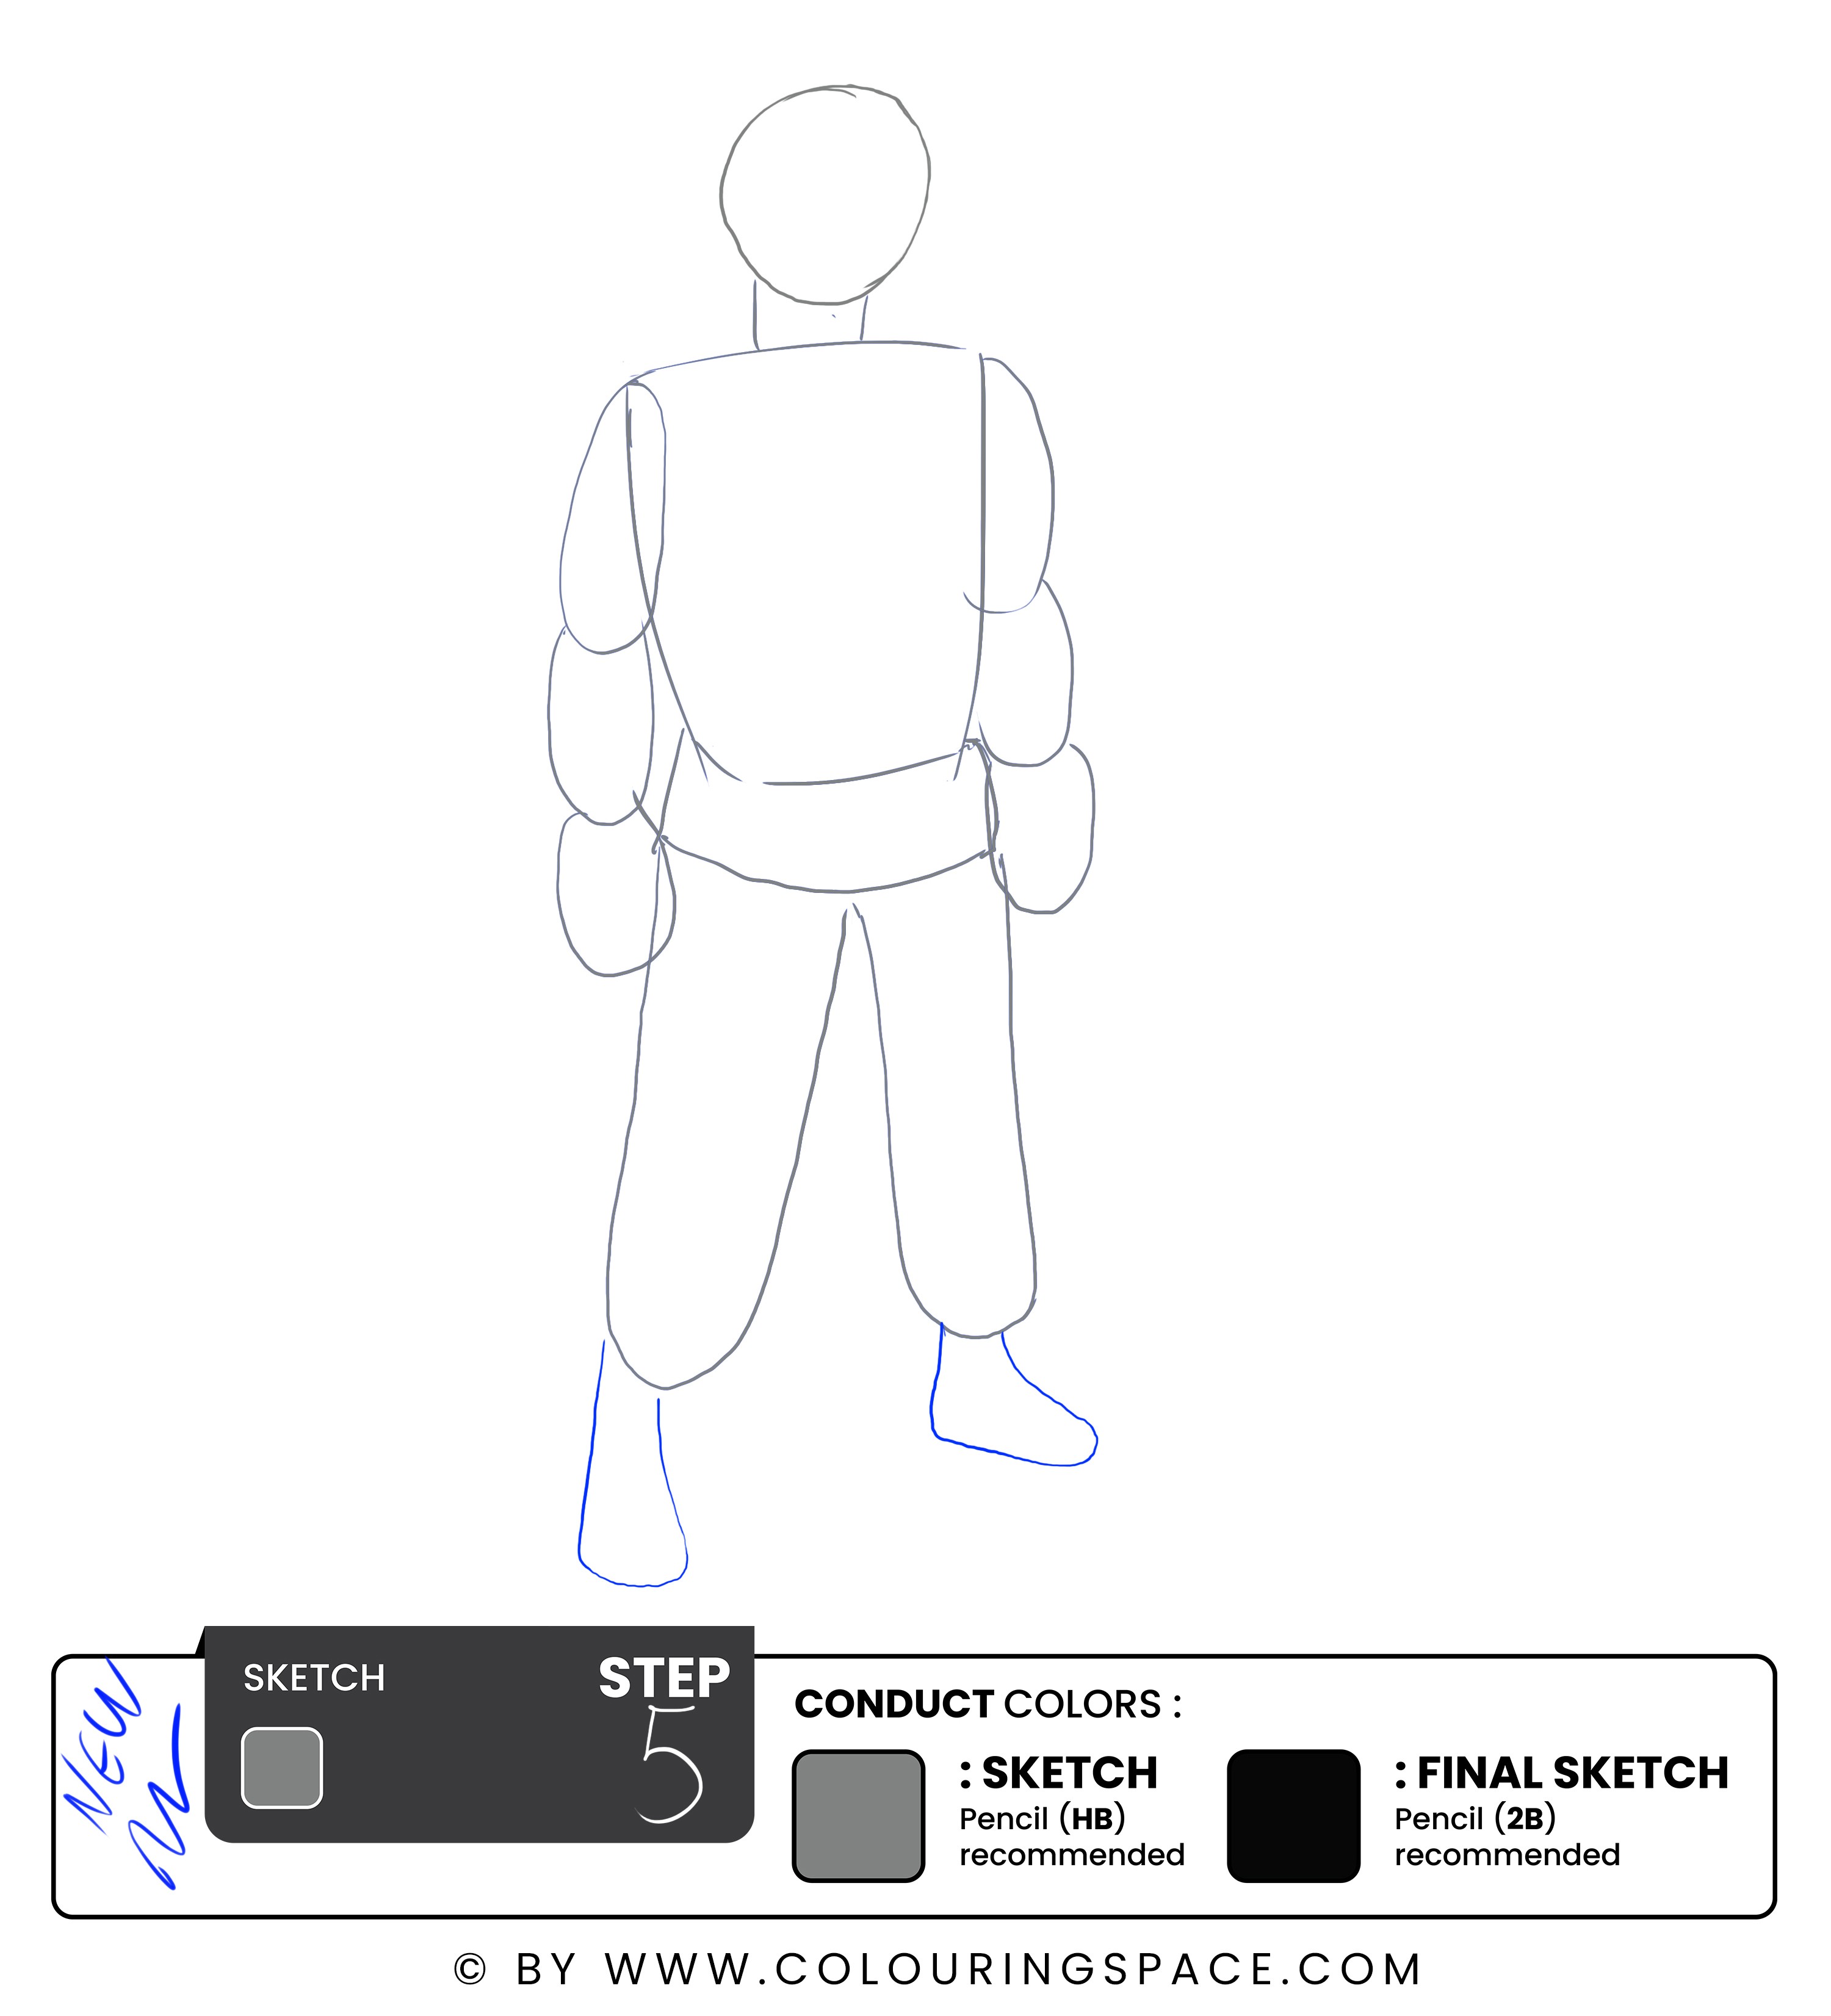
Using your HB pencil, roughly shape your character's feet just like the drawing above shows.
Step 6: Divide the Face into Four Sections
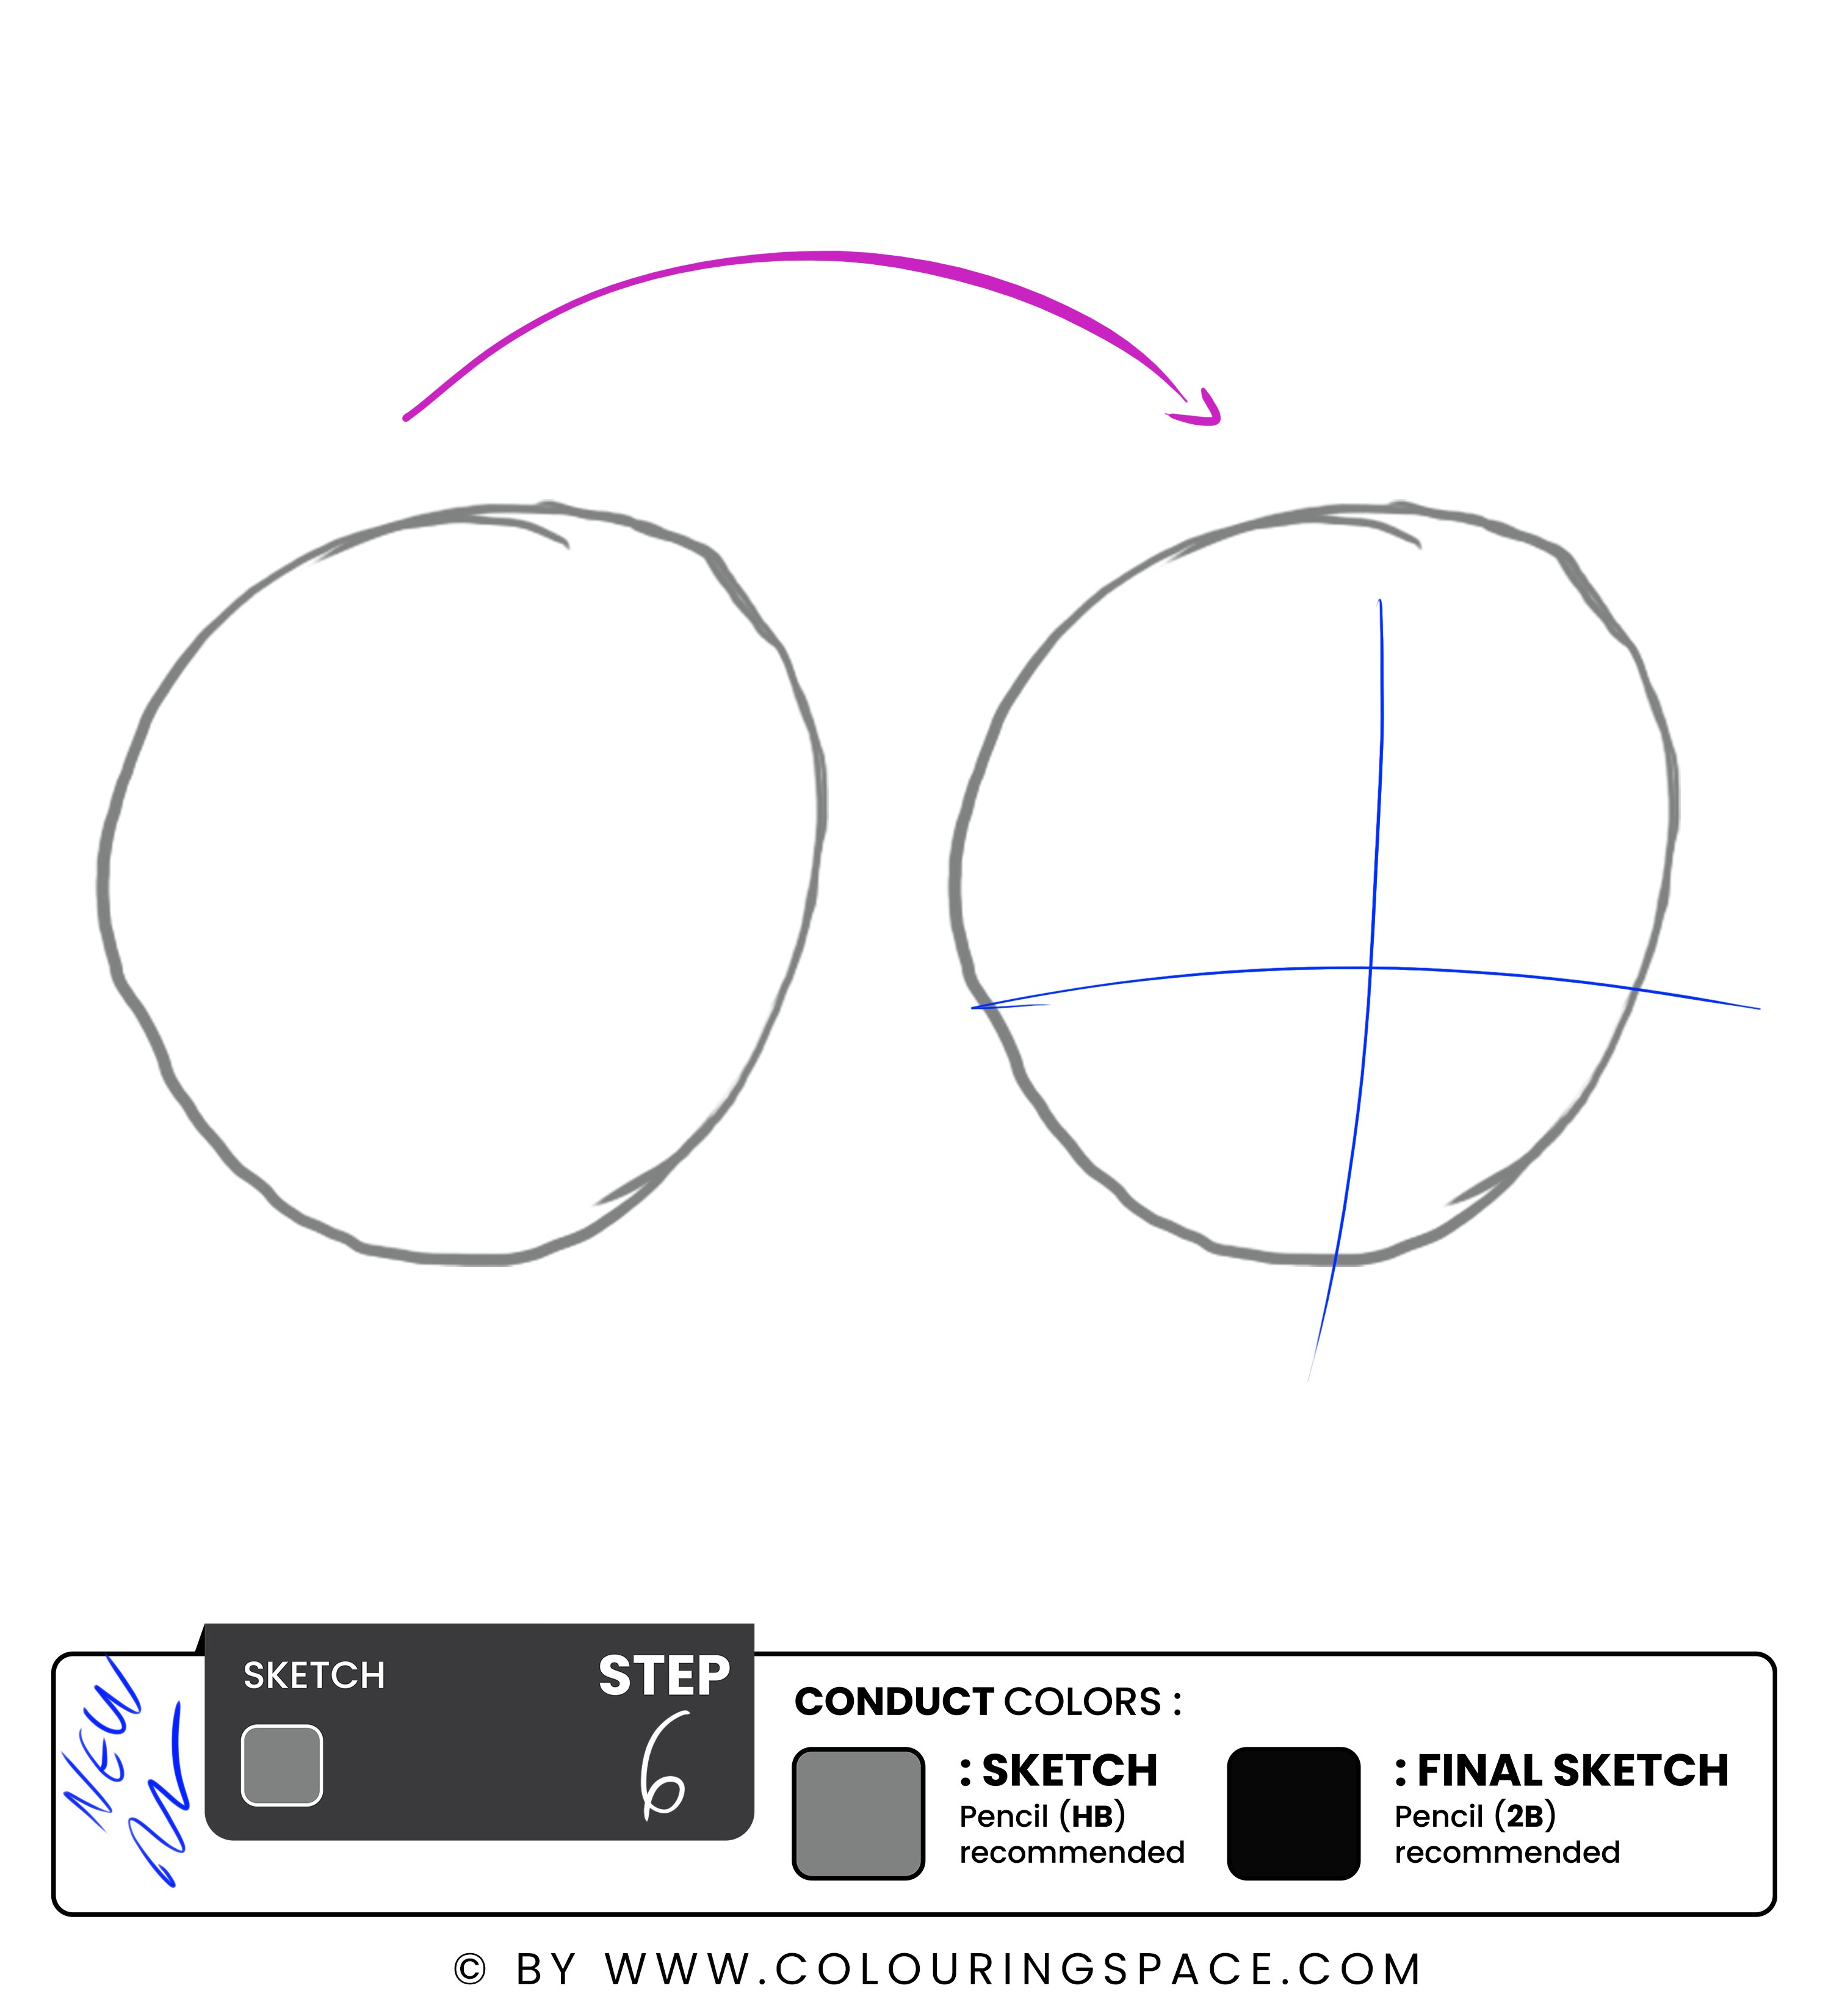
Using a ruler, or simply your hand, draw two lines meeting in the middle of the face circle, forming a right angle. Keep in mind that this sketch will help you position the facial features as well as possible.
Step 7: Sketch the Facial Features
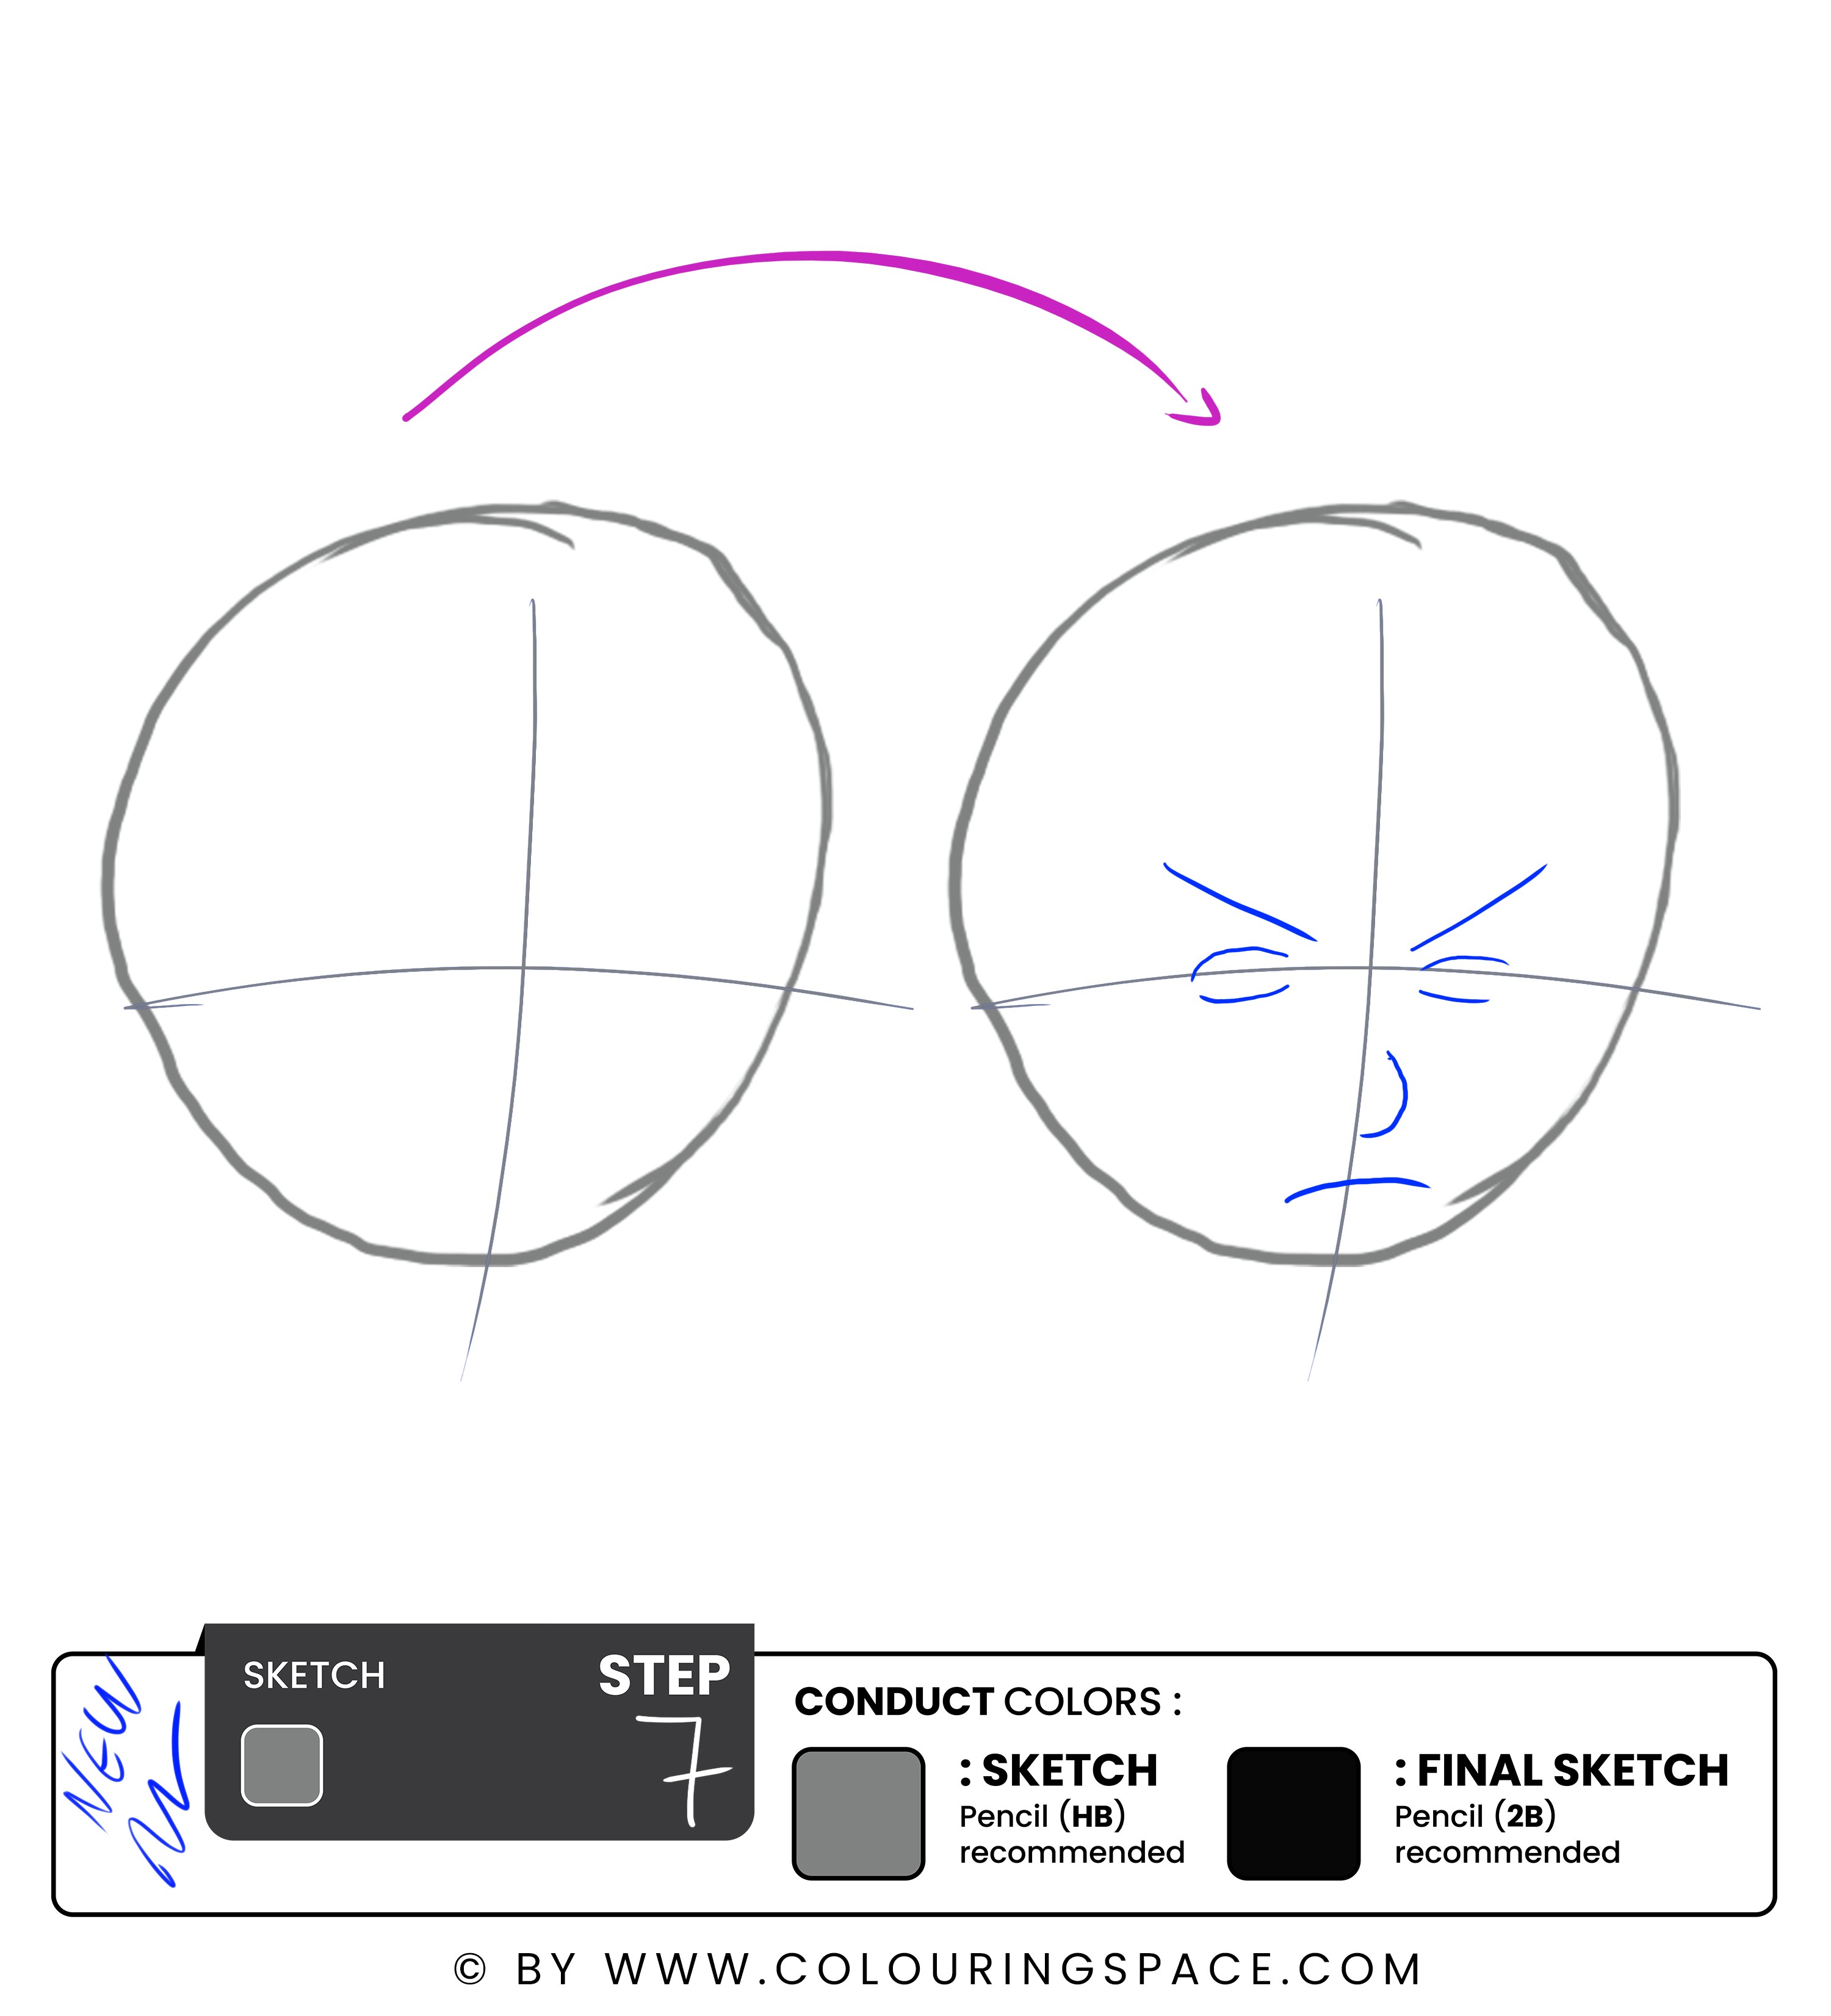
On the horizontal line, draw two rough circles, with one line on top of each for the eyebrows.
Then, move on to the nose and the mouth. Both can be drawn with a simple line and curve.
Step 8: Sketch Ryu’s Hair, Bandana, and Ears
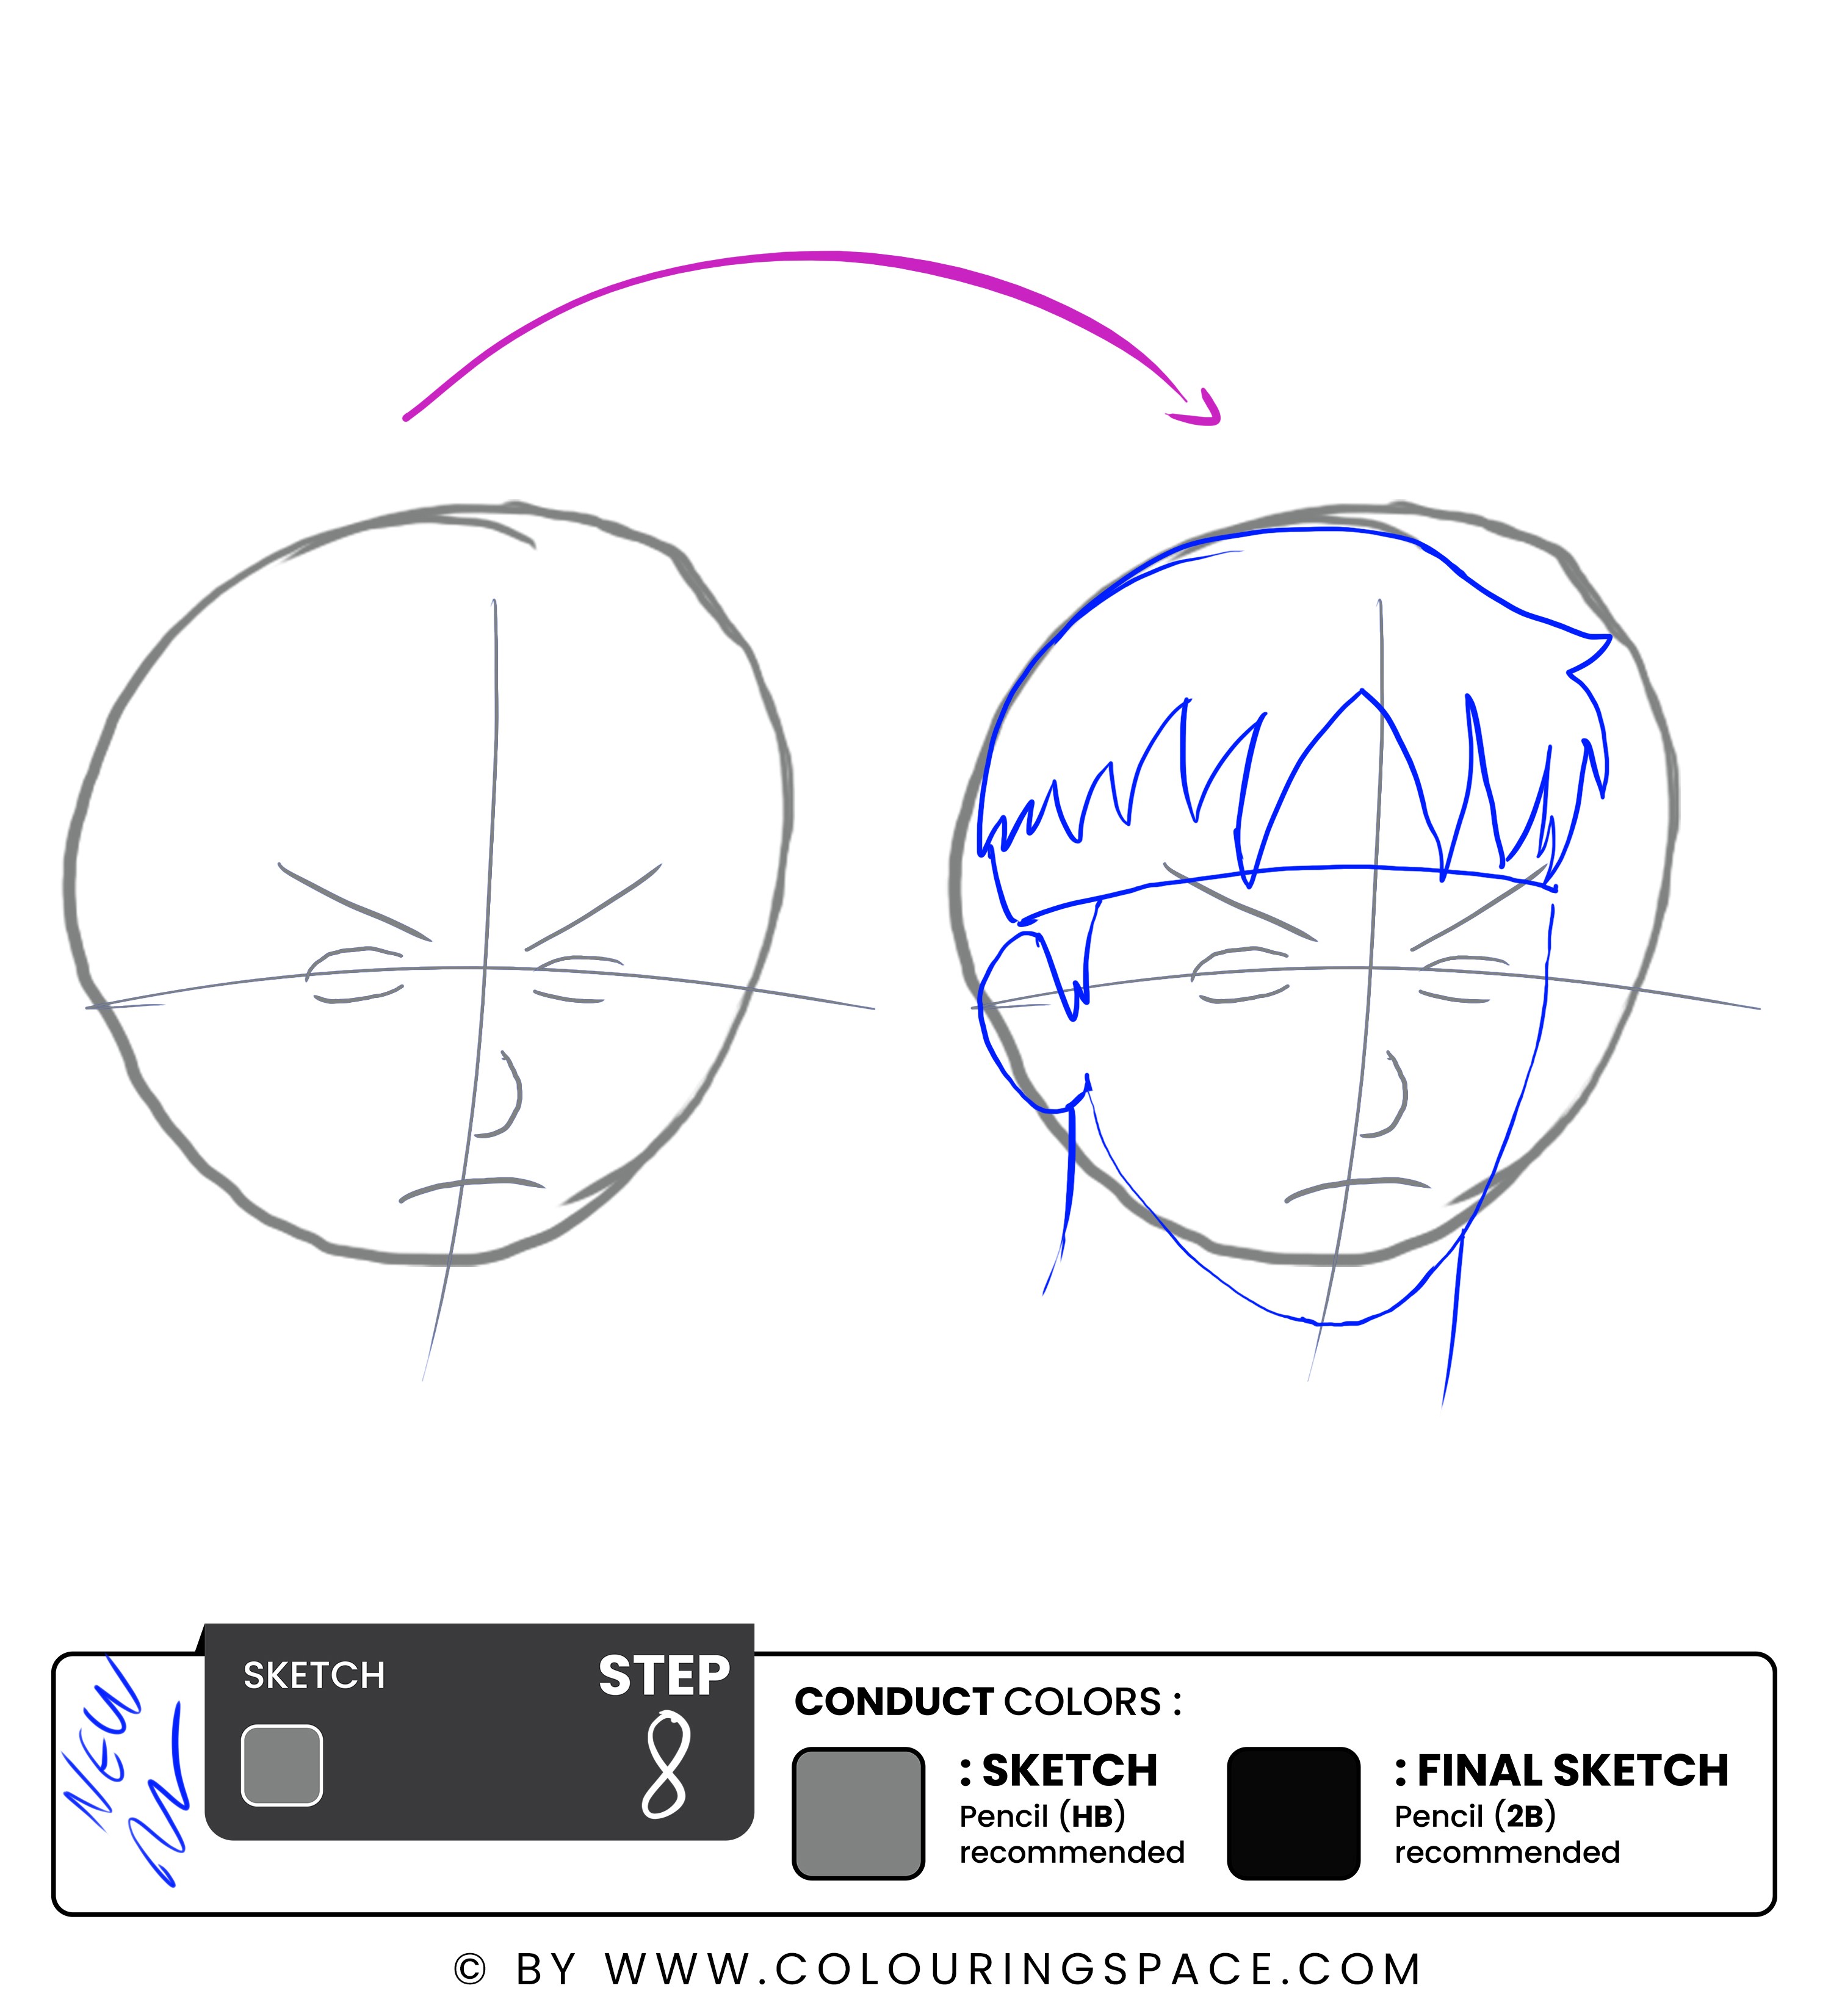
Start by drawing a horizontal line on Ryu's forehead, then move on to drawing a set of spiky hairs coming down from his head.
Once that’s done, draw the ears and continue to complete the neck and chin sketch.
Step 9: Outline the Hair
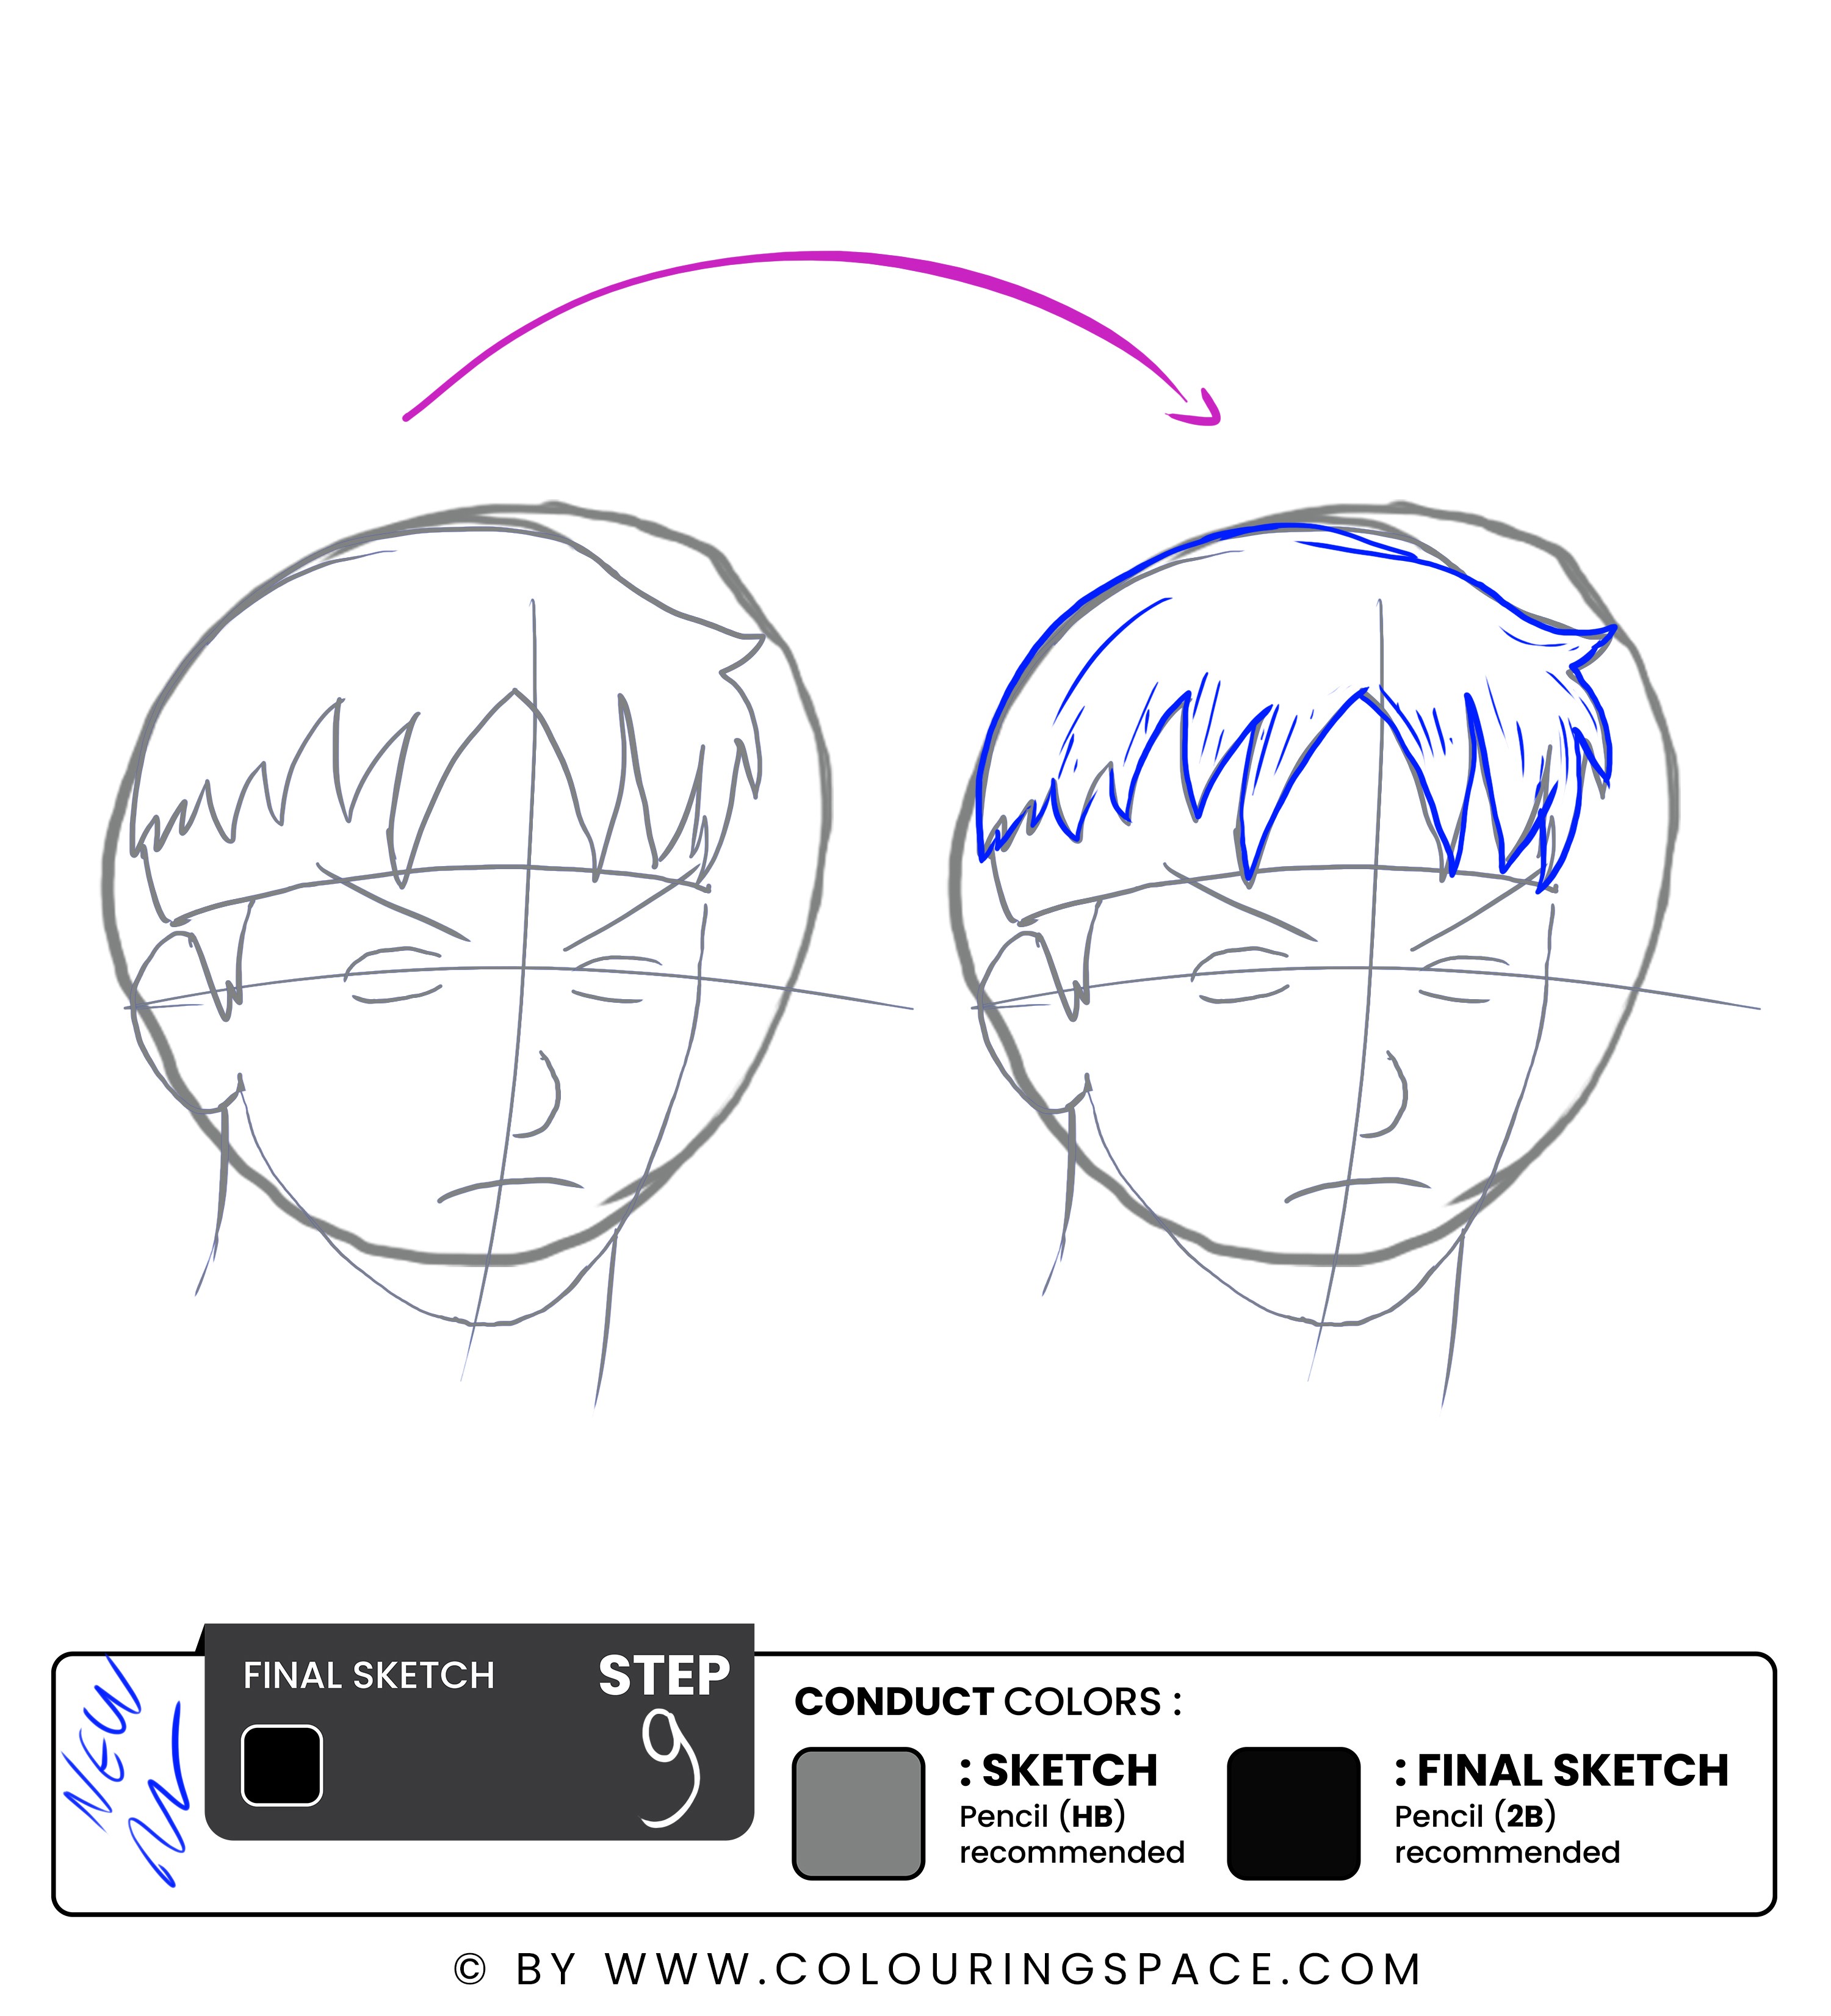
Once you’re done sketching the hair, outline it, and then give it more definition and depth by shading it.
Step 10: Outline the Eyebrows and Facial Features
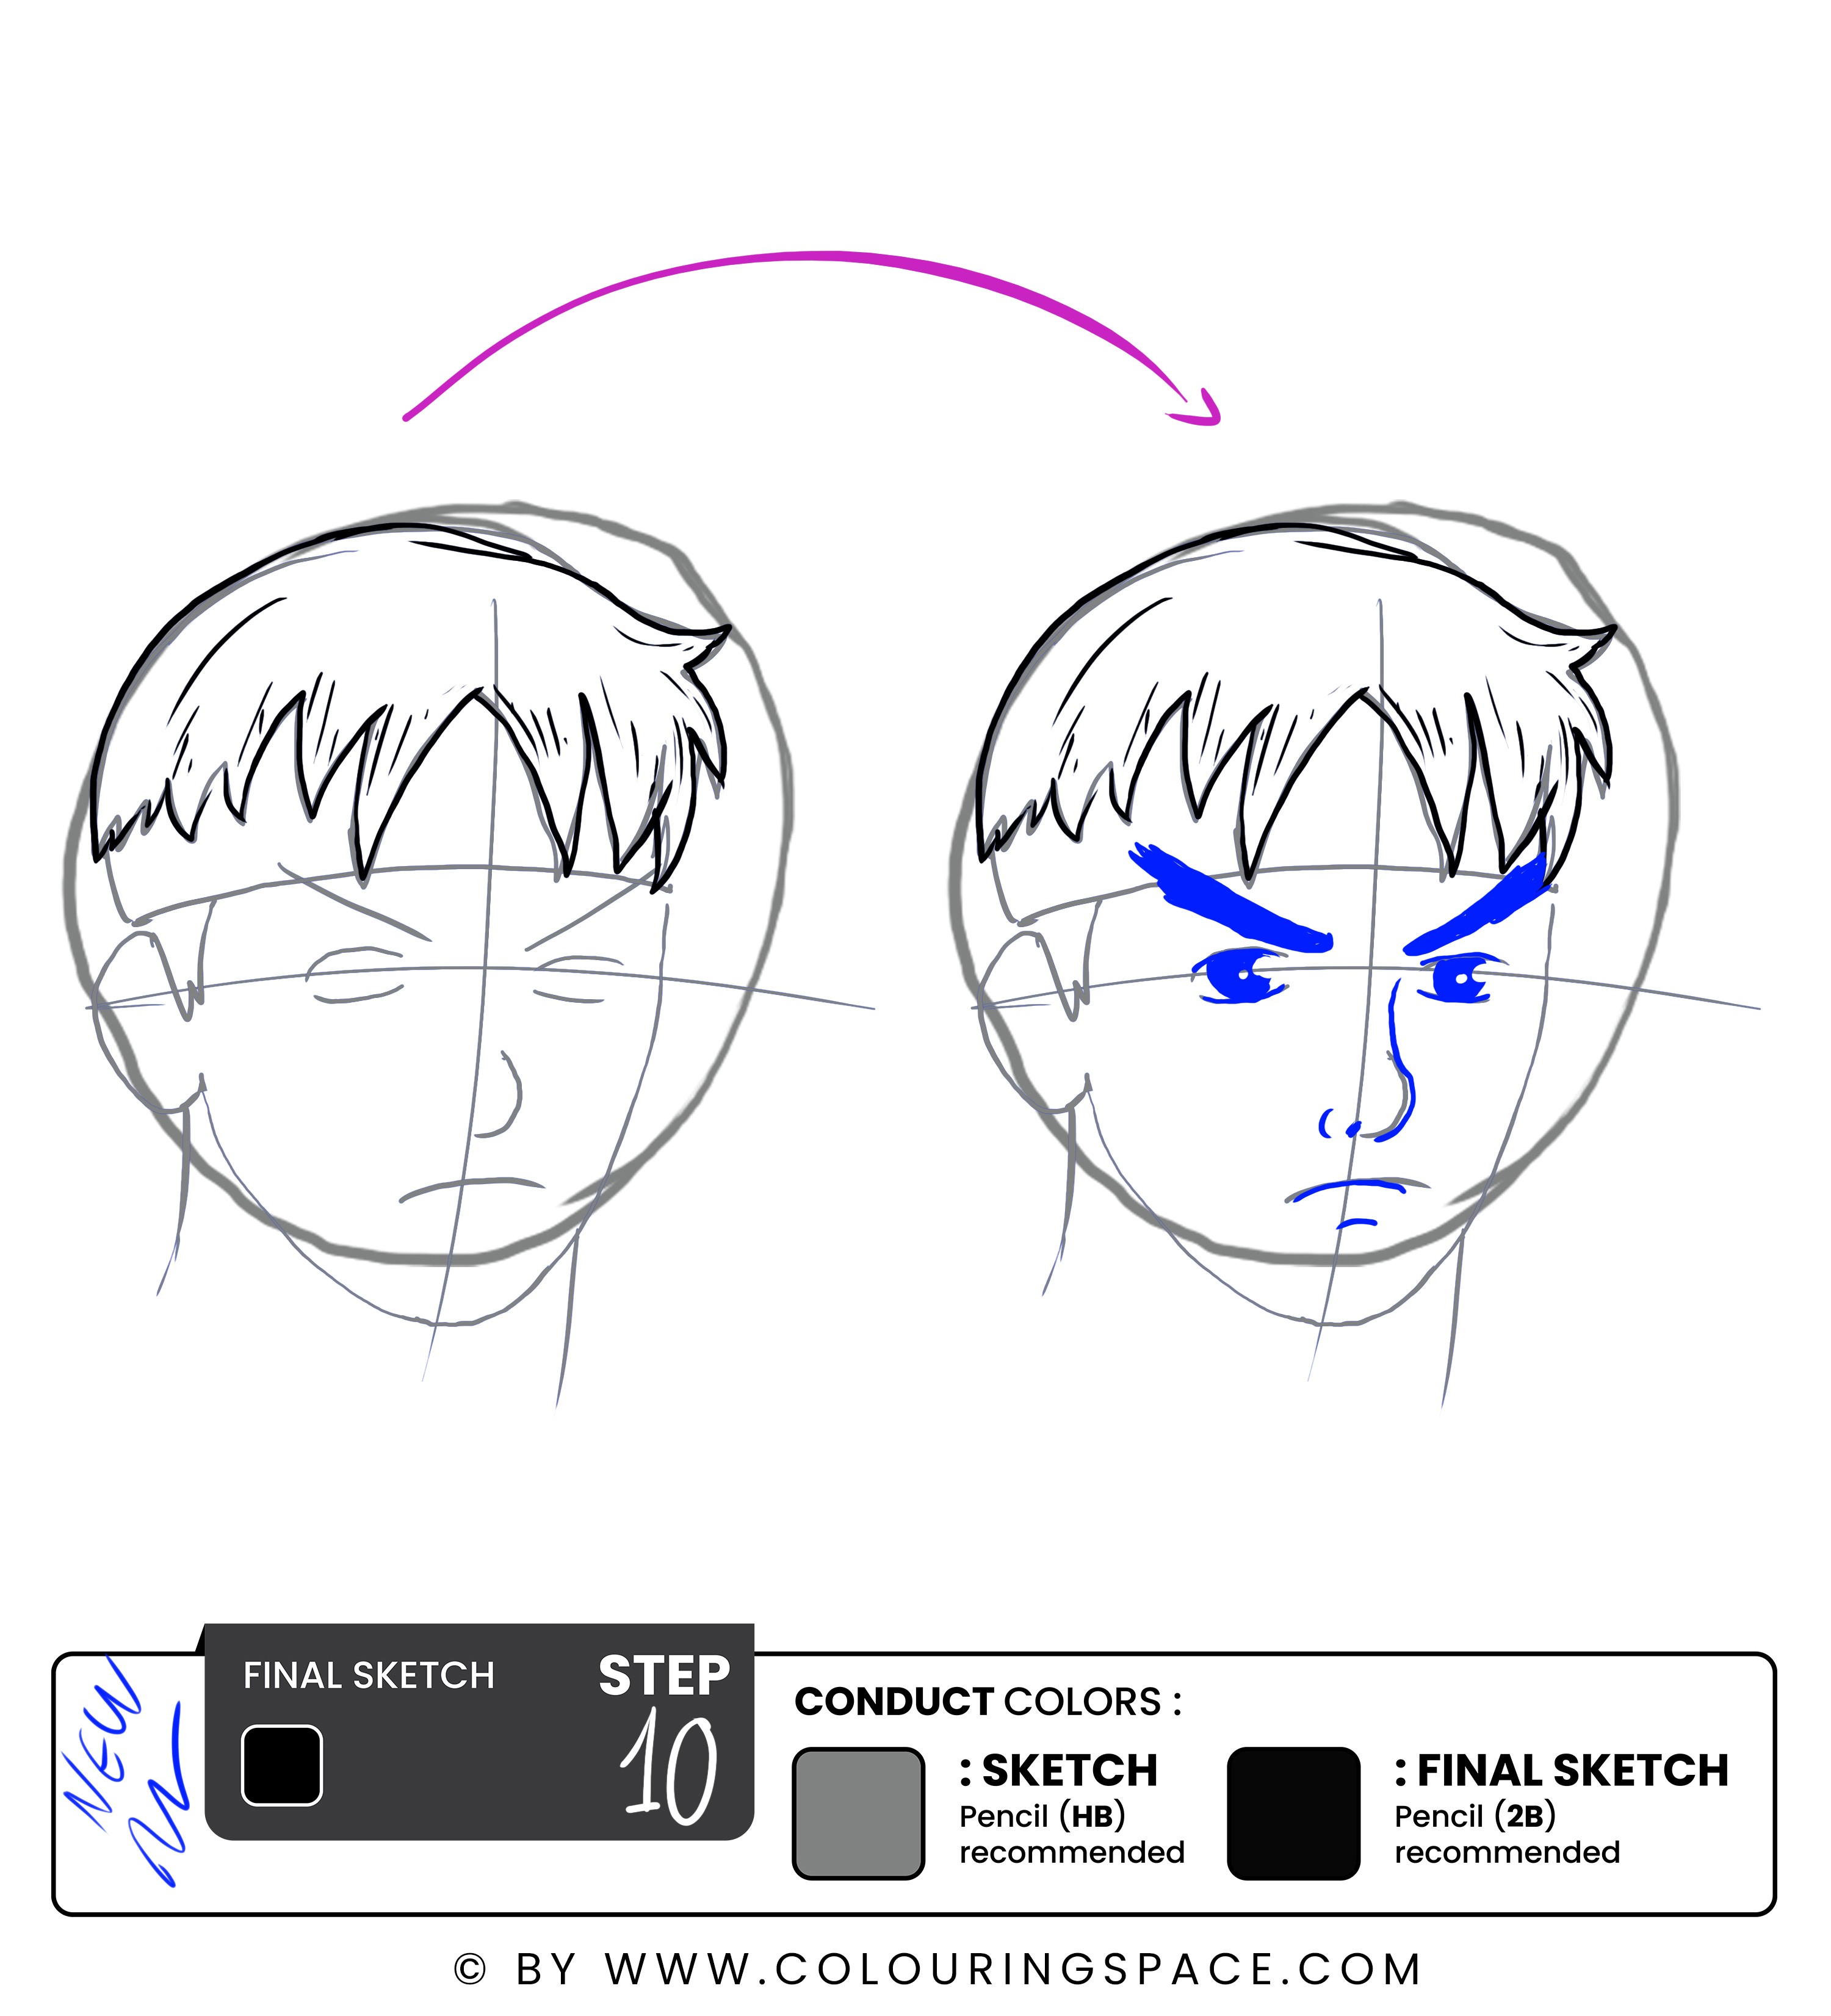
Starting with the eyebrows, using a 2B pencil preferably, outline over the initial sketch, then thicken it.
Next, move on to outlining the eyes and filling them in to give the impression of dark brown piercing eyes.
Don’t forget to outline the nose and leave a small nose hole.
Finally, outline the mouth, and you’re done with the facial features.
Steps 11 & 12: Outline the Head Sketch and Neck, then Remove the Sketch Guidelines
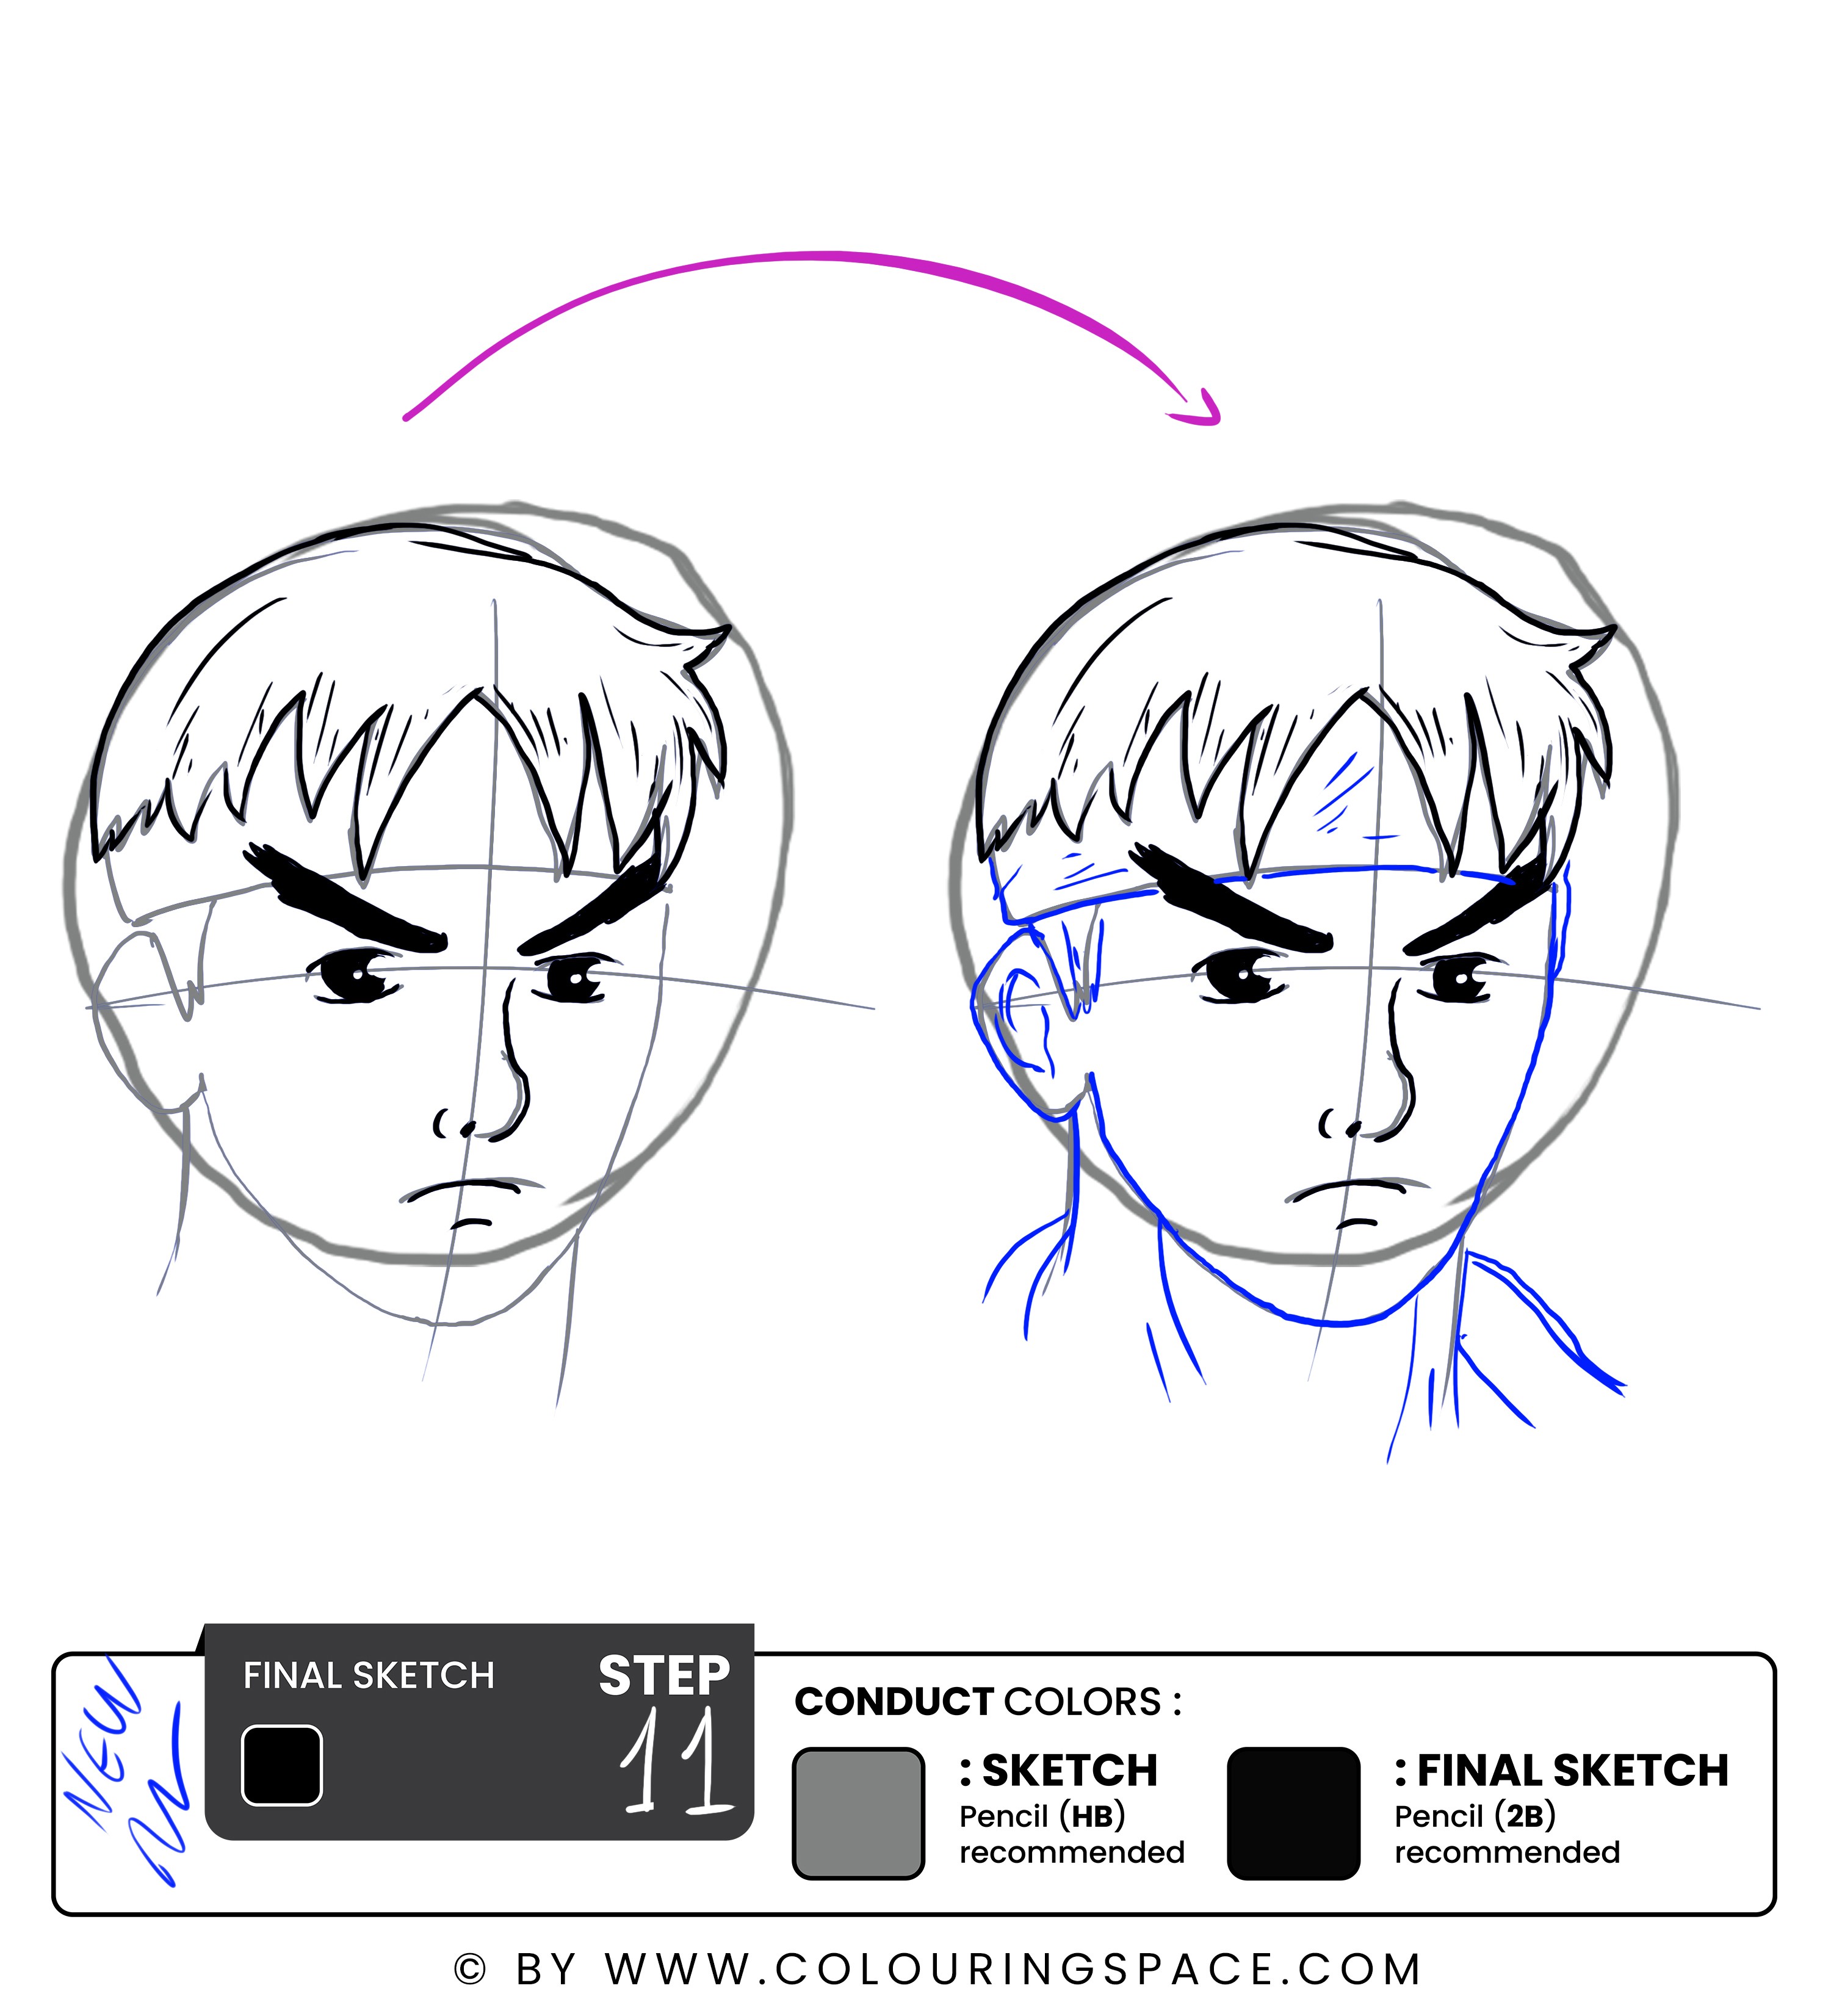
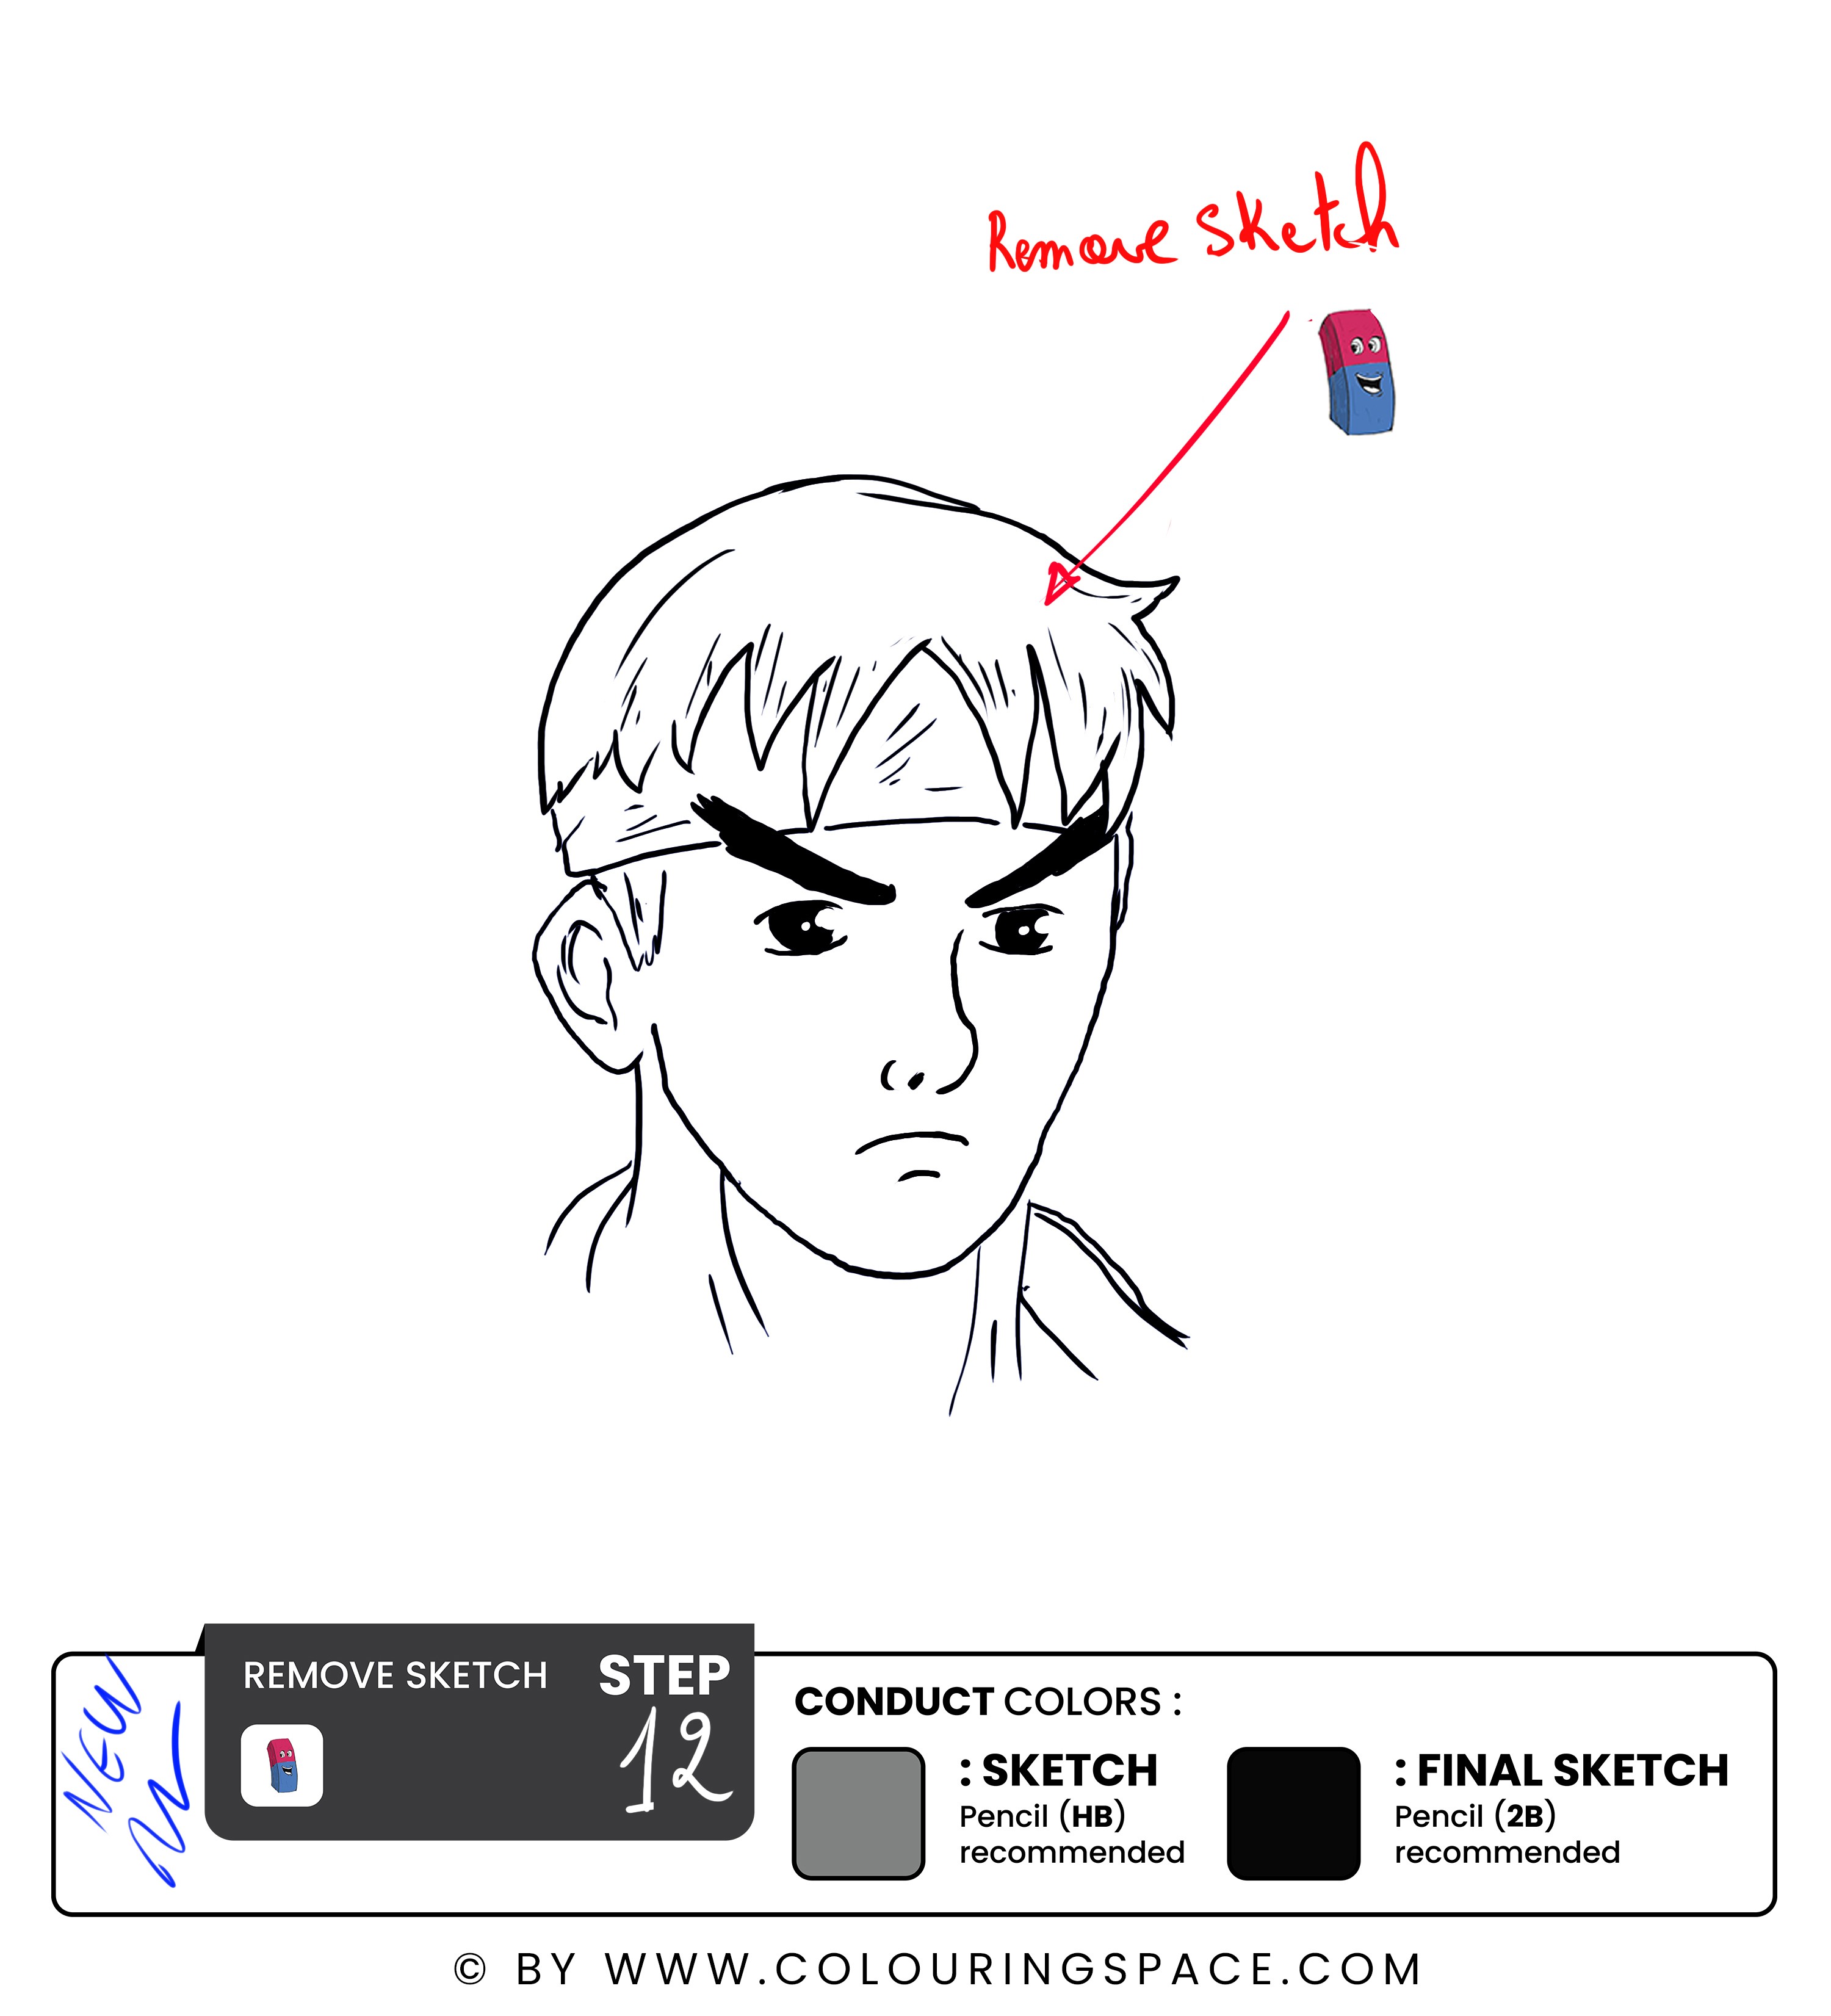
Using the same pencil, outline the character's bandana, ears, and chin. Once that’s done, move on to outlining the neck. Make sure to add shading to the details to make it look realistic and well-made.
Once that’s done, remove the head sketch lines using a clean eraser.
Step 13: Outline the Upper Part of the Kasaya
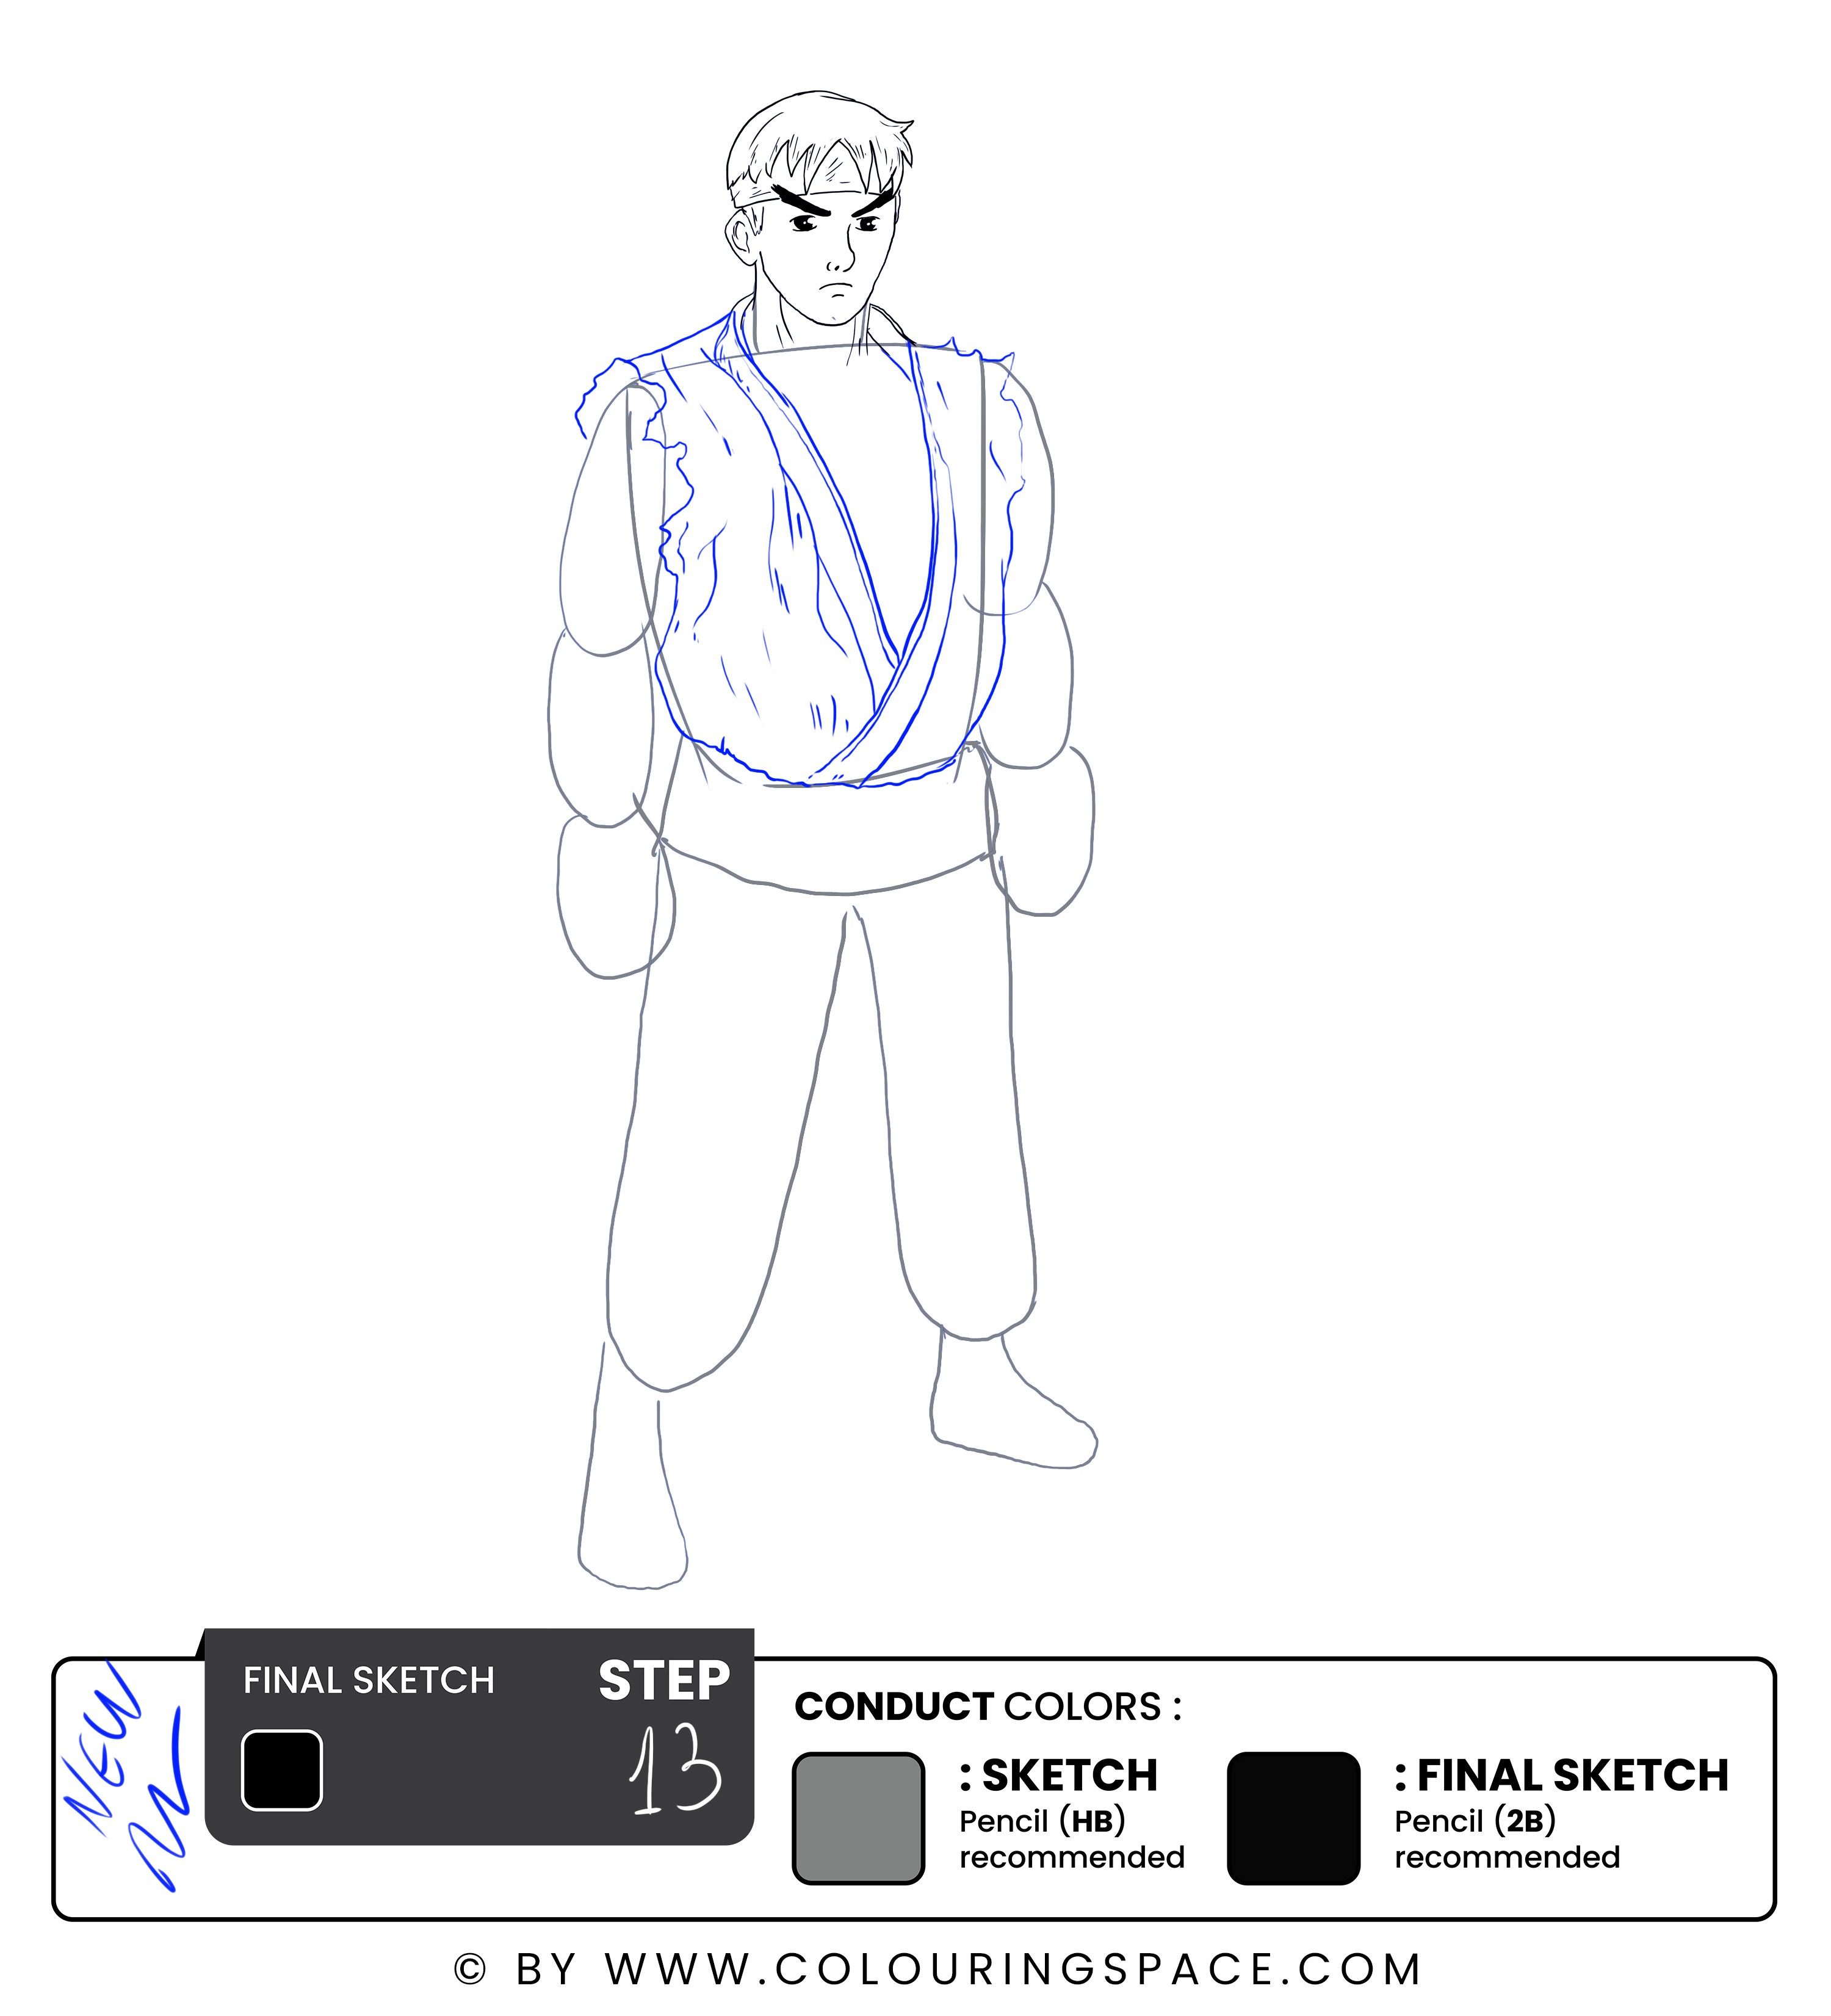
Draw the neckline of the kasaya. The neckline should be curved and wide enough to accommodate the wearer’s neck.
Next, draw the details of the kasaya. The kasaya is often decorated with intricate embroidery, so make sure to draw the designs accurately.
Step 14: Sketch the Chest
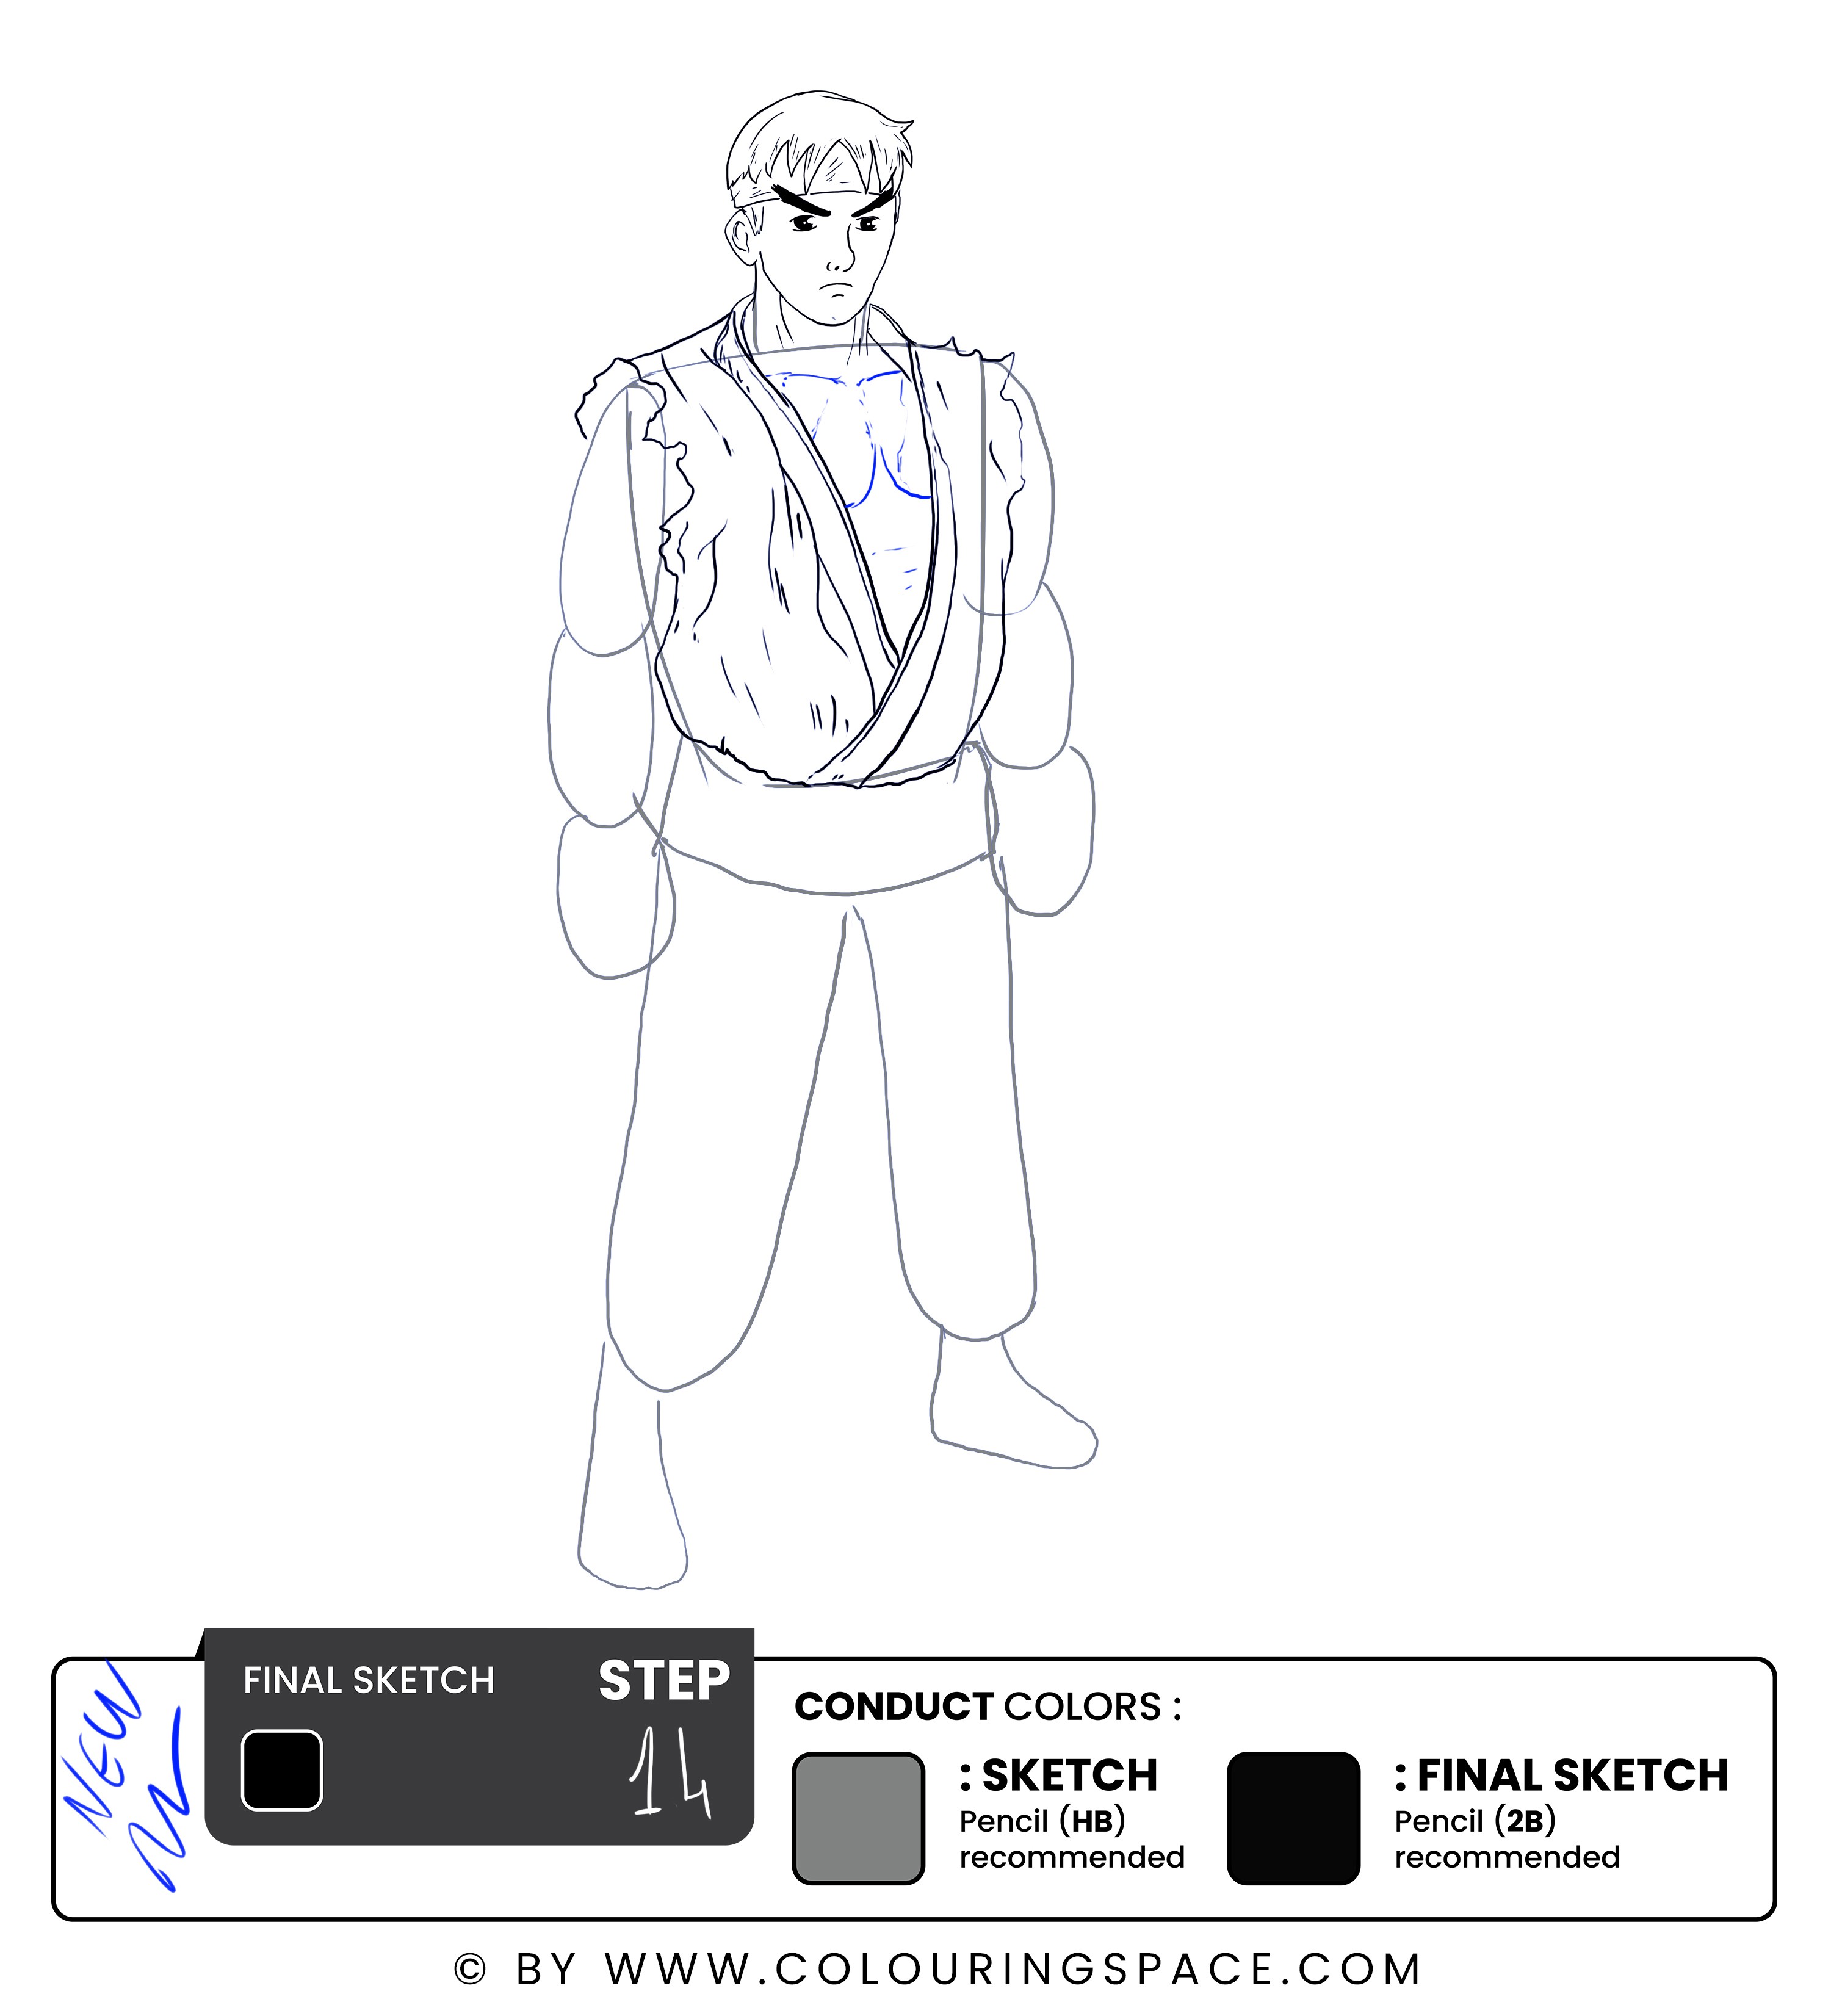
Using the same outlining technique, outline the neckline and chest of Ryu.
Step 15: Outline Ryu’s Arms
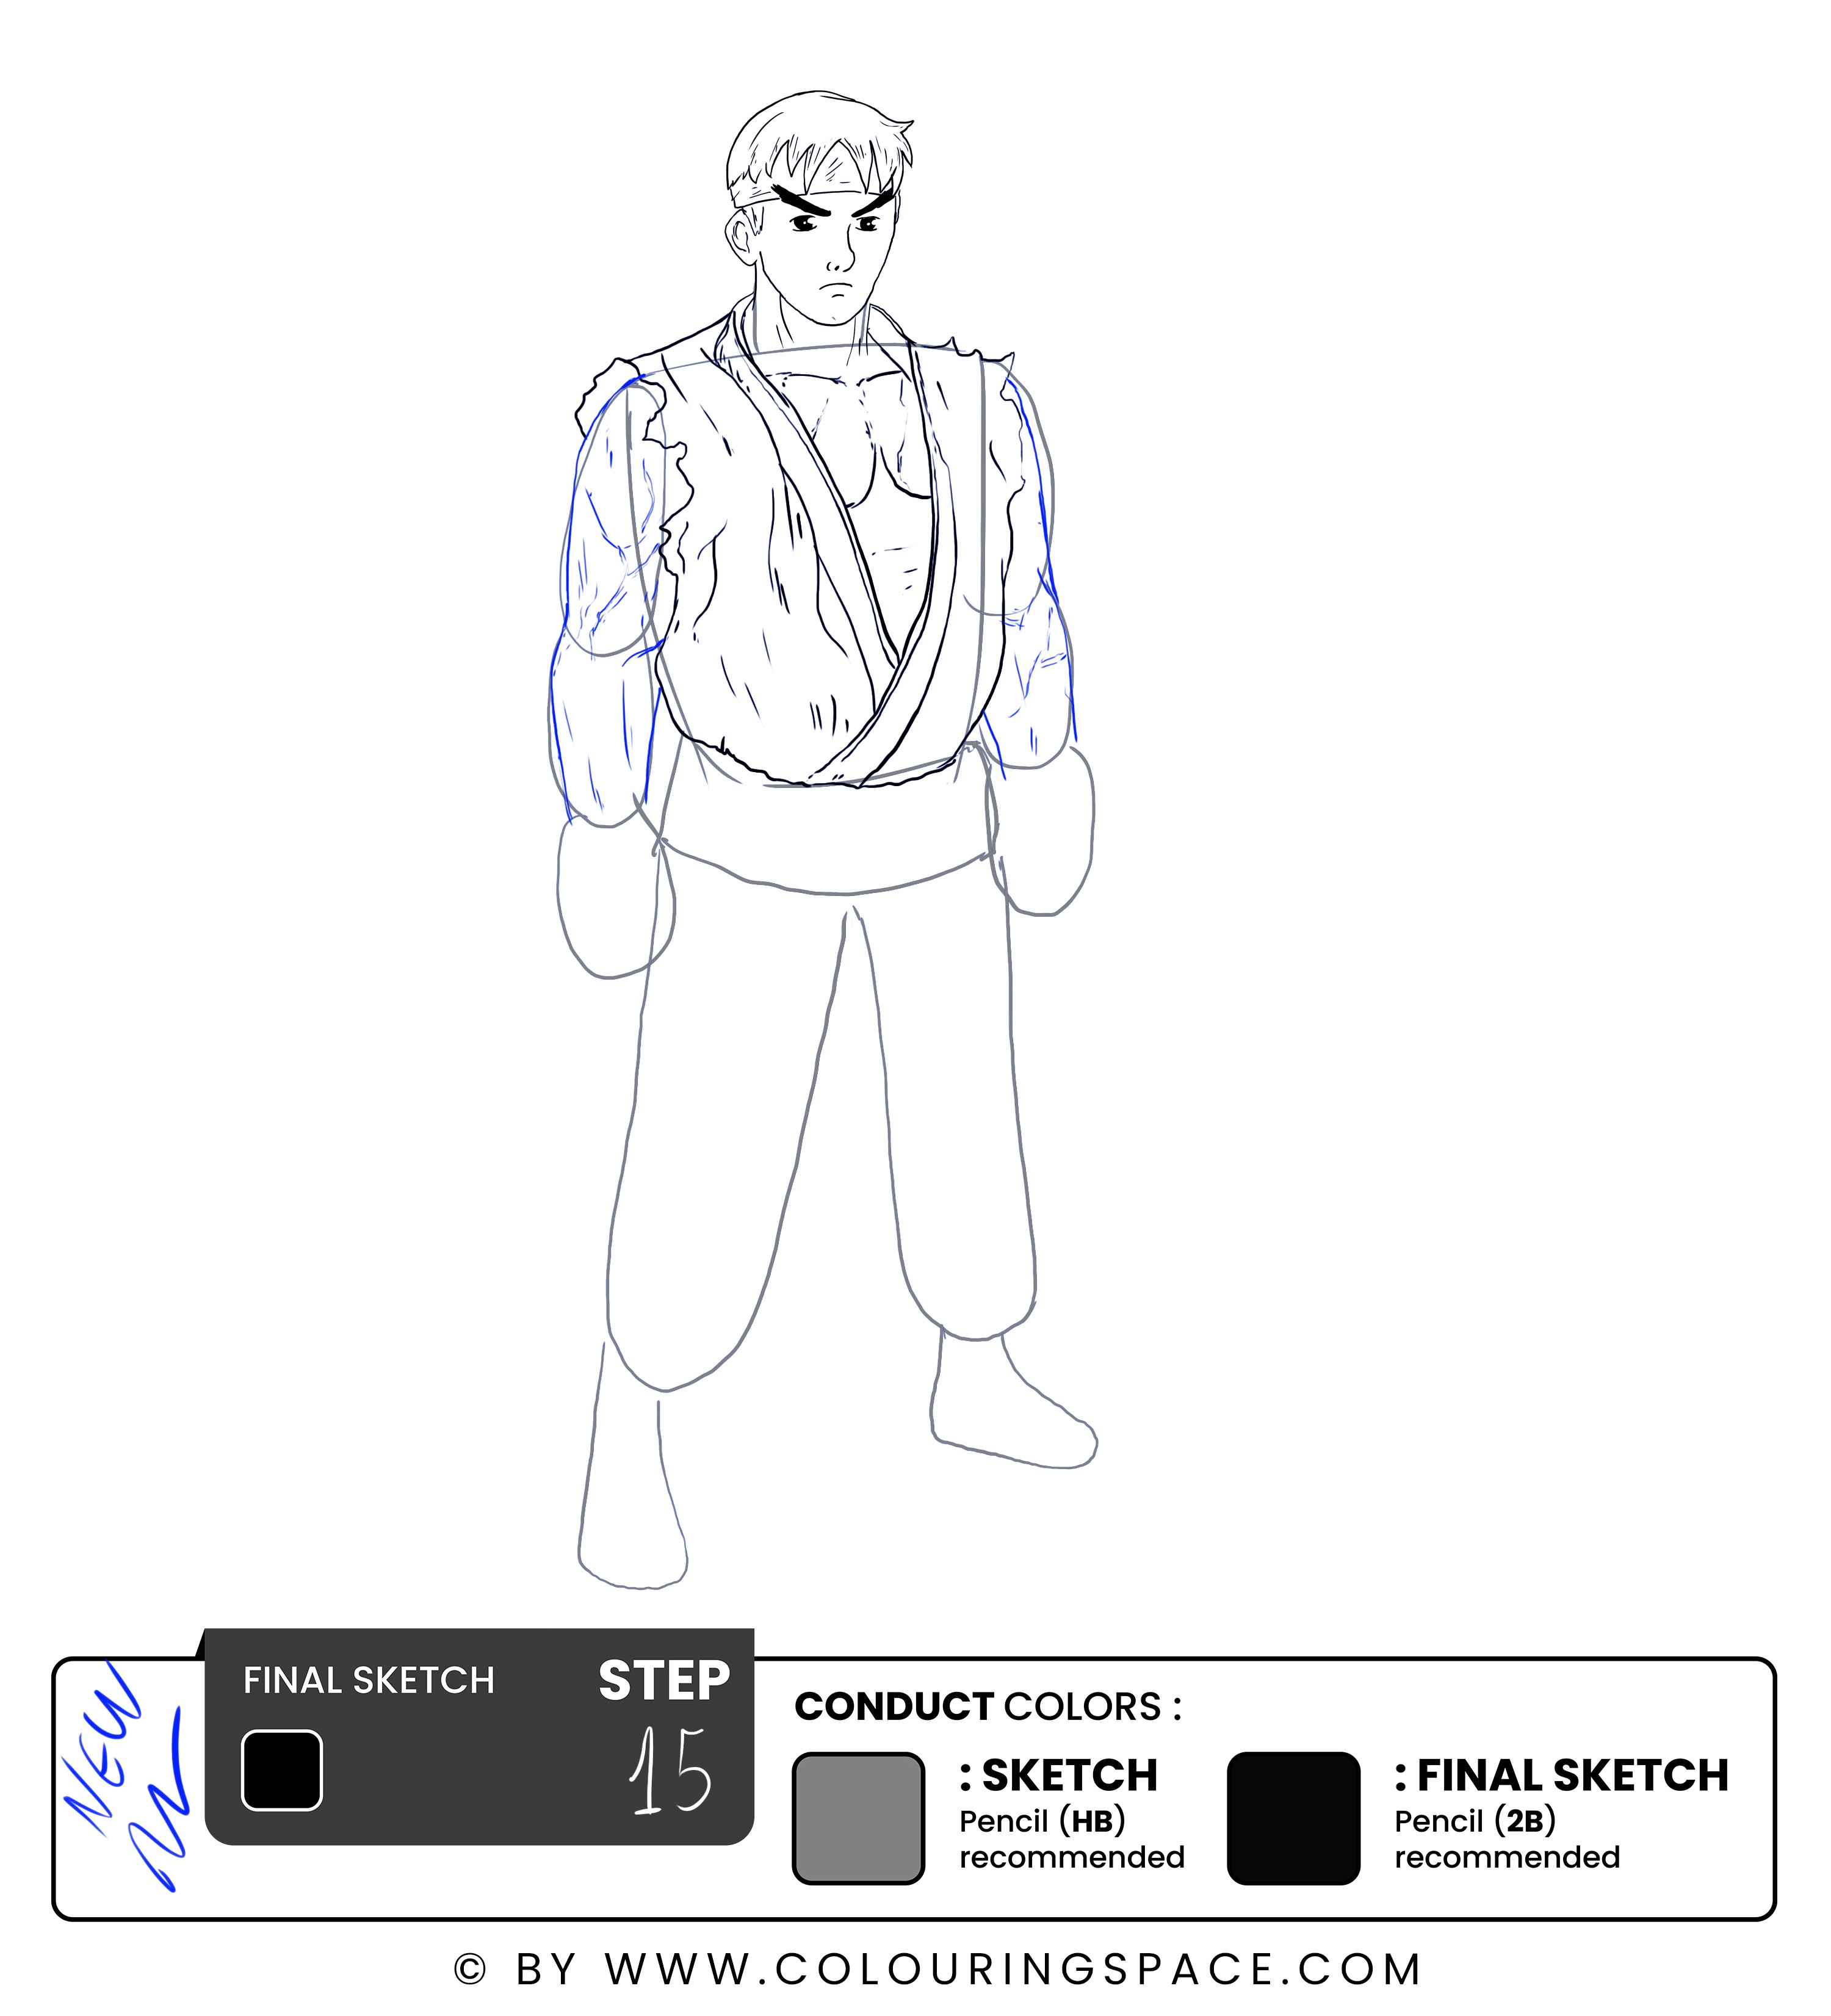
Ryu is a muscular fighter; make sure to depict that as you outline the initial sketch.
Don’t worry if you make mistakes; learning is all about trial and error.
Step 16: Draw his Boxing Gloves
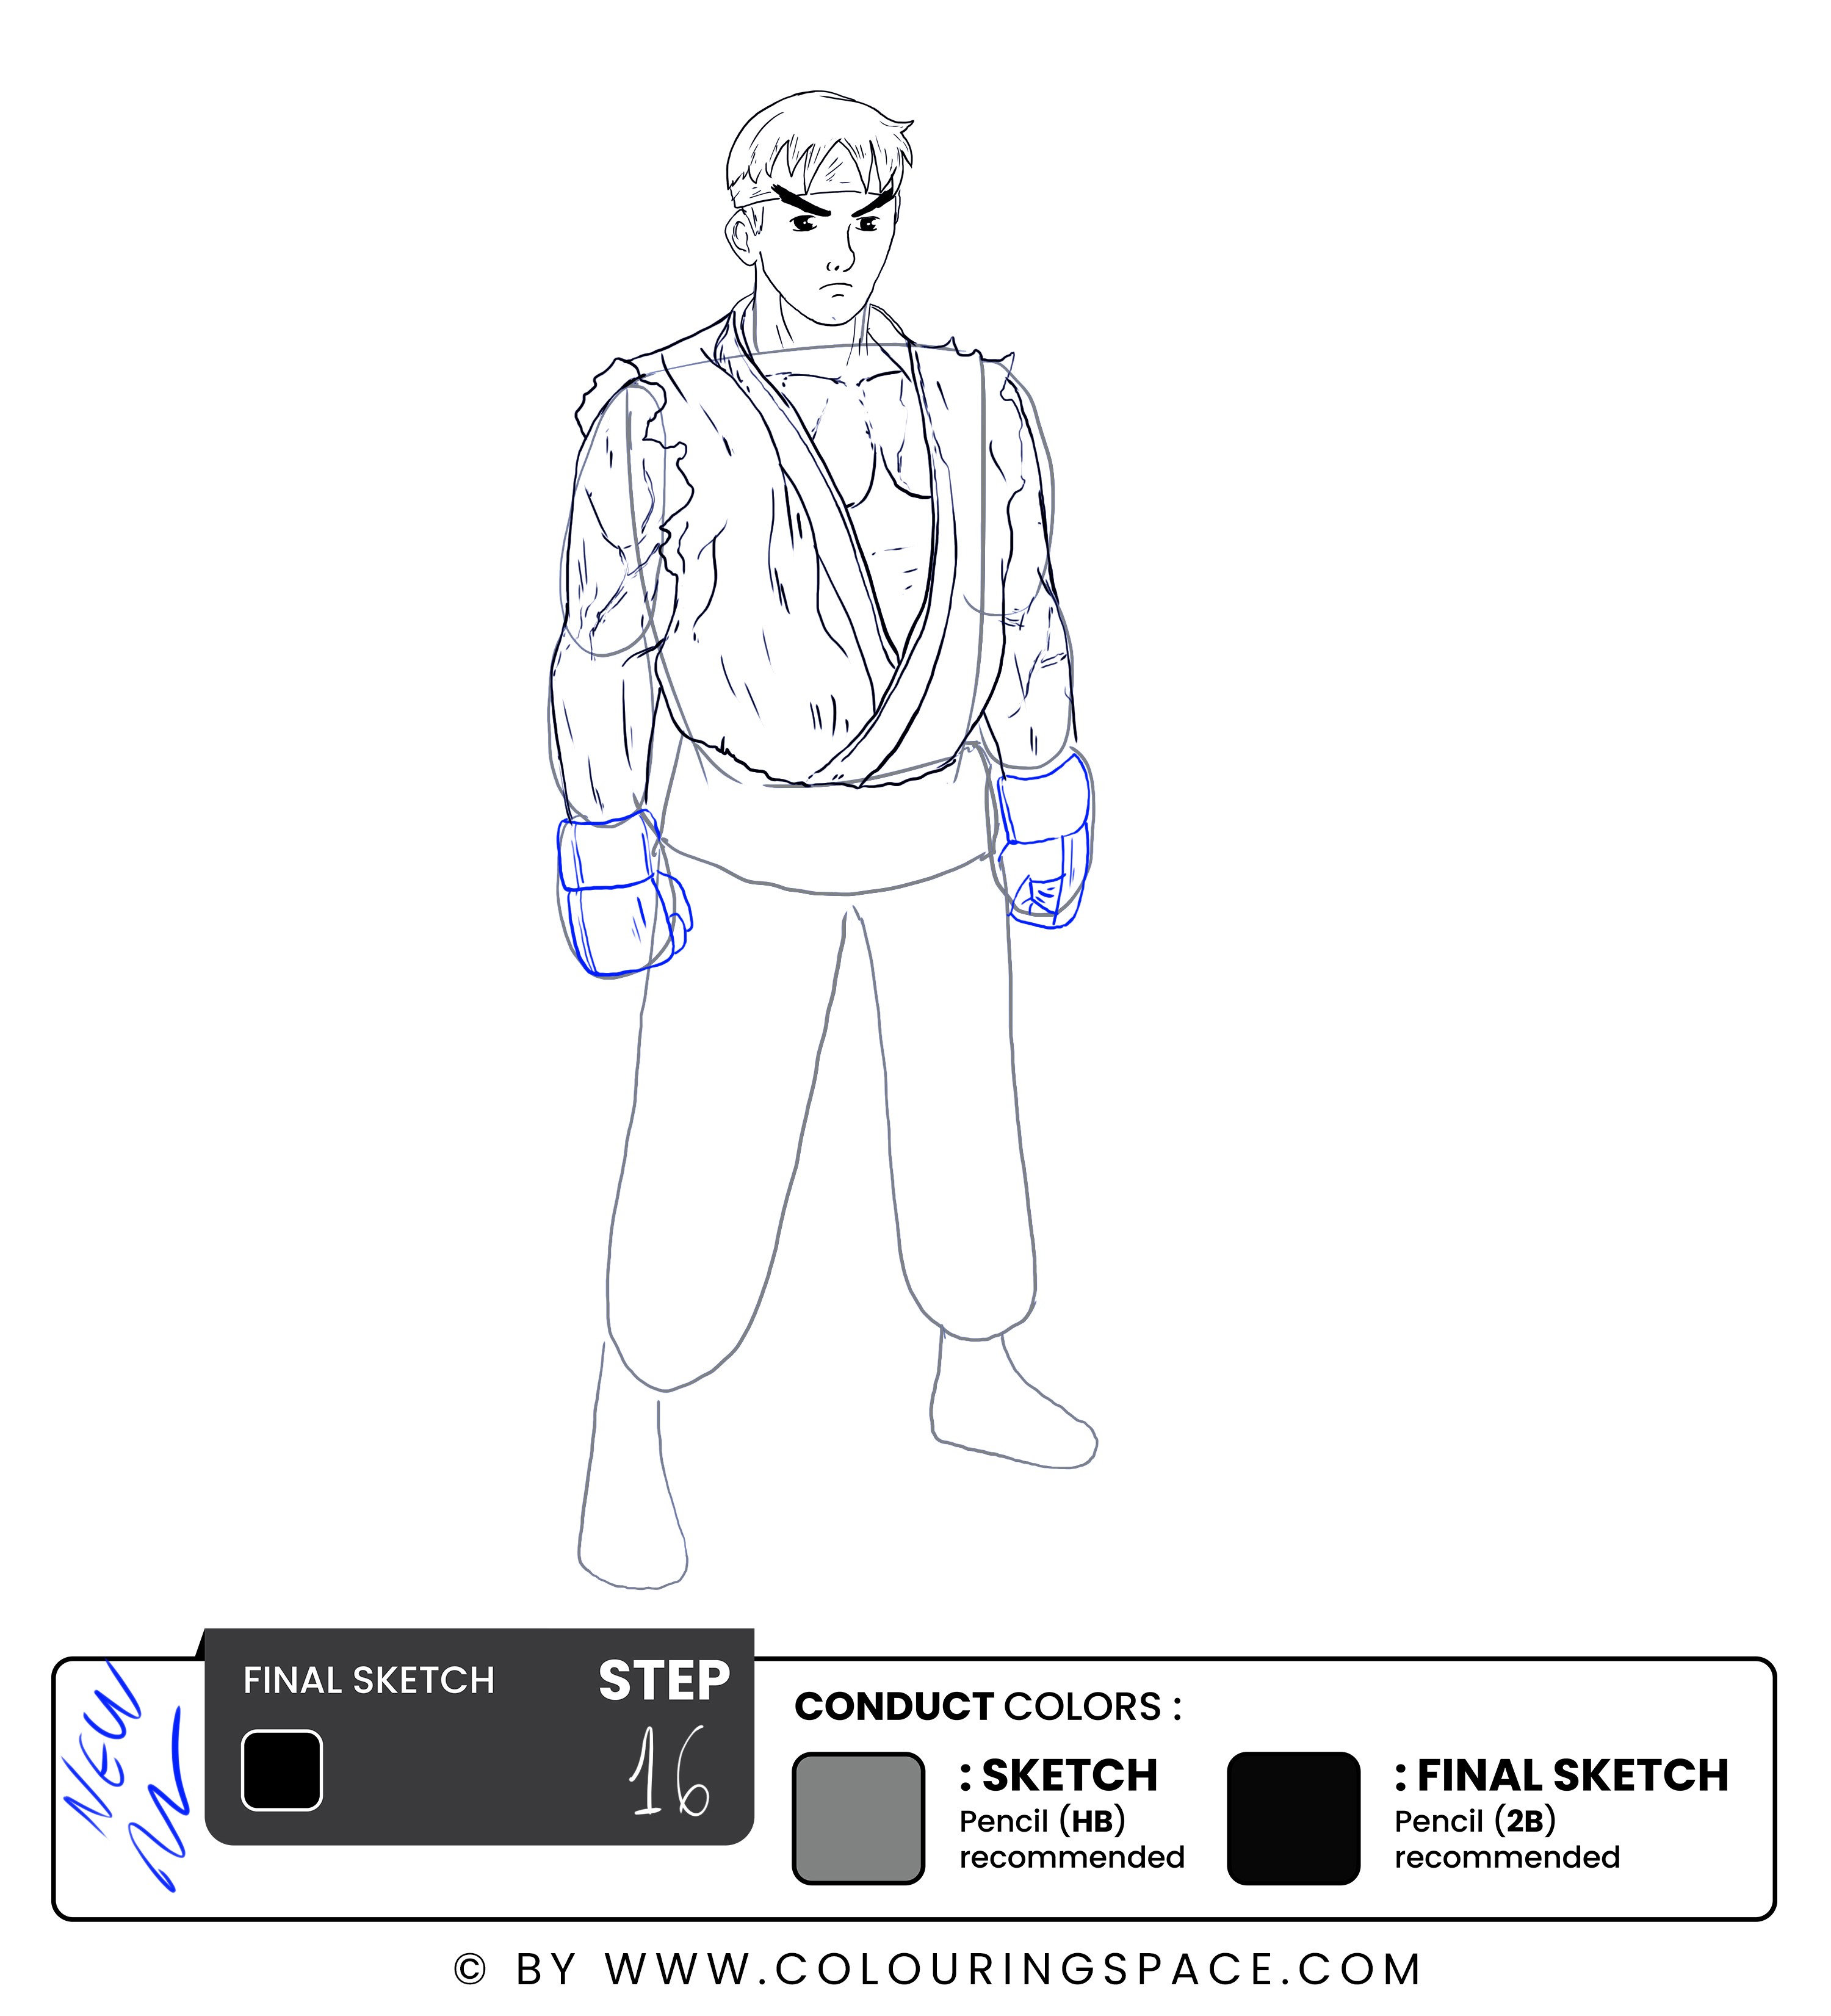
The first step in drawing the gloves is to sketch out the basic shape, as that’s already done; half of the job is done, too!
Now, sketch the glove's detailing. This covers any ridges, designs, or other distinctive elements of the gloves. Take your time when drawing the details to ensure that everything is well-proportioned.
Step 17: Outline the Belt
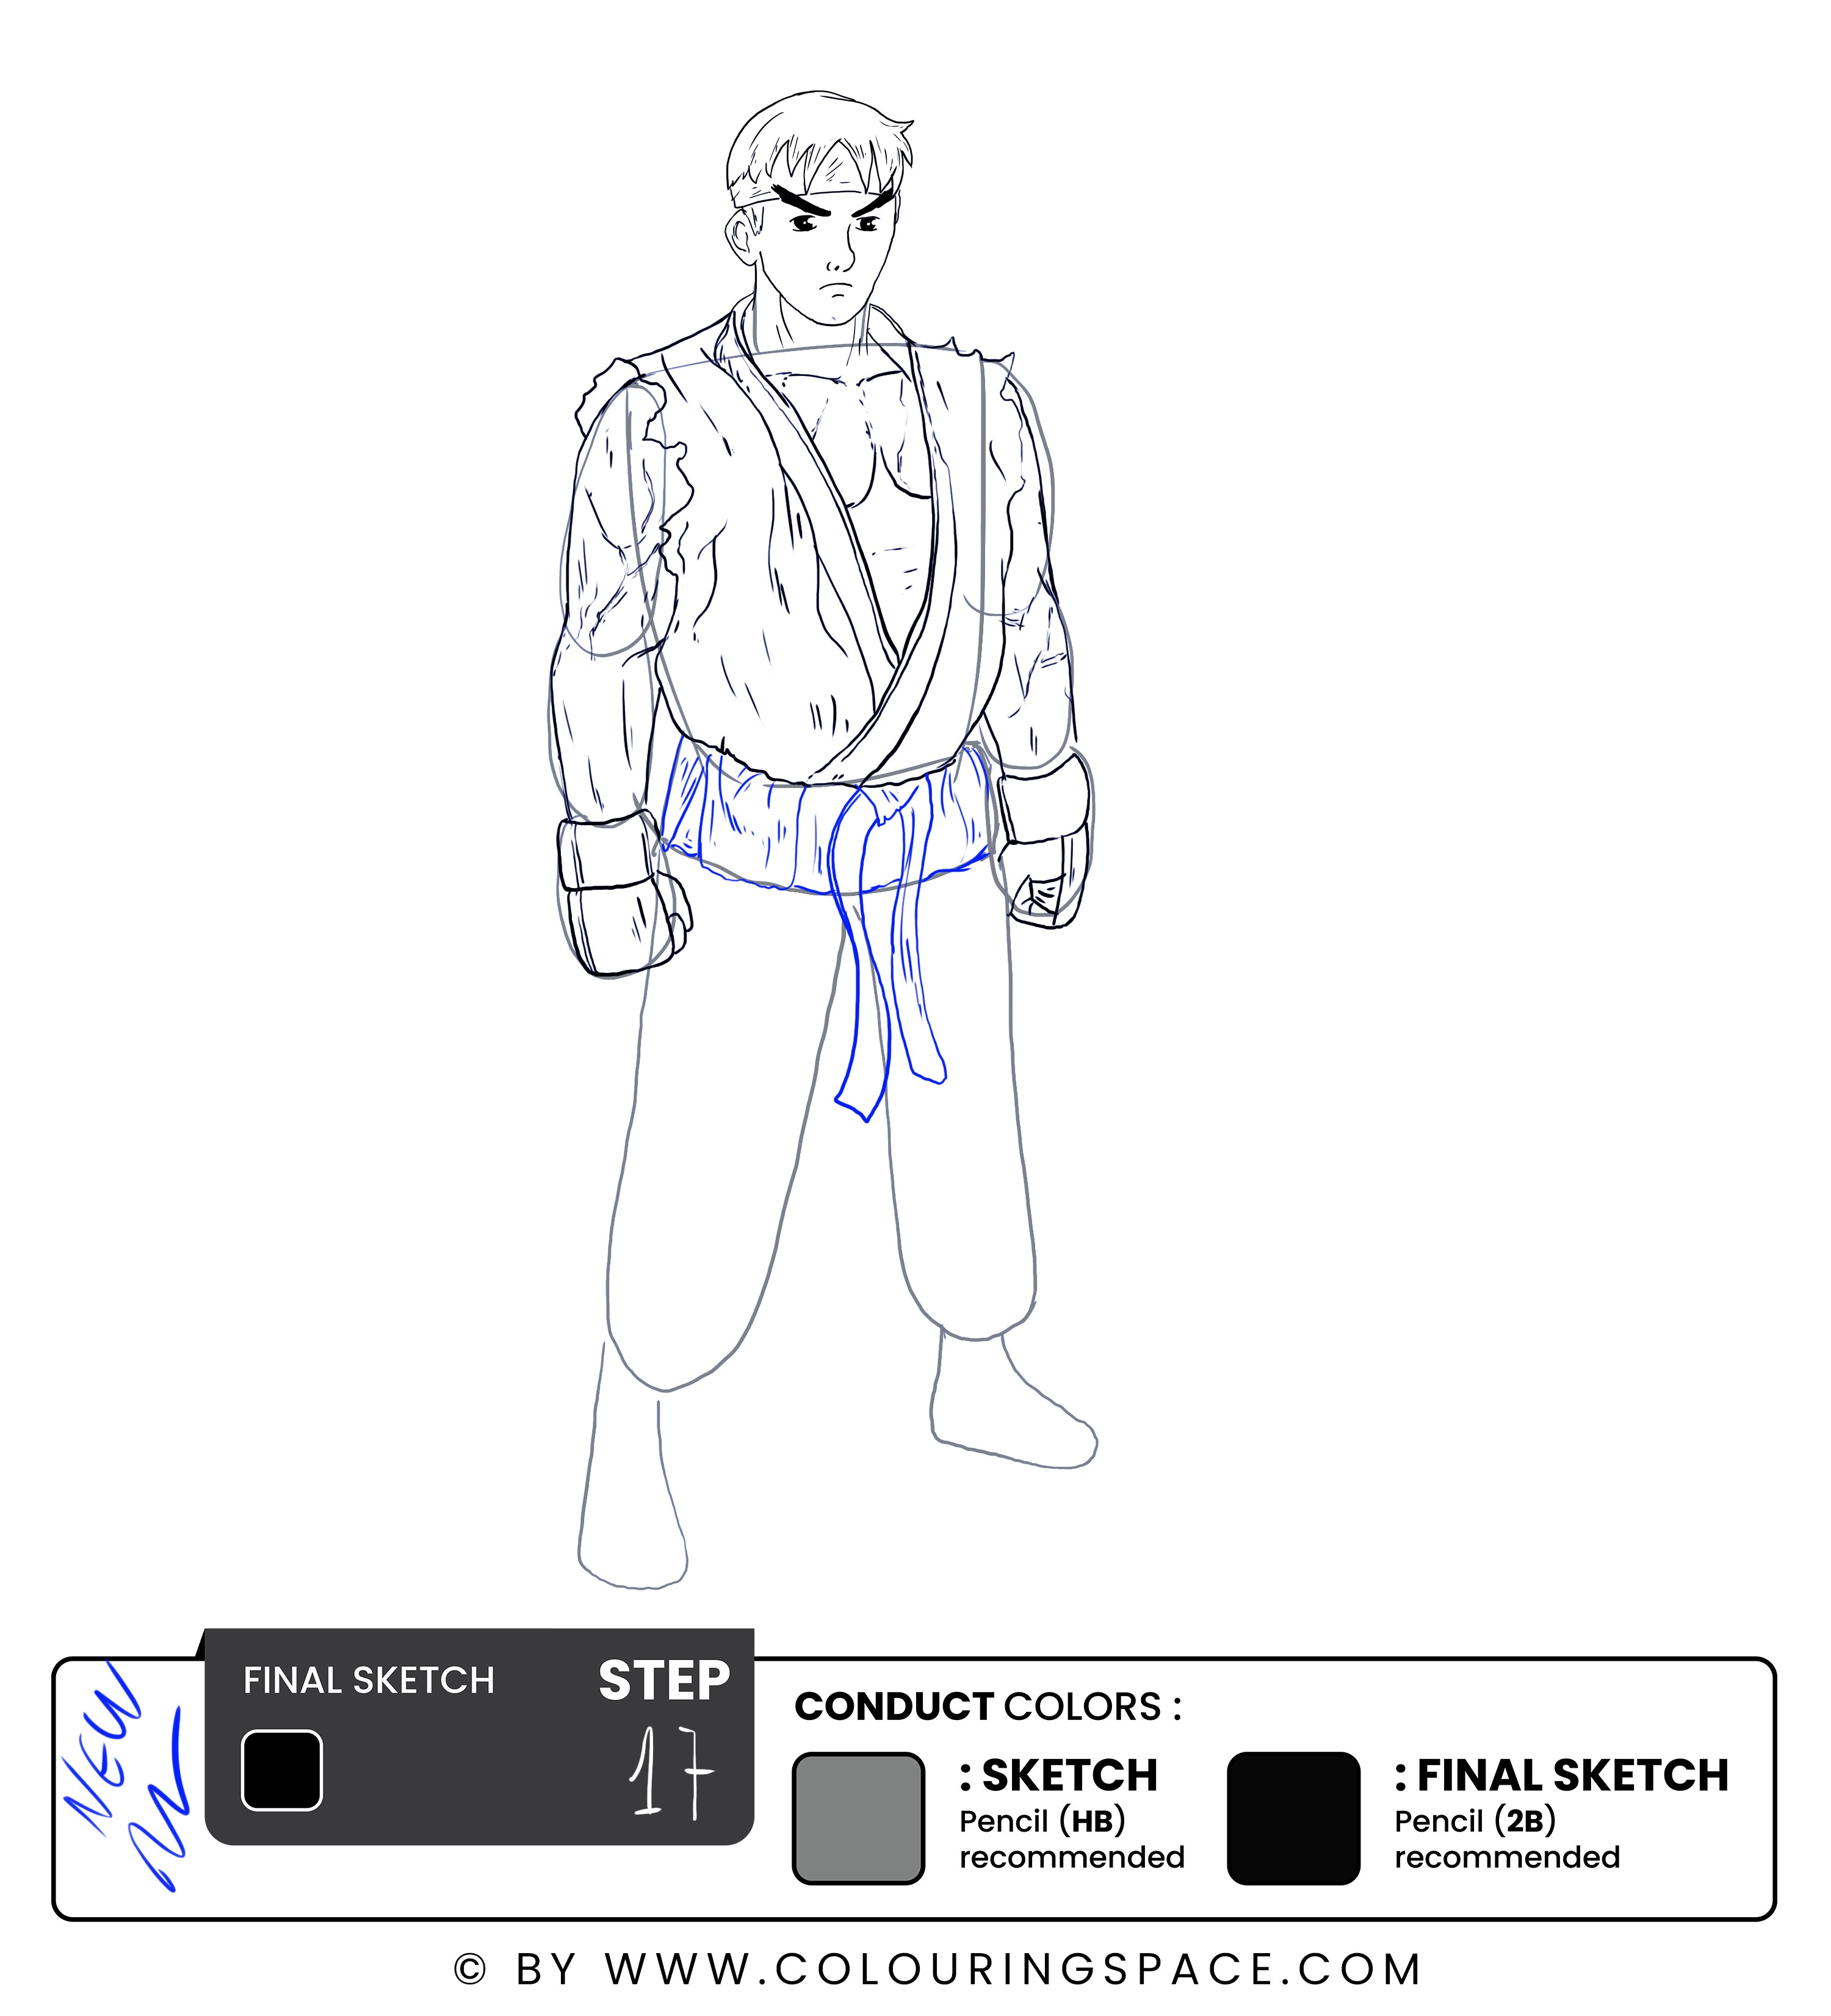
As Ryu's belt fits snugly on his waist, his shirt scrunches on the bottom.
Make sure to depict that as you outline the sketch.
Don’t forget to add the dangling belt part on the bottom.
Step 18: Outline the Pants
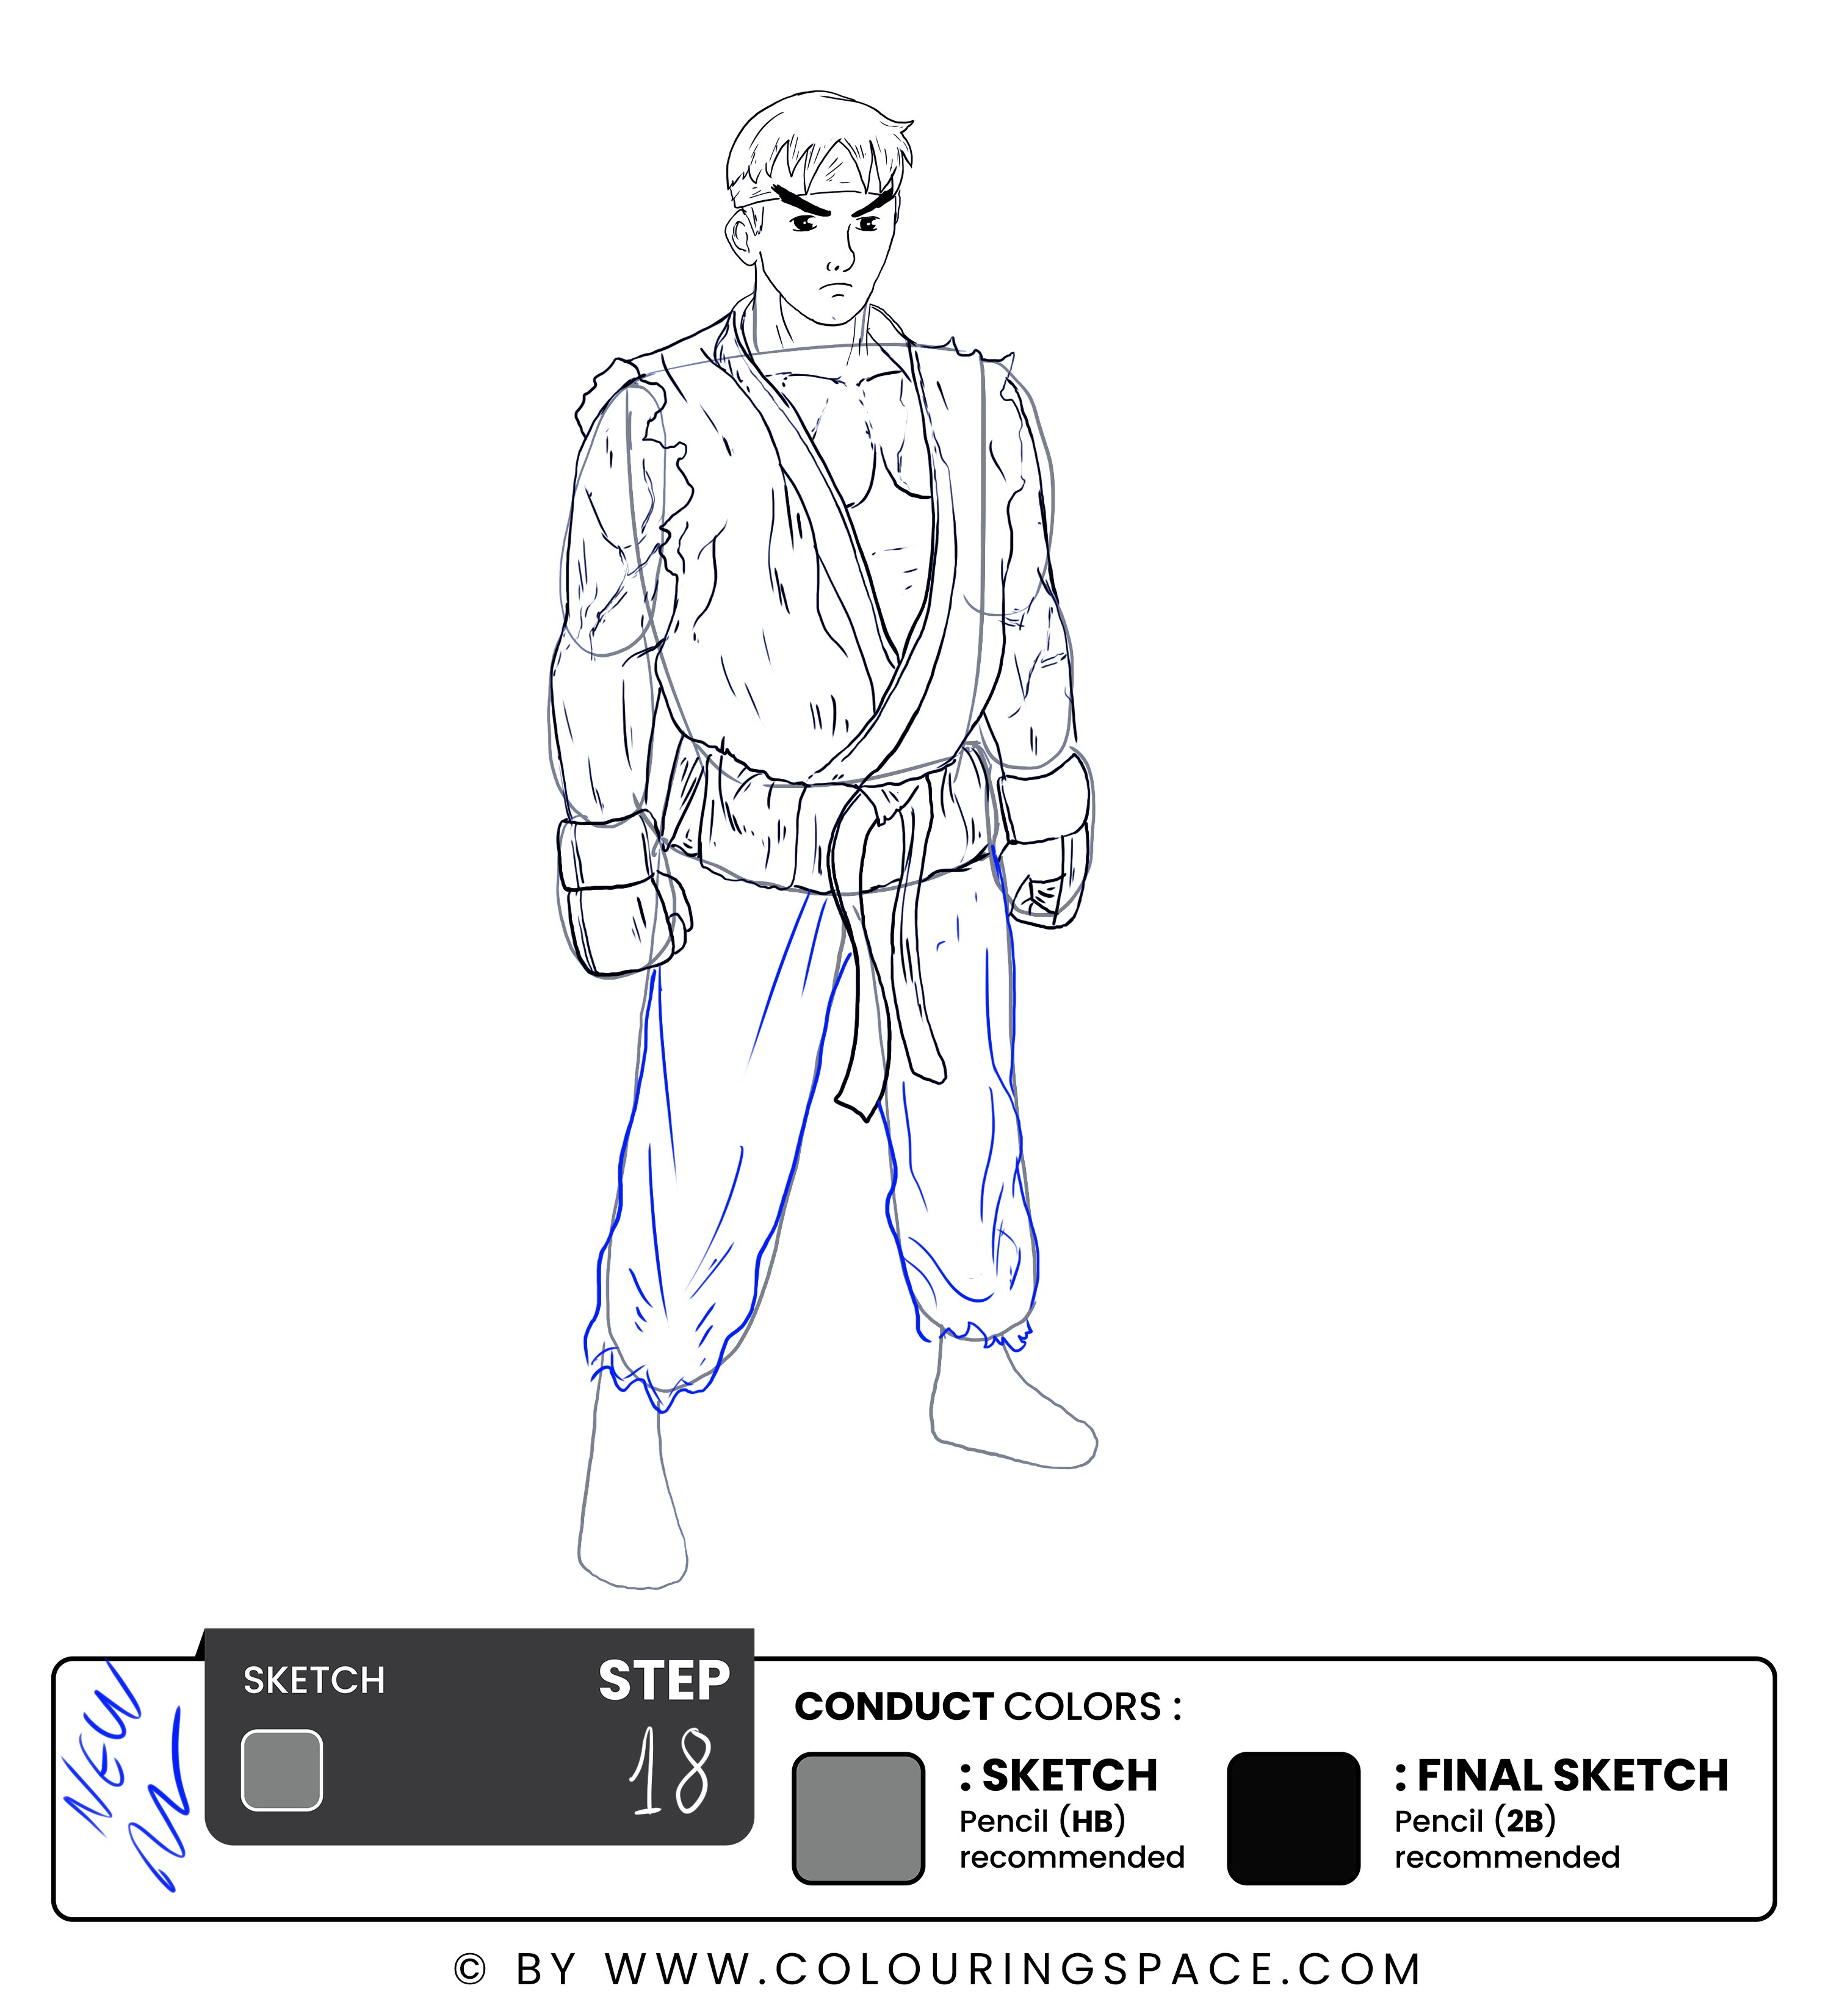
Starting from the bottom of the shirt, draw the pants following the sketch guidelines. Make sure to make it puffy and wrinkly on the sides, then scrunchy on the ankles.
When lost, always go back to the sketch guide above.
Steps 19 & 20: Outline the Feet, then Remove the Sketch Guidelines
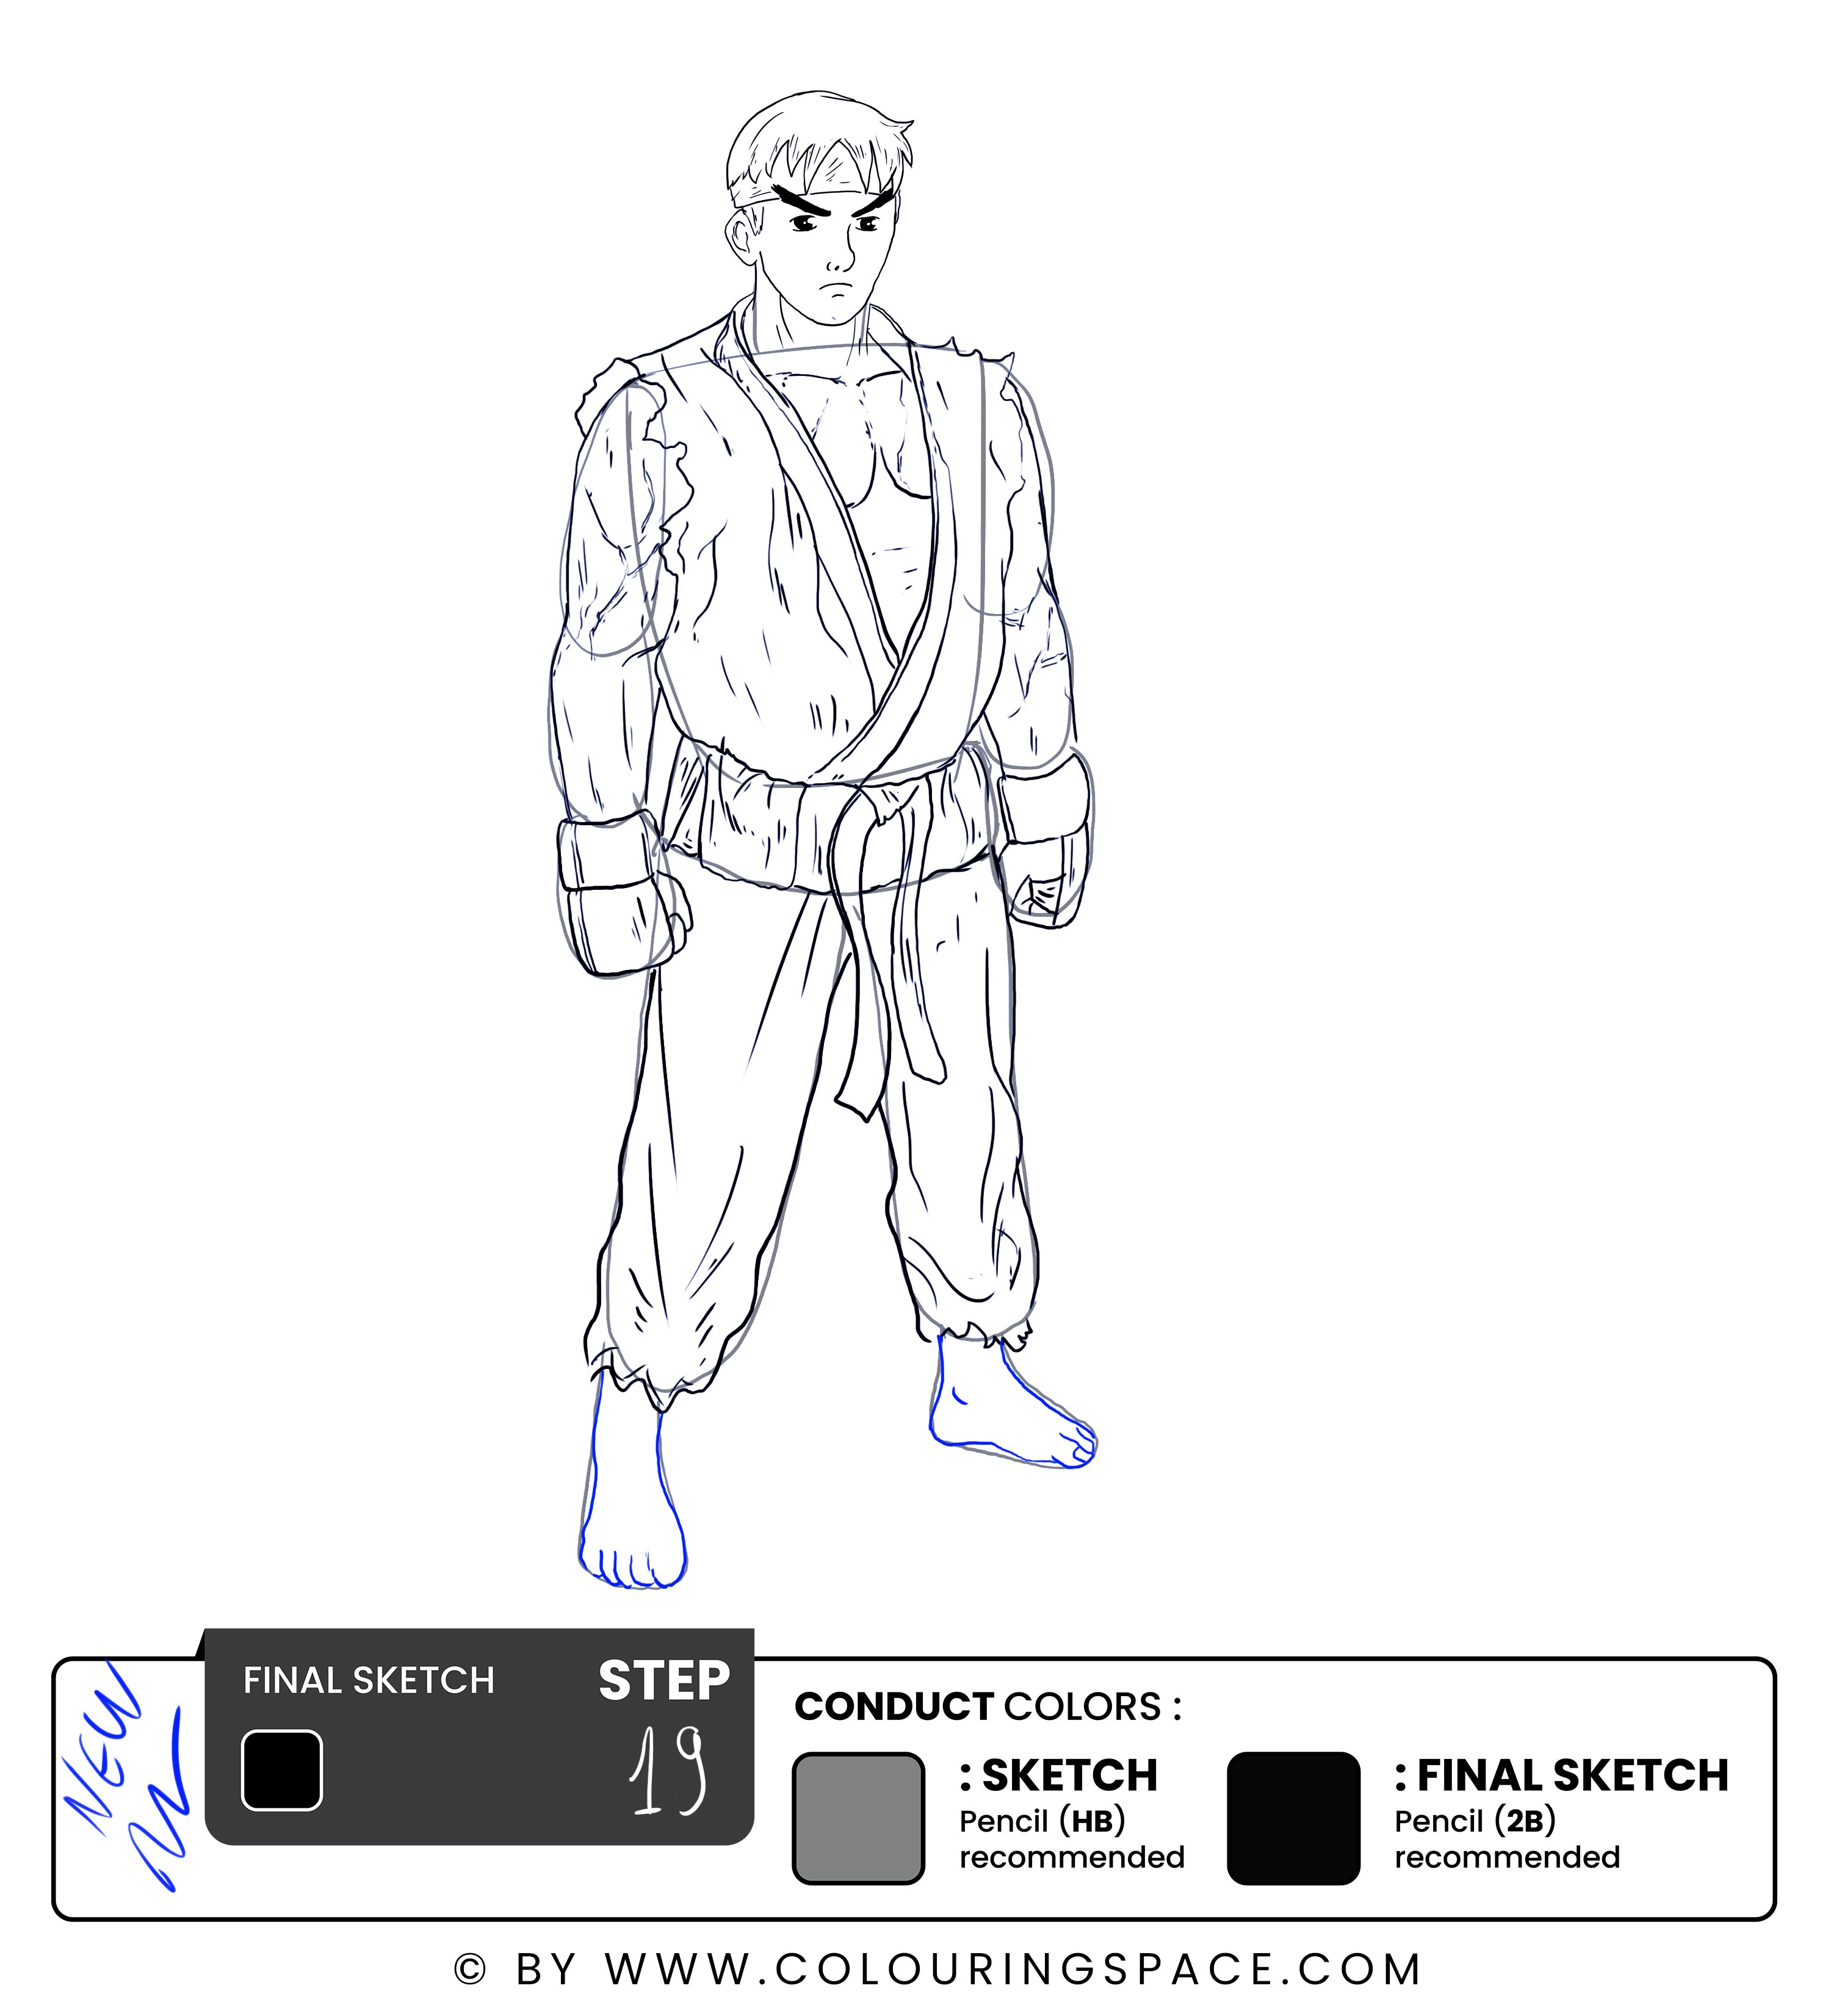
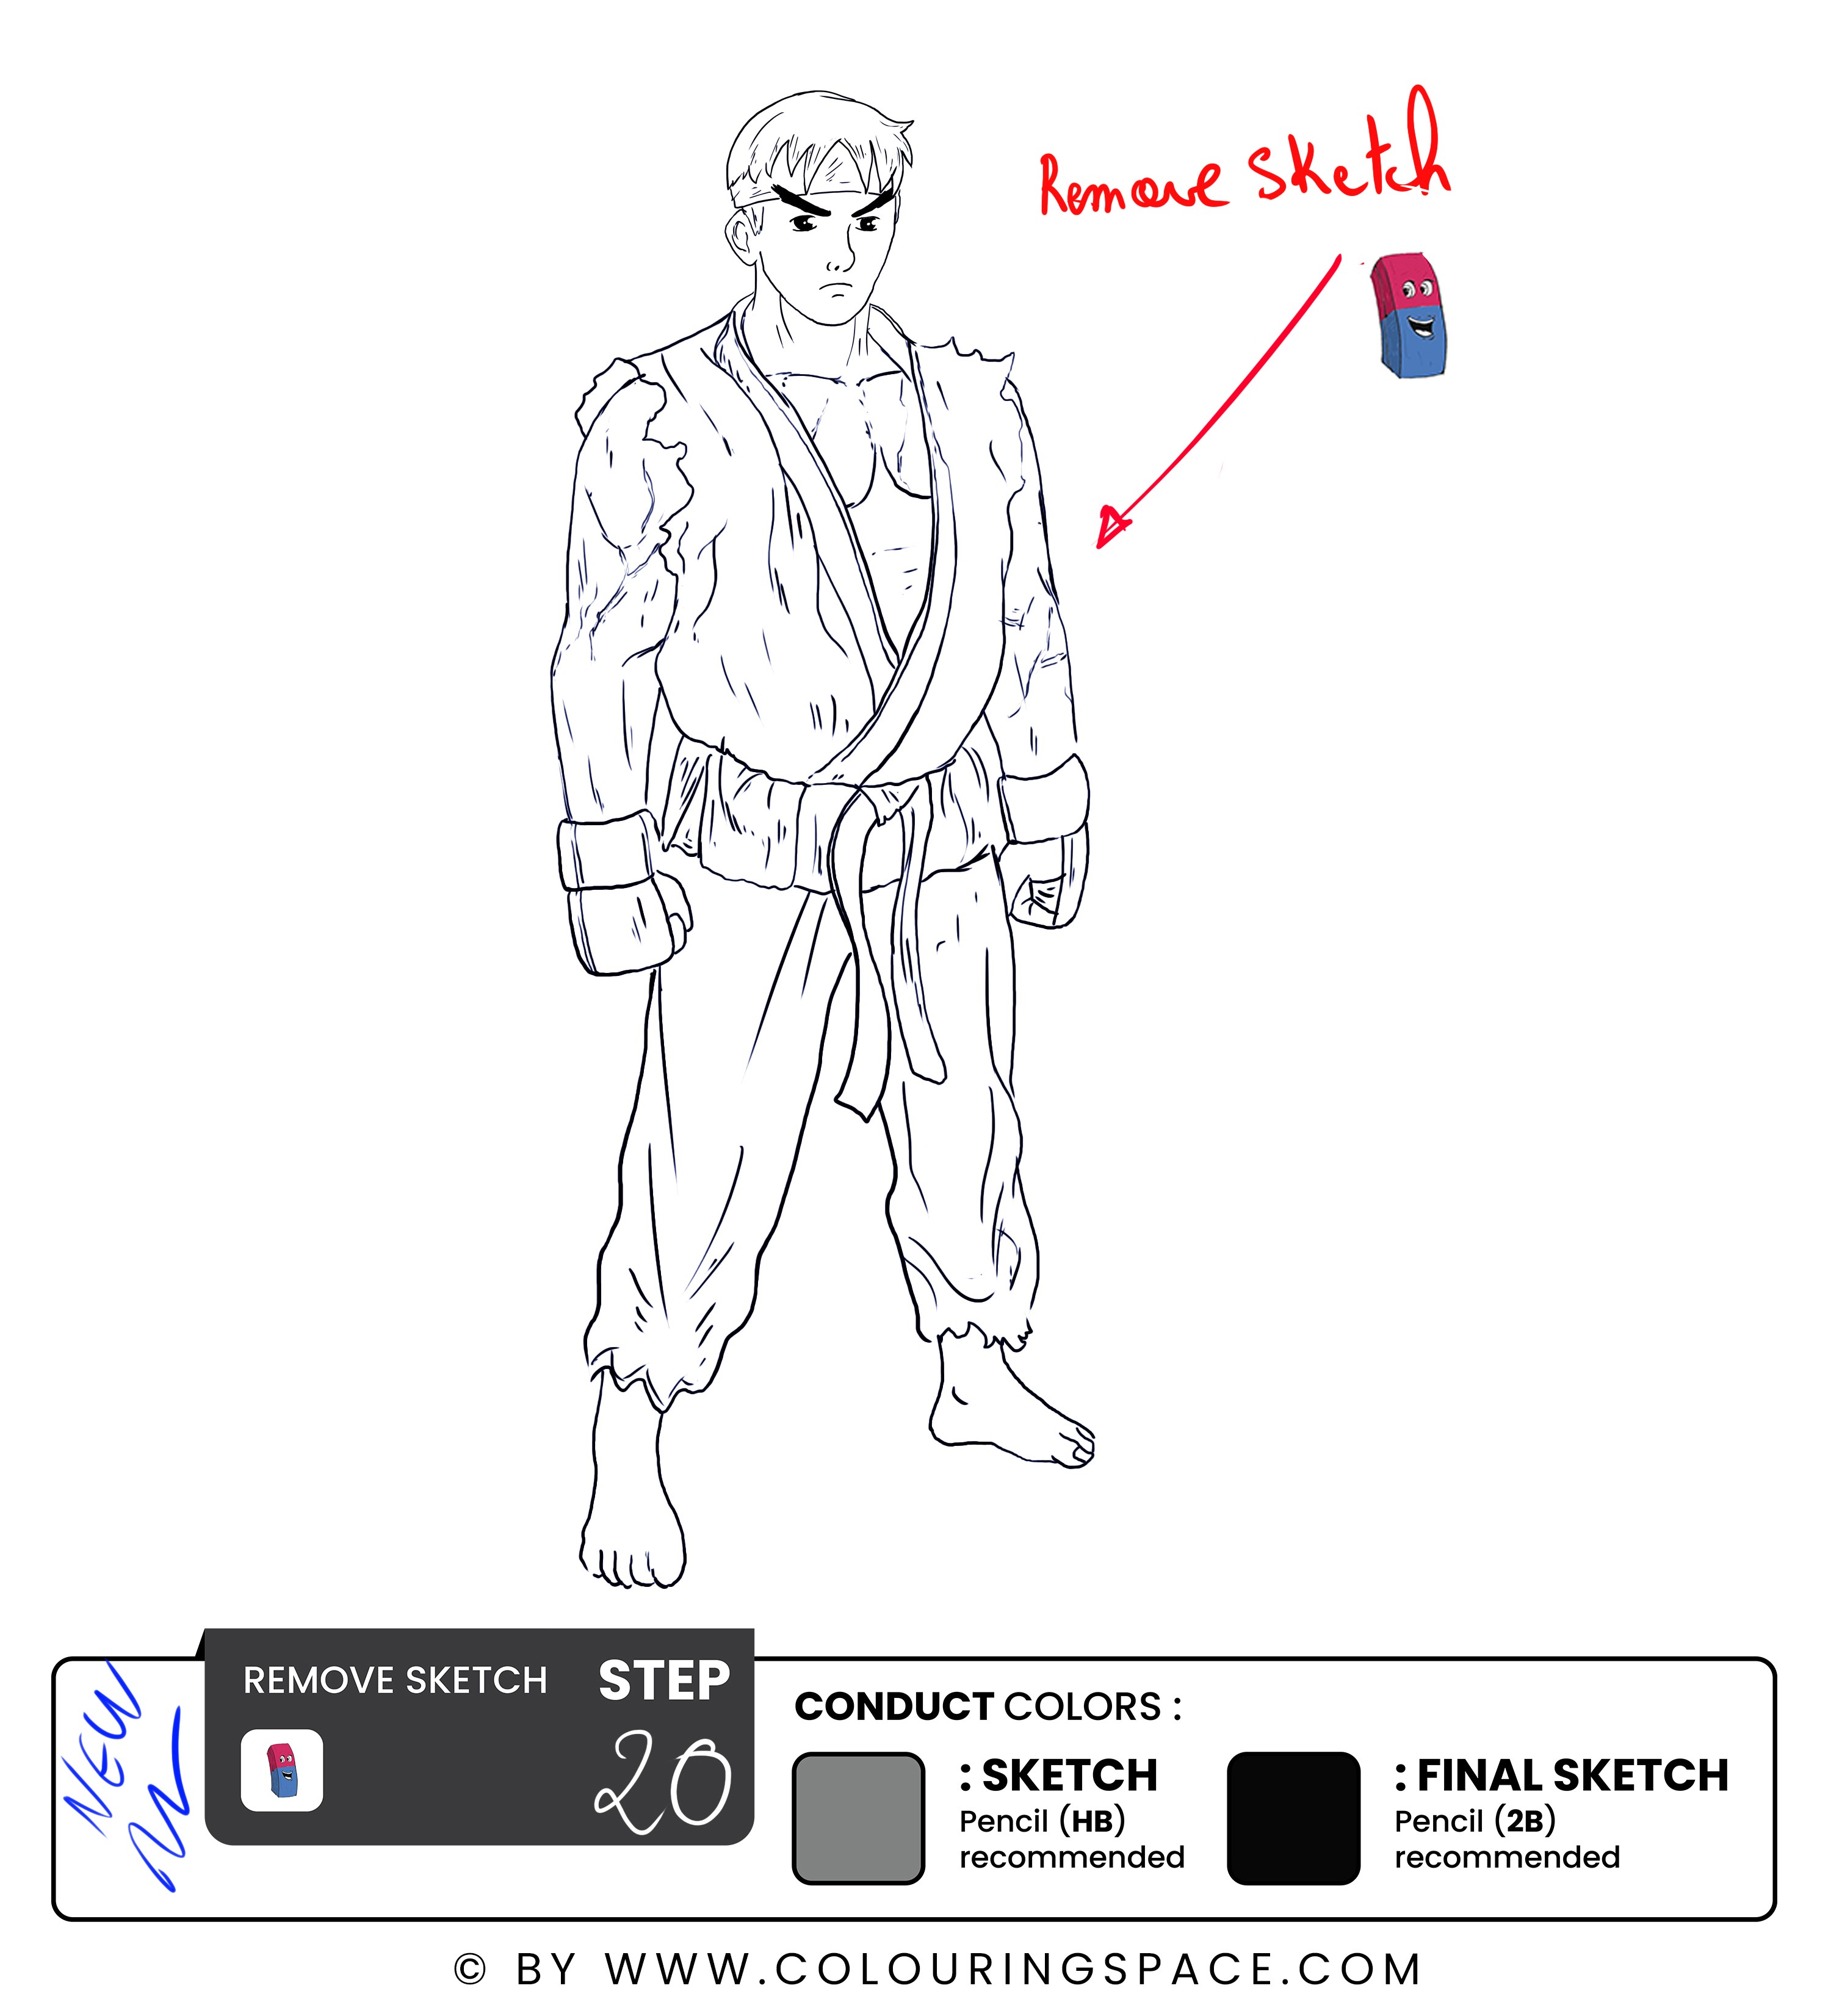
It’s time for the final steps.
Using the same outlining pen, go over the lines drawn earlier to achieve the foot's initial sketch, then add the five toes on each foot.
Feel free to add some shading to make the feet look realistic.
Once that’s done, remove the sketch guidelines.
Final Results

In summary, drawing Ryu Street Fighter is an excellent way to improve your artistic skills. As he is a popular and beloved character, he makes for a great subject for young artists. With some knowledge and effort, any artist can recreate Ryu in their own unique style. Just like Ryu charcters can achieve perfection through persistence and dedication, so can you!
Happy Drawing!
