Christmas Penguin Sketch: Fun Drawing Lessons

Are you a fan of penguins? Do you enjoy Christmas activities? We have combined the two just for you. Here is a full, step-by-step drawing tutorial on how to draw a Christmas penguin to celebrate this fun, long-awaited holiday.
Penguins are one of the most popular animals during the holiday season, alongside Christmas snowman and Santa's iconic laughing face that pops into anyone's head when they think of this jolly time of the year.
They are also associated with Christmas because they live in colder climates and tend to wear black and white feathered “tuxedos.”
They are also considered one of the most social animals, as they live in colonies, huddled together to keep warm, which reminds us of family and friends coming together at Christmas time.
Penguins also have a special way of showing affection to their partners, called "bowing." This behavior is similar to how humans exchange presents at Christmas time. As we all know, Christmas is all about giving, just like how Santa delivers gifts to well-behaved kids, and just like how families love spending some quality time around delicious food.
Penguins are also said to have inspired the popular Christmas song "Winter Wonderland" about exploring the North Pole's winter landscape.
We may not be able to visit the North Pole to see real penguins, but we definitely can create an adorable Christmas penguin.
So, let’s start drawing!
You will need:
-2B pencil
-HB pencil
-Eraser
You will find the guides in each sketch in the following tutorial.
Step 1: Draw a Circle

Using your HB pencil, draw a circle in the light upper middle of your page.
This step is quite simple, so get ready for the coming steps.
Step 2: Sketch the Hat’s Brim

Draw an oval shape on the upper part of the hat, slightly similar to a long rectangle. This will be the hat’s furry part.
Step 3: Complete the Hat Sketch, then Add the Pom Pom Sketch

Connecting two lines coming to each side of the hat’s fury part, link them on the top, then draw over it a circle to depict the pom pom. Once that’s done, remove the point where they’re connected to give it a clean look.
Step 4: Sketch the Scarf

Connected to the lower part of the neck, draw a similar shape to the one you drew on step n°2. This time, make sure it hugs the part where the neck is supposed to be.
Don’t worry about the final results; more details will be added later on.
Step 5: Sketch the Initial Flippers

Penguins flippers are an essential part of their body. They help them swim and stay balanced.
Starting with the right side, Draw a line extended from the neck all the way down to where the chest should be located. Once you get there, draw a sharp angle inwards to the chest.
Do the same for the other side.
Step 6: Draw the Middle Part of the Pengiuin’s Body

Right below the head of the penguin, draw a big bowl shape.
Penguins are known for their chubby bodies, so this will depict it perfectly.
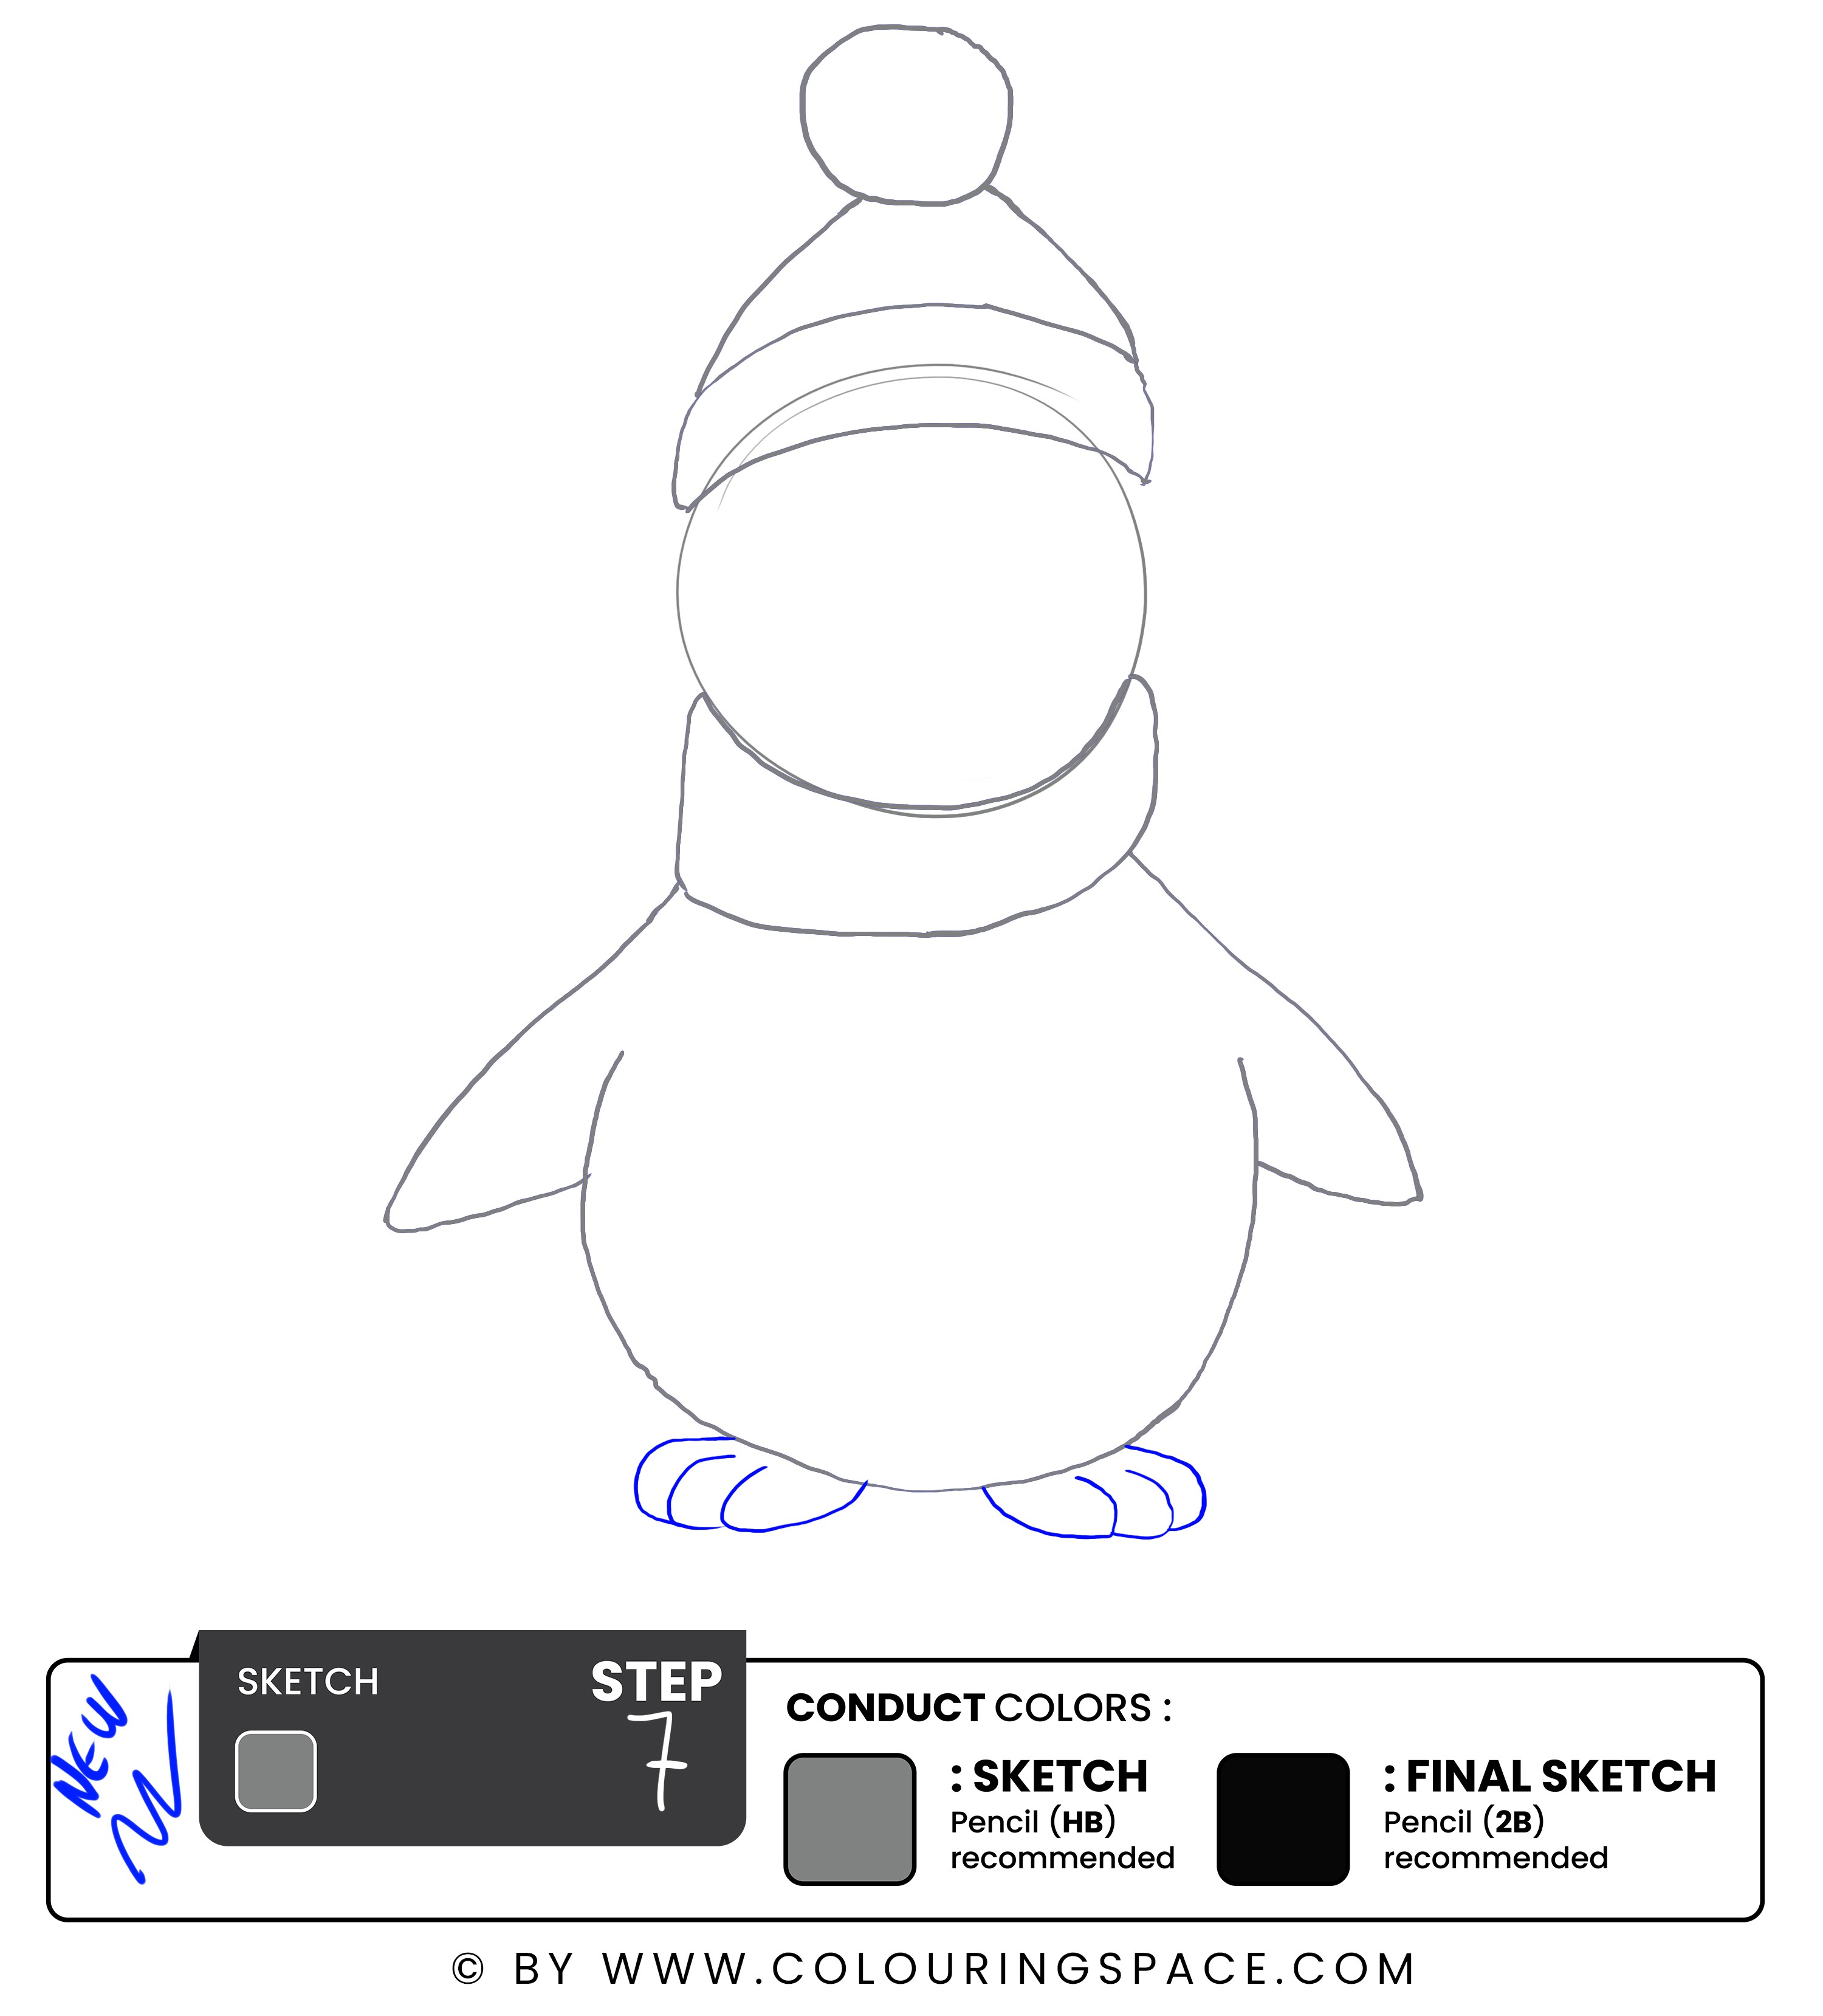
Step 7: Add the Feet

This cartoon baby penguin has such adorable feet.
Start by sketching three long navy bean shapes to represent three toes on each foot.
Now, you’re ready to start working on the baby penguin’s face.
Step 8: Divide the Face into Four Sections

Using a ruler, draw two lines, one horizontal and one vertical. These two lines should form a right angle in the middle of the baby penguin's face.
Step 9: Sketch the Eyes

Draw two small circles on each side of the face on the horizontal line to depict the eyes.
Don’t worry; that is not its final look.
Step 10: Add details to the face

Draw a line over the first eye, disconnected in where the beak should be, then over the other eye.
This step might seem intimidating, but do not fear making mistakes; learning is all about trial and error.
Step 11: Draw the Beak

The first step in sketching your cartoon penguin's beak is to create an inverted half circle that is situated between the eyes, right below them. Subsequently, draw a line connecting the two ends of the half circle. To create the beak's bottom, draw a smaller half-circle beneath that line.
When lost, always go back to the sketch above for guidance.
Step 12: Outline the Hat

Using your 2B pencil, outline the hat, then move on to adding the necessary details.
Add an equally spaced vertical line on the hat sketch to give it some dimension, then move on to outlining the pom pom, making sure to make it fuzzy.
Step 13: Outline the Face sketch and Fill in the Eyes

It’s time to add more details to your beautiful winter penguin.
Outline the eye circles drawn earlier, then fill them in, making sure to leave two little white dots to depict the light reflection on each eye.
Step 14: Outline the Beak

Moving on to the beak, using the same pencil, outline the shape of the beach, then add two tiny circles on each side to depict the two nares.
Step 15: Outline the Christmas Penguin’s Face

Now that you’re done with the facial details of the Christmas penguin, outline its head. Make sure not to overline it. Don’t be afraid of adding some shading to the sketch to make it more realistic.
Step 16: Add Fun Details to the Scarf

Hanging on the side of the scarf, add two small ornaments, the small leaf on the opposite side.
We think this adds more cuteness to the sketch.
Step 17: Finish the Scarf Details

Going over to finalize the sketch details is crucial.
Once again, grab your 2B pencil and add vertical lines equally spaced throughout the scarf.
Then, outline the scarf and add the necessary details.
Always use the sketch above as your reference to have an accurate result.
Step 18: Outline the Flippers

Now, let’s work on the flippers.
Using the same pencil you used to outline the sketch, go over the sketch drawing of the flippers or wings.
Once that’s done, add a thin line in the middle of each one to add more dimension to the drawing.
Step 19: Outline the Tummy- Middle Part of the Penguin

Coming to the end of the tutorial, there are only a few details left to add.
Outline the penguin’s tummy and make sure to add a small fluffy circle in the middle to give it a more realistic representation of real baby penguins.
Step 20: Outline the Feet

Congratulations, you have come this far.
We are almost done!
Grab your 2B pencil and outline the baby penguin’s feet.
Then, grab your eraser to go to the last stop of this drawing journey.
Step 21: Remove the Sketch Guidelines

Now that you have added all the necessary details and finished the shading process, it’s time to remove all the sketch guidelines used to help you get to the final result.
Make sure not to push the eraser too hard against the paper and not to remove any final sketch lines.
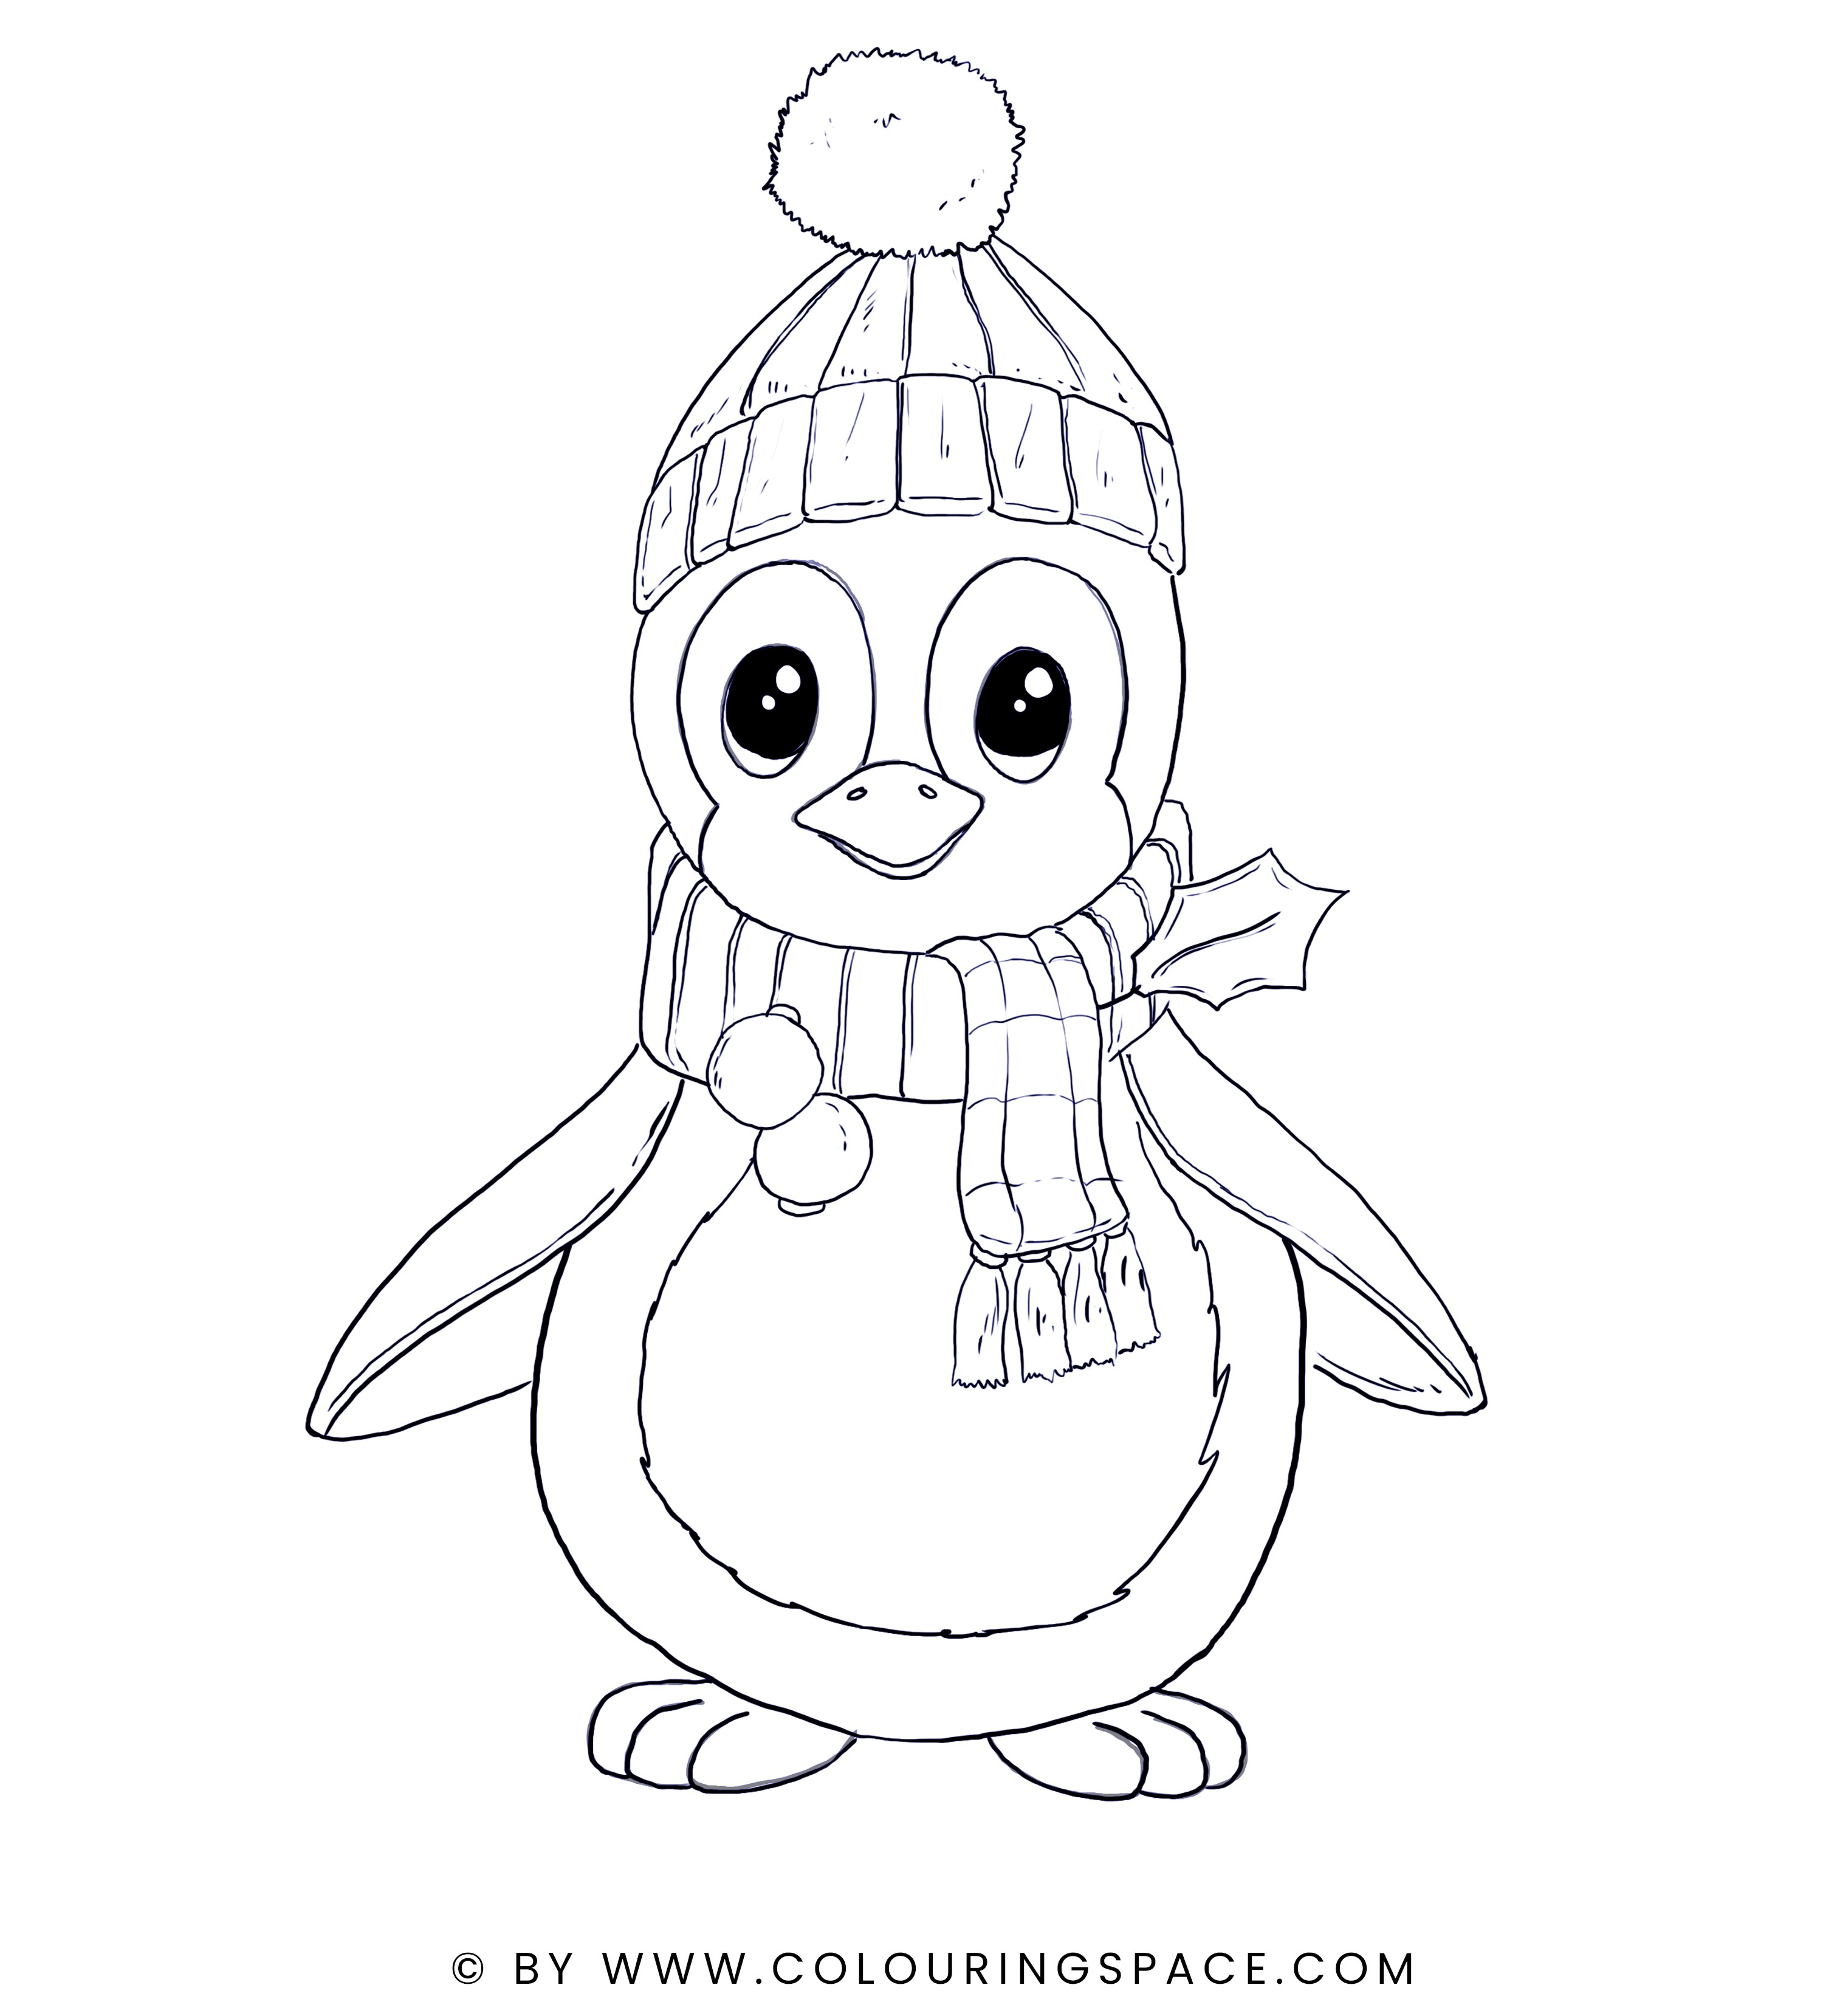
Final Sketch Result

Congratulations, you have finally finished drawing your own baby penguin!
Christmas is a season of happiness, giving, and celebration. A unique and enjoyable idea to add a little more brightness to the holiday season is to learn how to draw cute penguins. A festive sketch of a winter penguin will make your family and friends smile this time of year. You only need a few basic art tools and simple techniques.
You can practice more of your drawing skills by following our free, engaging learning tutorial of drawing Santa's full body; like that, you'll be able to combine this lovely penguin with his friend Santa!
So, go ahead and get out your art supplies and give drawing a Christmas baby penguin a try. It only takes a few easy steps to make an original festive masterpiece that will be cherished for many years.